
Want a quick guide on how to make a one-product website? Single product websites are perfect for entrepreneurs, small business owners, and dropshipping brands that specialize in a specific product line.
Store owners use these platforms to create user-friendly shopping experiences. When customers discover your product on social media or marketplaces, they can easily complete their purchase without jumping through hoops; just a simple click from your Instagram post or Facebook ad straight to checkout.
This blog includes a step-by-step guide on how to make a single product website with a limited budget. We will be building our site with EasyCommerce for WordPress, but don’t worry – we will also show you how to build a WordPress site from scratch.
Before we dive into the guide, let’s learn a bit about single-product websites and their ideal customers.
What Is a Single Product Website?
A single product website is exactly what it sounds like, an online store dedicated to selling just one specific product. While most of us are familiar with traditional websites that have a range of items, this approach has recently become more commonplace.
The simplicity of this setup helps you zero in on what matters most: presenting your product in the best possible light, instead of overwhelming visitors with endless options. Every block is designed to showcase its benefits, answer potential questions, and guide customers to make a purchase.
How to Find Your Perfect Customer?
You might think that a single product may not bring in the sales you need to keep your business afloat. While it is true that your product won’t appeal to everyone, it’s not necessarily a bad thing.
You need to target customers who are most likely to see the value in your products and make a purchase. To pinpoint these potential buyers, start by asking –
- What problems does my product solve? Who struggles with this issue regularly?
- What are their habits? Where do they spend time online?
- What objections might they have? Price, usability, or trust could be barriers. How can your website address these?
For example, if you’re selling a high-quality ergonomic chair, your perfect customer might be remote workers who experience back pain and are willing to pay extra for quality. So, you need to create a tone that focuses on pain relief, quality, and durability.
The more specific you are about your audience, the easier it’ll be to attract the right buyers to your store.
By now, you should have a basic idea of how to structure your business goals for your single product website. Let’s learn how to build one using EasyCommerce.
How to Make a Single Product Website with EasyCommerce in 10 Easy Steps
Before you start to build your website, you will need a few things to set up WordPress. Begin by getting –
- A domain name
- Web hosting service
- SSL certificate
Now, these might sound like just a bunch of tech lingo, but in all honesty, you don’t need any prior experience to set this up.
Firstly, a domain name is just the name of your website (www.example.com). Secondly, web hosting is where your website will be housed. And finally, any ecommerce store needs an SSL certificate to keep the data of your customers safe.
Gathering all these may seem like a lot of work, but some web hosting companies usually offer all of these on a single package. You can pick from the following –
All of these hosting services are optimized for WordPress, and all of them come with a free domain name and SSL certificate.
Below, we’ll show you how to set up your website hosting with Hostinger –
Step 1: Set Up Your Website Hosting
Go to the Hostinger website and click Claim Deal or Get Started to be redirected to the pricing section.
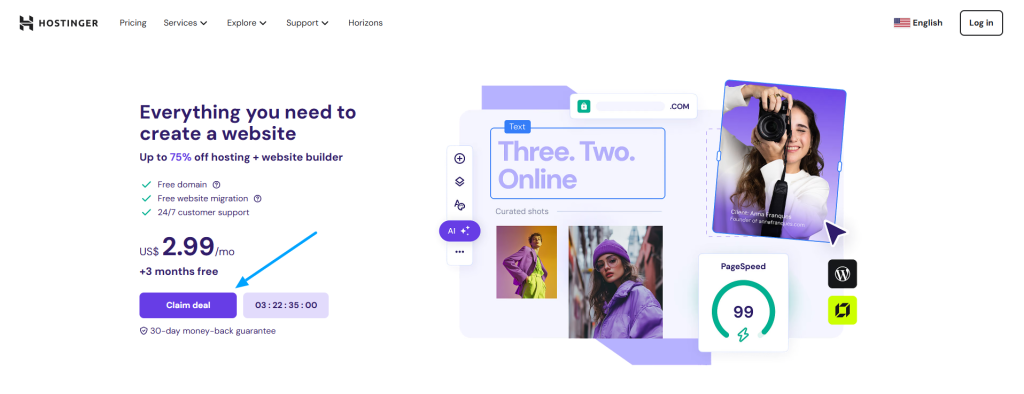
We recommend choosing the Business package, but you can also go with the Premium package for almost the same features.
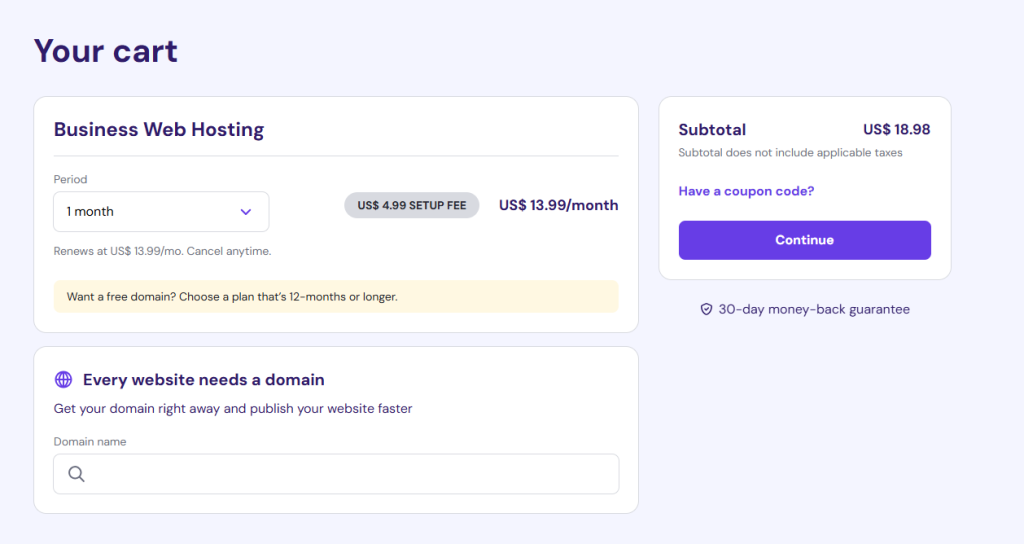
From here, choose a hosting period that’s 12 months or longer to get a free domain. Click on Continue to create a Hostinger account.
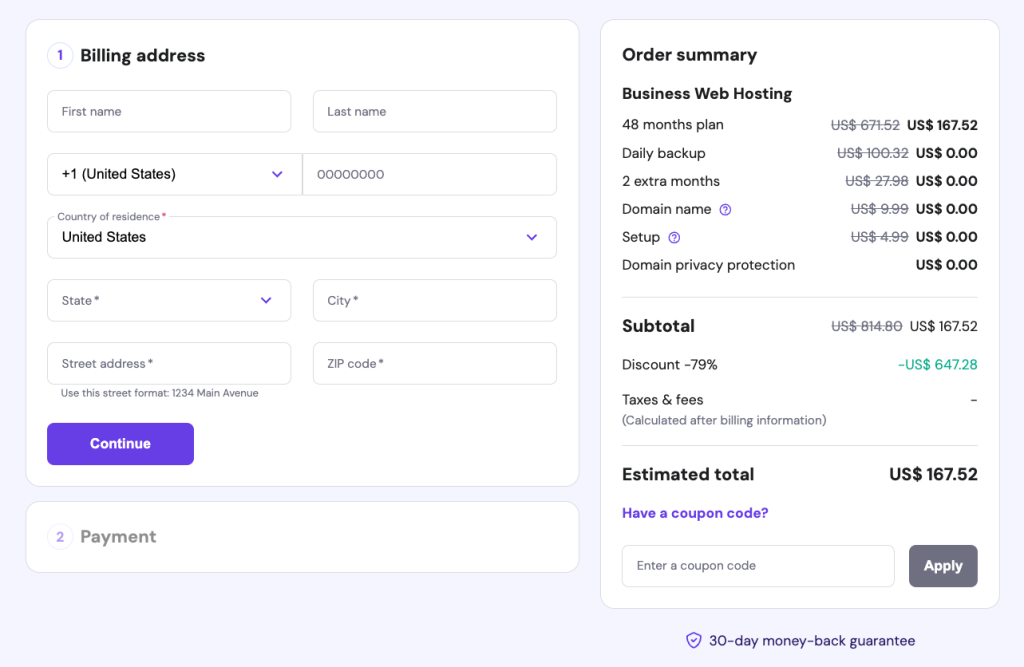
Enter the Billing Address details, and complete the payment using your preferred payment method.
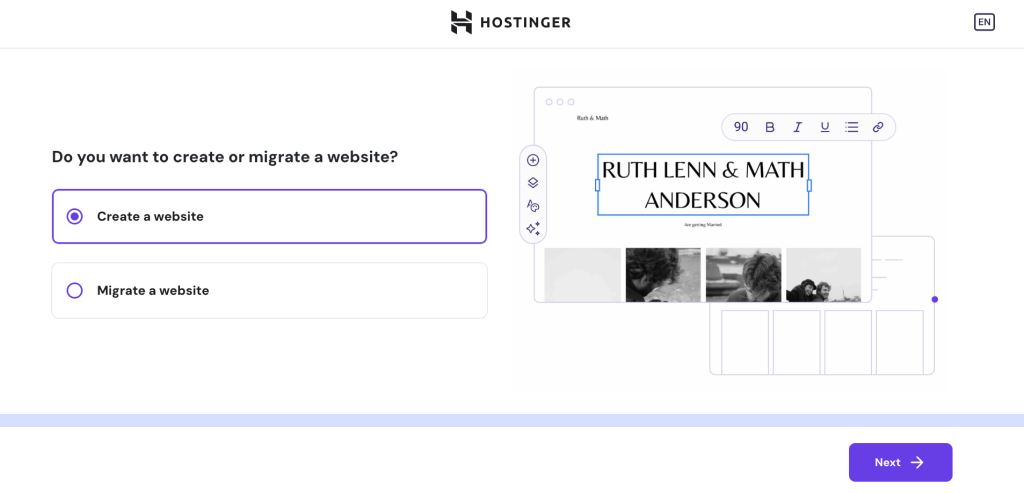
Once the purchase is complete, you can choose between Create a website or Migrate a website from Hostinger’s onboarding.
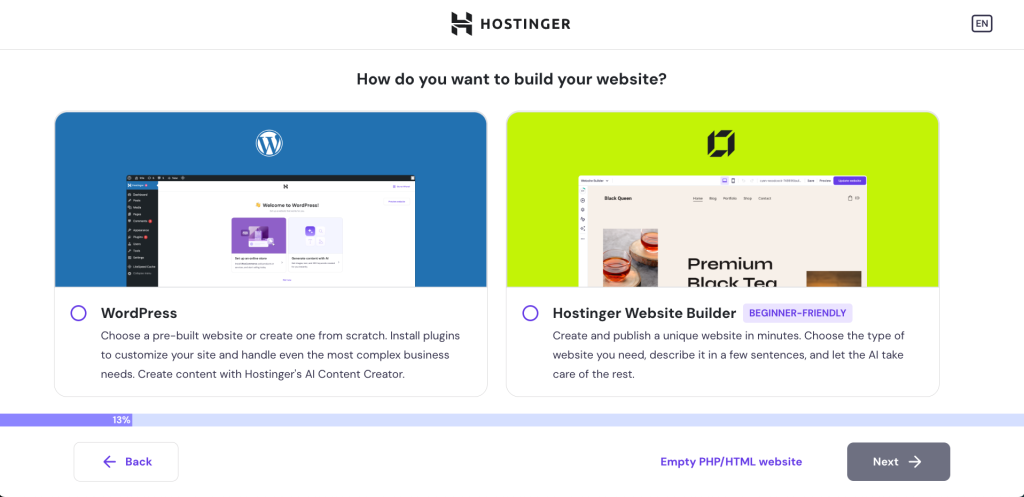
Now, choose Create a website and select WordPress, as we will be using it as the guide to make a single product website.
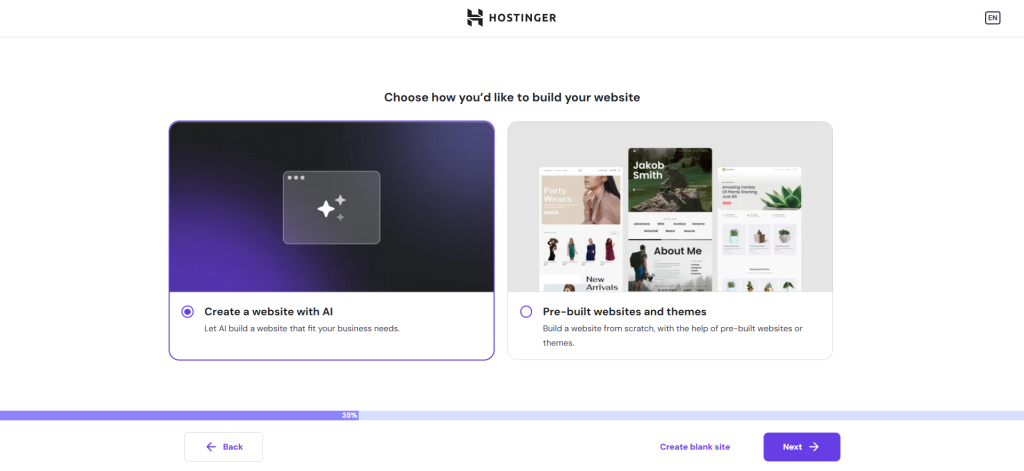
When you reach the Choose how you’d like to build your website page, select Pre-built websites and themes, and choose Astra.
And finally, in the domain name section of the onboarding setup wizard, enter your preferred domain, or click Use temporary domain to quickly proceed (you can connect your actual domain name later).
Step 2: Auto-install WordPress
All the web hosting services we’ve mentioned in this blog have a one-click WordPress install. To set up WordPress with Hostinger, go to your Panel > Websites > Dashboard and look for Auto Installer in the left sidebar.
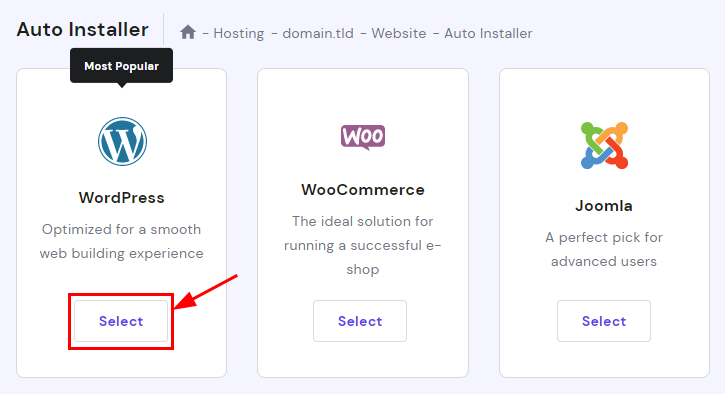
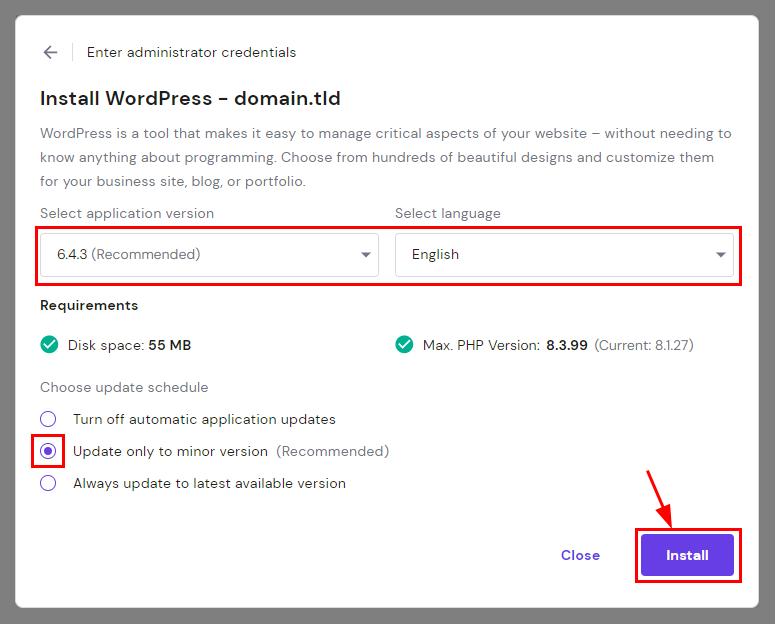
From here, select WordPress and fill in all the required details. Click Next and select WordPress version details (you need WordPress version 6.0 and up for EasyCommerce), and hit Install.
With the website credentials you’ve provided, you can now log in to your WordPress website dashboard.
Step 3: Install and Activate EasyCommerce
Log in to your WordPress Dashboard and navigate to Plugins > Add New Plugin.
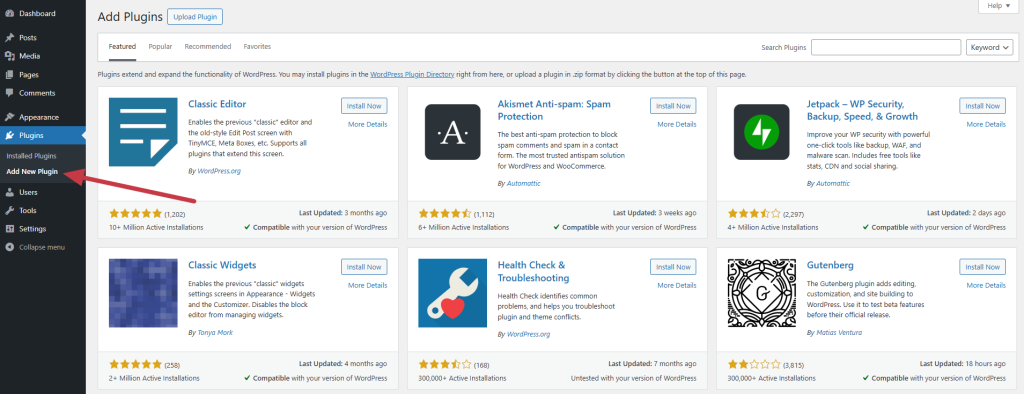
Search for EasyCommerce in the plugin directory and click Install Now, and then activate the plugin.

Once the plugin is activated, go to Plugins > Installed Plugins and click the Setup Wizard button under EasyCommerce.
Step 4: Run Setup Wizard
You can quickly get your single product website running with the EasyCommerce setup wizard. It has three pages for you to fill out: Brand, Store, and Account.
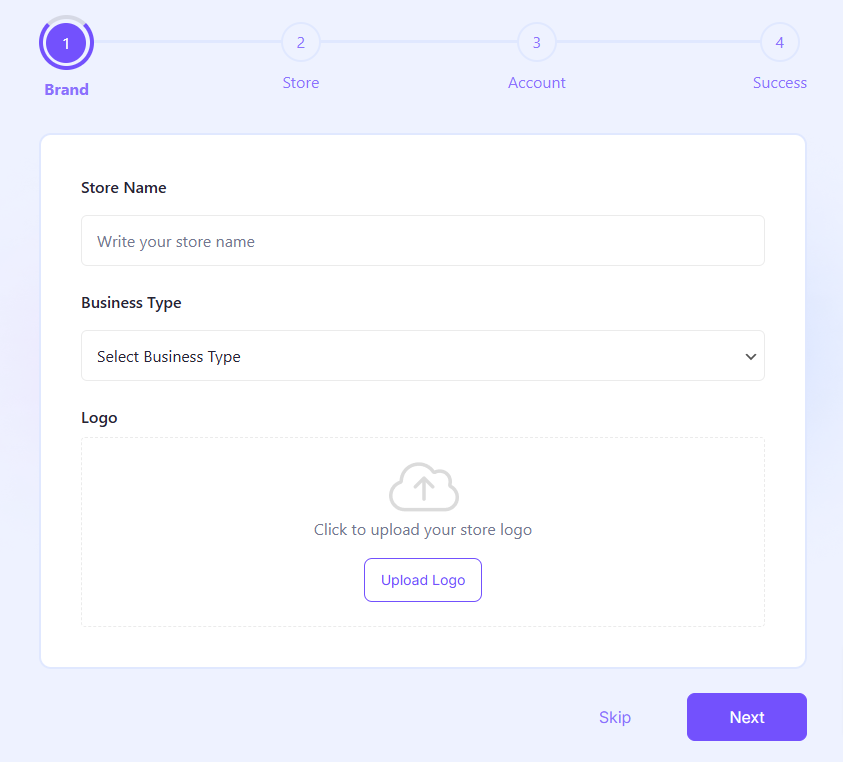
In the Brand page, you will provide your store’s name, select a business type, and upload your store’s logo. In the Store page, you will choose your preferred currency, payment methods (you can manage this later), and set the necessary pages.
You can choose pre-existing pages and assign roles to them for Shop, Checkout, and Dashboard. Or just choose Create a New Page to automatically build a new page with the EasyCommerce shortcode dedicated to that page.
In the Account page, you will provide your name and your email address. You will find an API key in your inbox. Enter that here to connect your store with the EasyCommerce system.
Your basic ecommerce store is now ready. In the following section, we’ll show you how to set up payment, shipping, and add products to your EasyCommerce store.
Step 5: Set Up Payment Gateways
You can activate multiple payment gateways from the addons library.
Go to EasyCommerce > Addons from the WordPress dashboard sidebar and locate your preferred payment gateways (Stripe, PayPal, Mollie, Square, etc).
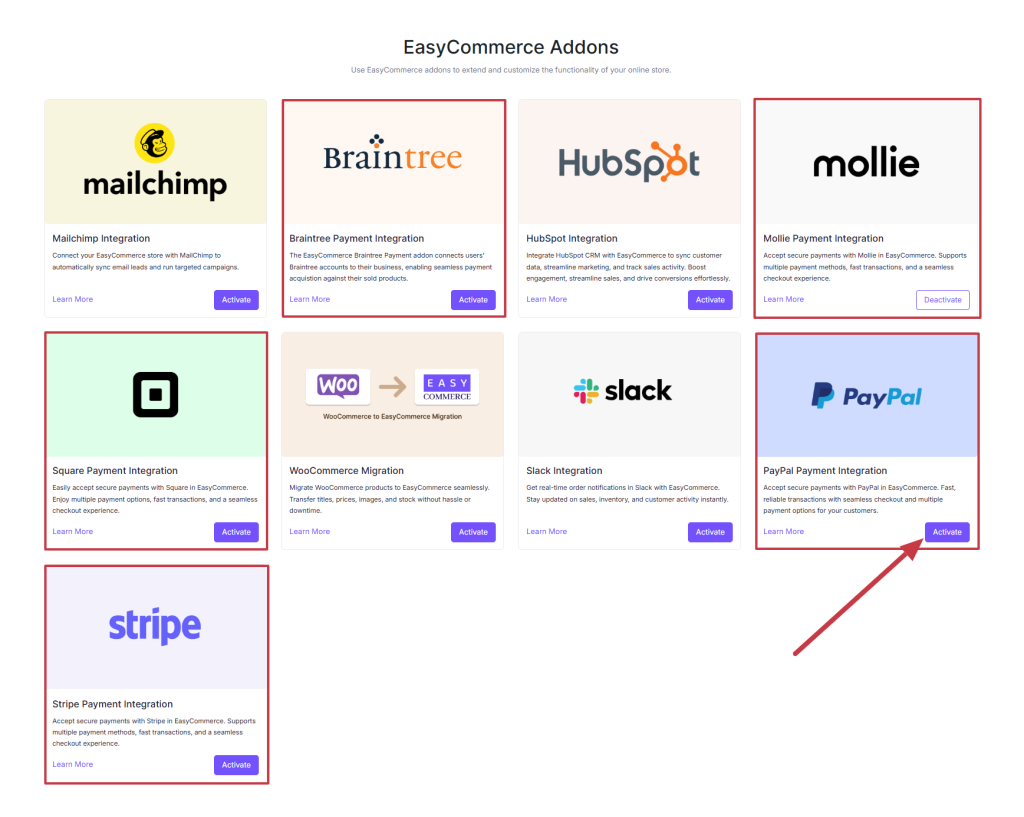
If you’ve followed the setup wizard, your store should already be connected to the EasyCommerce system. So, just hit Activate under your chosen gateway addon.
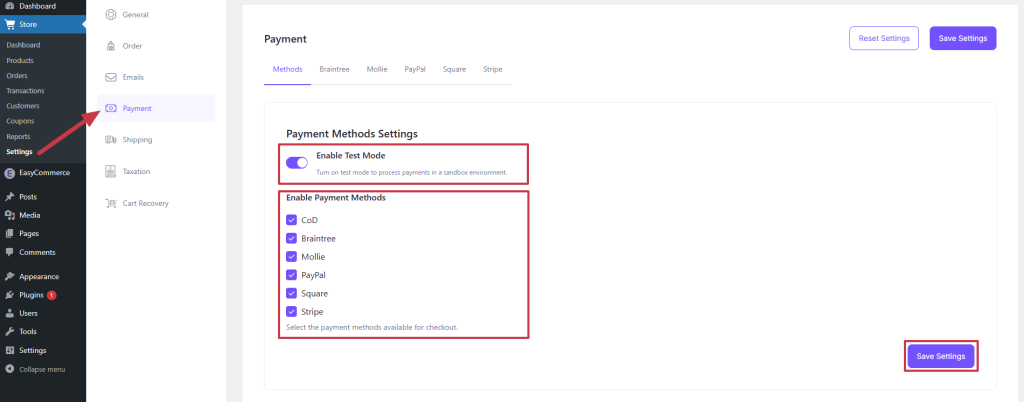
Now go to Store > Settings > Payment, and you will find all the payment gateways you’ve activated listed here. Enable the gateways you want on your store and click Save Settings.
Note: You can also enable testing mode to try out the method before going live.
After you enable the gateway and save the settings, you will find the new options next to Methods on top.
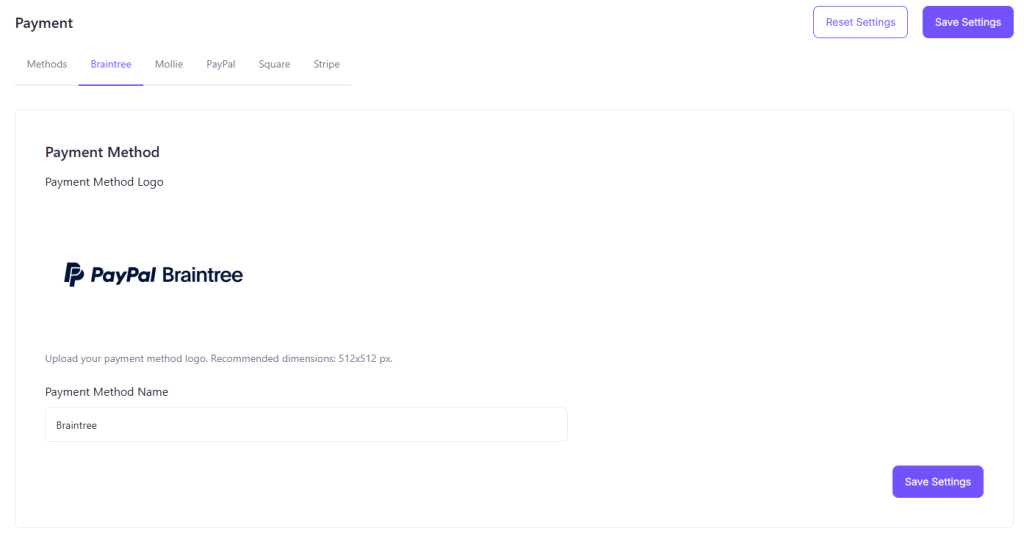
We’ll be using Braintree for this example, so click on that. Start by uploading the logo, add the payment method name, and scroll down to add the necessary credentials.
And finally, click Save Settings to make the gateway live.
Step 6: Set up Shipping
Having proper shipping methods during checkout is an essential part of the ecommerce experience.
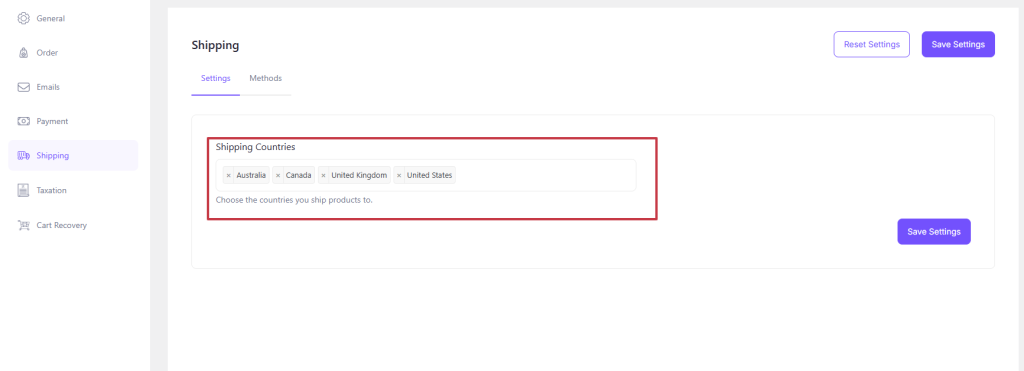
Start by going to EasyCommerce > Settings > Shipping > Settings, and add your preferred Shipping Countries from the dropdown.
Based on the countries you’ve chosen, you can assign specific shipping methods to each zone (e.g., free shipping, flat-rate shipping, carrier-calculated rates, etc.).
Now, go to the Methods section from the top, click the Add Shipping, and enter the basic information about the method, like name and description.
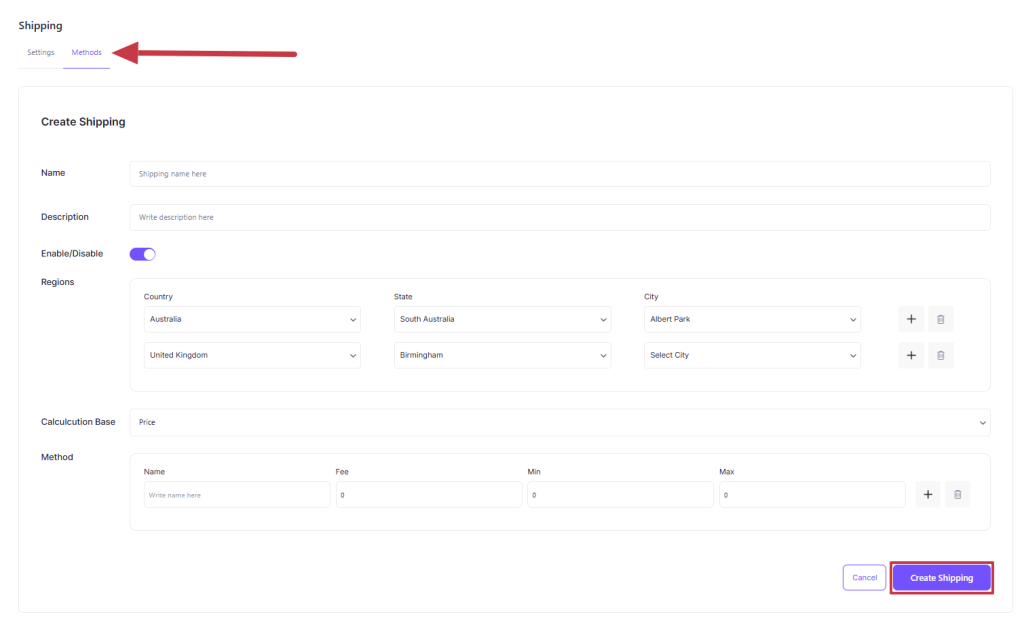
For the Regions section, select the Country, State, and City where you will ship your products. You can add multiple regions based on the countries you’ve added.
Set the calculation base depending on weight or quantity, and give it a name, enter the fee, and minimum/maximum limits.
Once you’re done, click Create Shipping to make this method live on your website.
Step 7: Add Your Product
Now you can start adding products to your catalog.
Go to Store > Products and click Add New Product. You will find four sections for the new product page: Basic Info, Attributes, Pricing, and Settings.
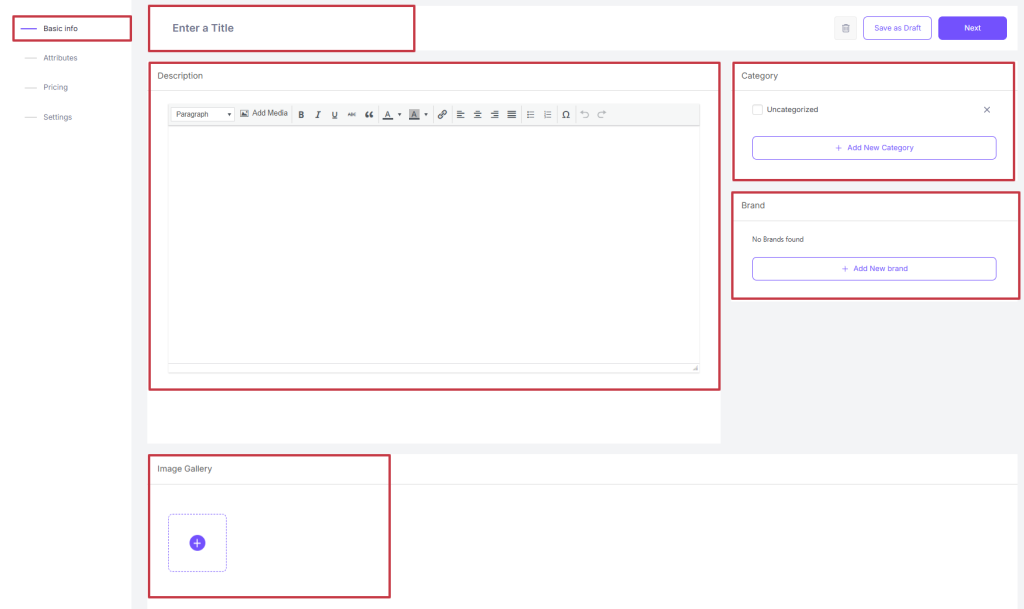
Basic information includes product title, description, images/thumbnails, category, and brand. For single products, you can add a category and brand, and choose from that list next time you add a product.
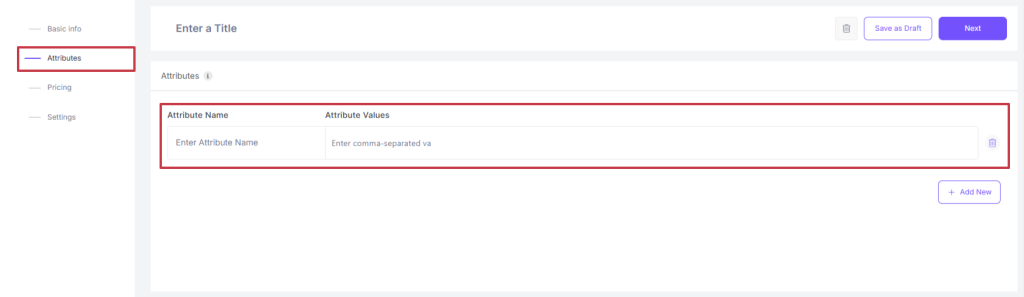
Attributes are separated by commas, and for single products, you can easily offer different variations.
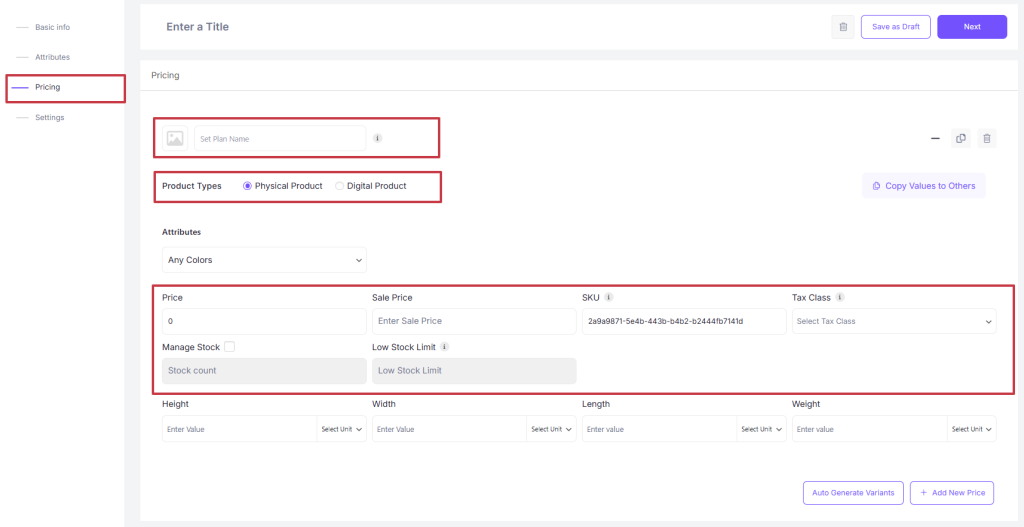
You can set different pricing structures and SKUs for each variation by clicking the Autogenerate Variants (or manually set them by hitting the + Add New Price button).
You can also set a tax class, include a stock count, and a low stock limit to be notified (from the EasyCommerce dashboard) whenever the stock hits that number.
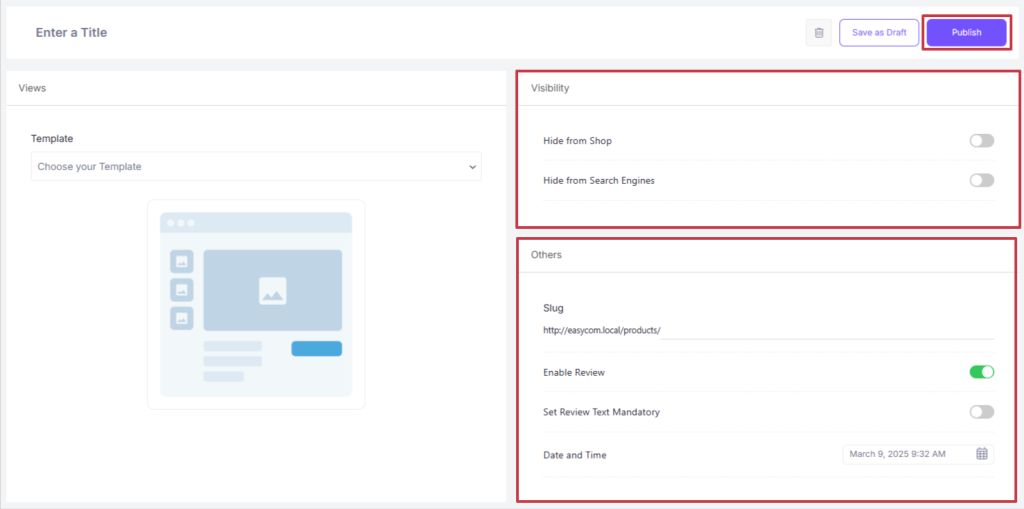
The settings let you select a template for your shop page, change visibility, slug (the URL), and manage other functions.
If you’re satisfied with the input, hit Publish to make this product live on your store.
Step 8: Set Up Taxation
From the Settings page, find the section for taxation. Add the countries you’re selling your products to and click Save Settings.
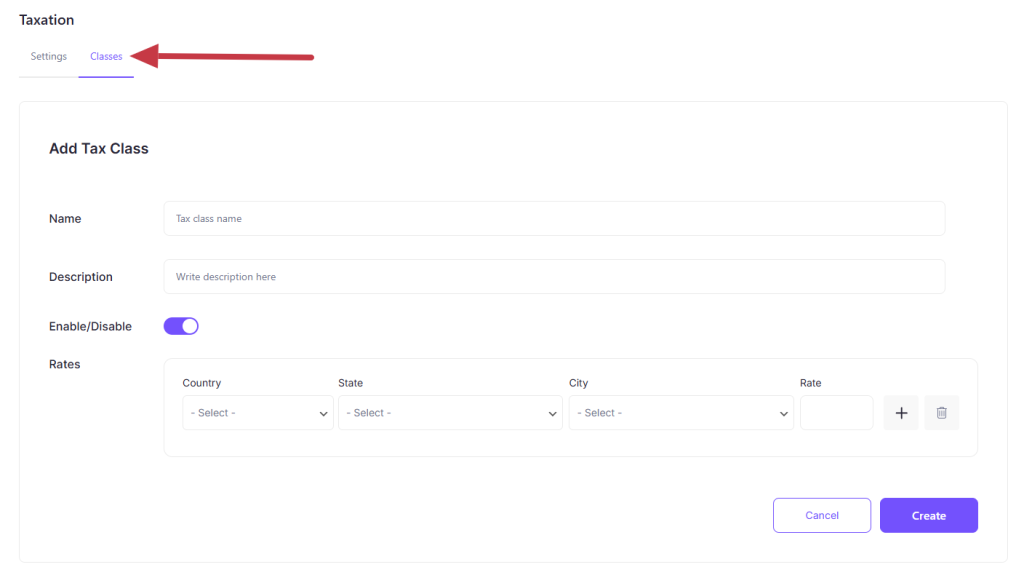
Now go to Classes, hit + Add Class, and in the new page, enter all the necessary details. And for the tax rate, you can enter a specific rate for all the countries, states, and cities you will be covering.
Once done, just hit Create to save all the changes.
Step 9: Add Coupons
Potential customers are more inclined to purchase from your store if you offer them discounts for special occasions or for first-time buyers.
EasyCommerce makes it simple to make custom coupons. Just go to the Coupons page and click the Add Coupons button.
Enter all the coupon details, like giving it a name, setting the amount, and specifying the code. And configure the settings like which products the code applies to, what’s the minimum/maximum you need to spend to avail it, and its start and expiry date.
Hit Create Coupon to save and manage them by going back to the coupons page.
Step 10: Optimize Your Store for Search Engines
Now that your store is set up, you need to optimize it for search engines. This means writing copies for your website that are SEO-friendly and highly relevant to your product.
Let’s look at the basic SEO overview for your single product website –
- Research Keyword: Find out which search terms your potential customers are using to look for products that are similar to yours. You can use tools like Google Keyword Planner or SEMRush to structure this.
- Optimize Content: Use the keywords you found and naturally include them in your website’s content, including headings and product descriptions.
- Technical SEO: Retaining potential customers has a lot to do with how well your website functions. So, make sure your store is mobile-friendly, has an easy-to-follow structure, and loads quickly.
Final Words
At its core, a single product website keeps things simple. Instead of overwhelming visitors with endless options, it puts all the focus on one great product. It’s a great approach that makes customers trust your business, as you specialize in this specific niche.
The real secret? Knowing exactly who you’re selling to. When you understand your ideal customer’s needs and frustrations, you can craft a website that speaks directly to them.
So, if you’re using our guide to learn how to make a single-product website, make sure to use clear messaging, smart design, and customer-focused content to create a seamless path from visitor to buyer.
Frequently Asked Questions (FAQs)
How do I drive traffic to a single product website?
Since you’re not relying on a large product catalog, targeted marketing works best:
- Paid ads (Facebook, Instagram, Google)
- Influencer collaborations
- SEO-optimized content (blog posts, videos)
- Email marketing and retargeting
Can I eventually expand to multiple products?
Yes! Many brands start with a single product to validate demand before scaling. If you expand, you can either –
- Keep the single-product site and launch separate sites for new products
- Transition into a full ecommerce store (but this requires strategic planning)
Do I need technical skills to build a single product website?
Not at all. Platforms like EasyCommerce offer easy-to-use templates that are optimized for single-product sales. This platform also requires no coding, just drag-and-drop customization.