


Stripe is integrated by default in EasyCommerce. Follow the steps below to configure your ecommerce store with Stripe payment functionality in just minutes.
Step 1: Navigate to Payment Settings
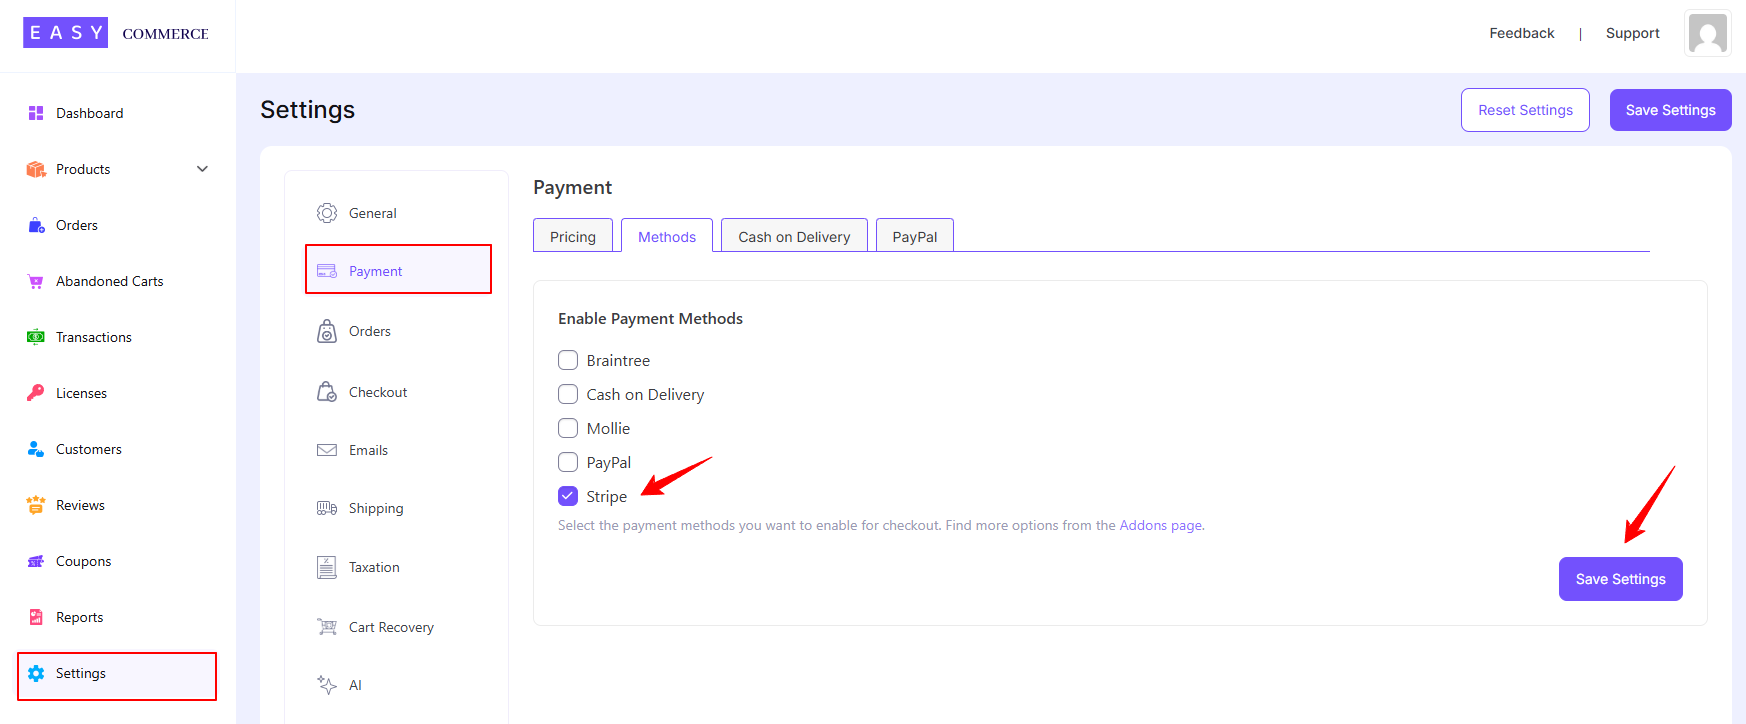
- Go to Store > Settings > Payment.
- From the Methods section, select Stripe as your payment gateway.
- Tap ‘Save Settings’ to finalize the changes.
Step 2: Configure Stripe Settings
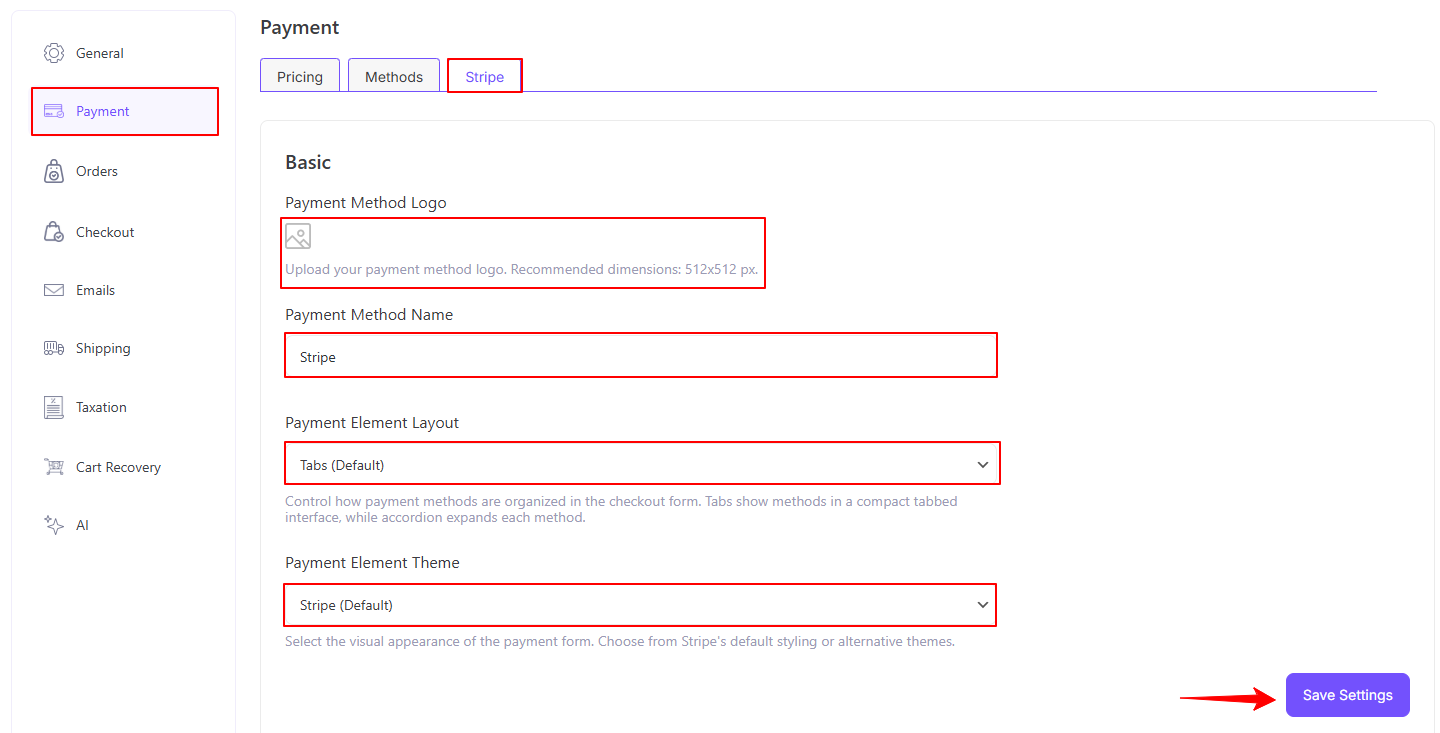
- Access the Stripe addon settings tab beside the ‘Methods’ tab.
- Add the Stripe payment method logo from Media Library.
- Enter the Payment Method Name.
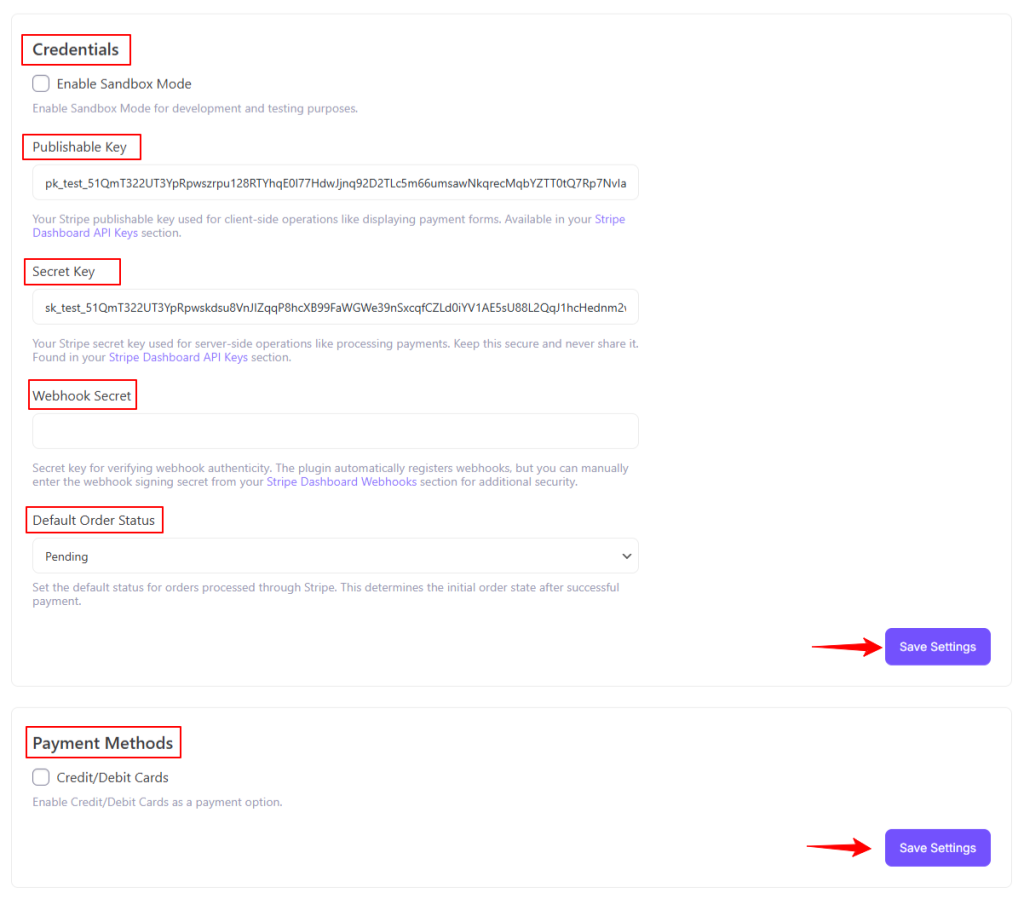
- Enter your Stripe credentials, i.e., Publishable Key and Secret Key, to verify your connection.
- Configure the default status payment gateway settings.
- Finally, tap ‘Save Settings’ to store the changes.
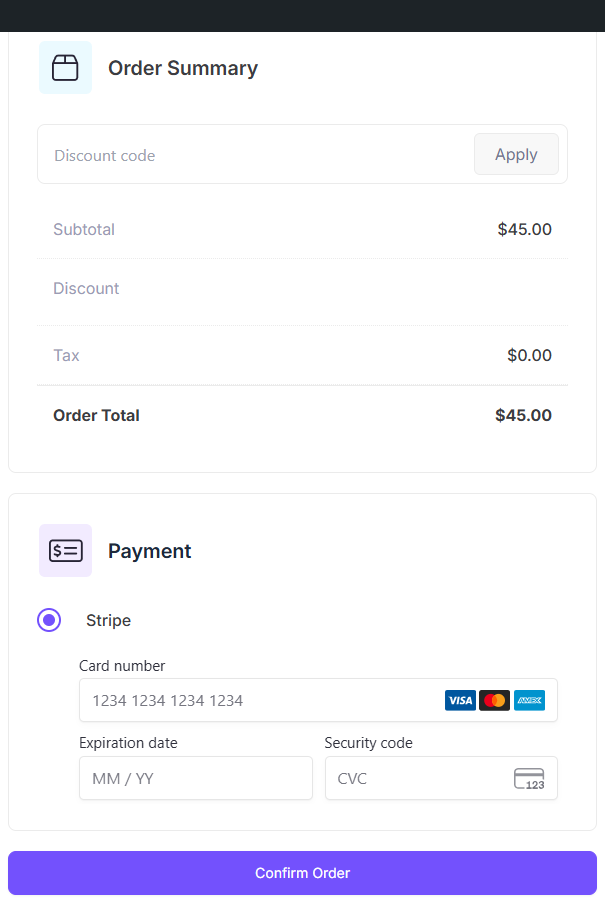
Step 3: Test the Integration
- Test your account for accurate transaction activities using Stripe’s Sandbox Environment.
- Once testing is complete, switch to live mode and start accepting payments.
Was this doc helpful?