


How to Activate Tax in EasyCommerce
EasyCommerce offers a built-in taxation mechanism for the extended convenience of both consumers and sellers. A clear and easy taxation system allows businesses to collect and segment value-added taxes across multiple products easily.
In this guide, you will learn how to configure your ecommerce tax classes website using EasyCommerce.
Step 1: Navigate to Settings
Go to EasyCommerce Dashboard > Settings > Taxation and then the Settings tab.
Step 2: Add Tax Countries
Add countries of your interest from the dropdown or simply type their name to find it faster. Once you’re done, tap Save Settings to finalize your changes.
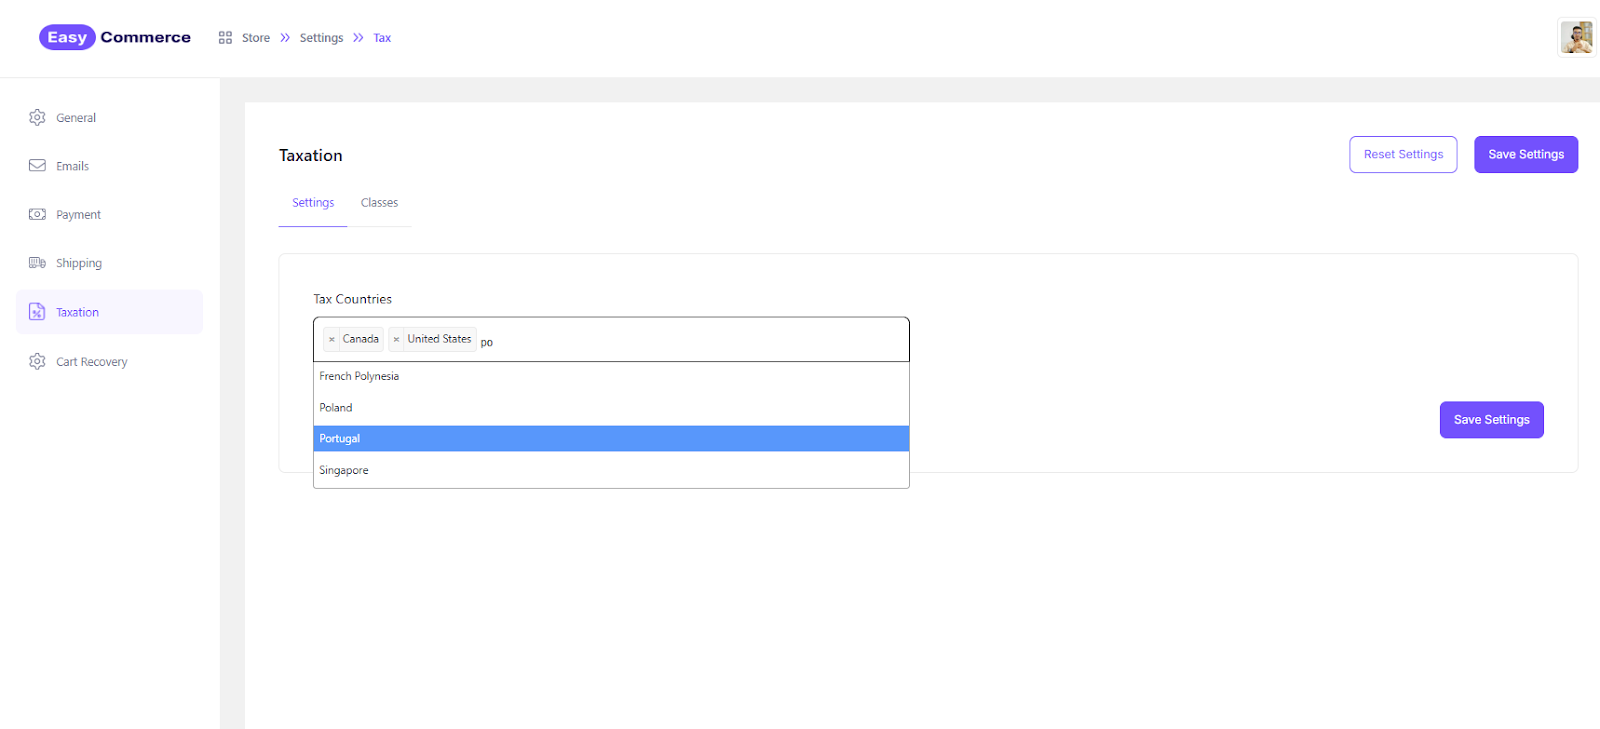
If you change your mind and want to remove a country from the list, just click the ‘cross’ icon located next to its name. Or you can click ‘Reset Settings’ anytime to remove everything and start fresh from scratch.
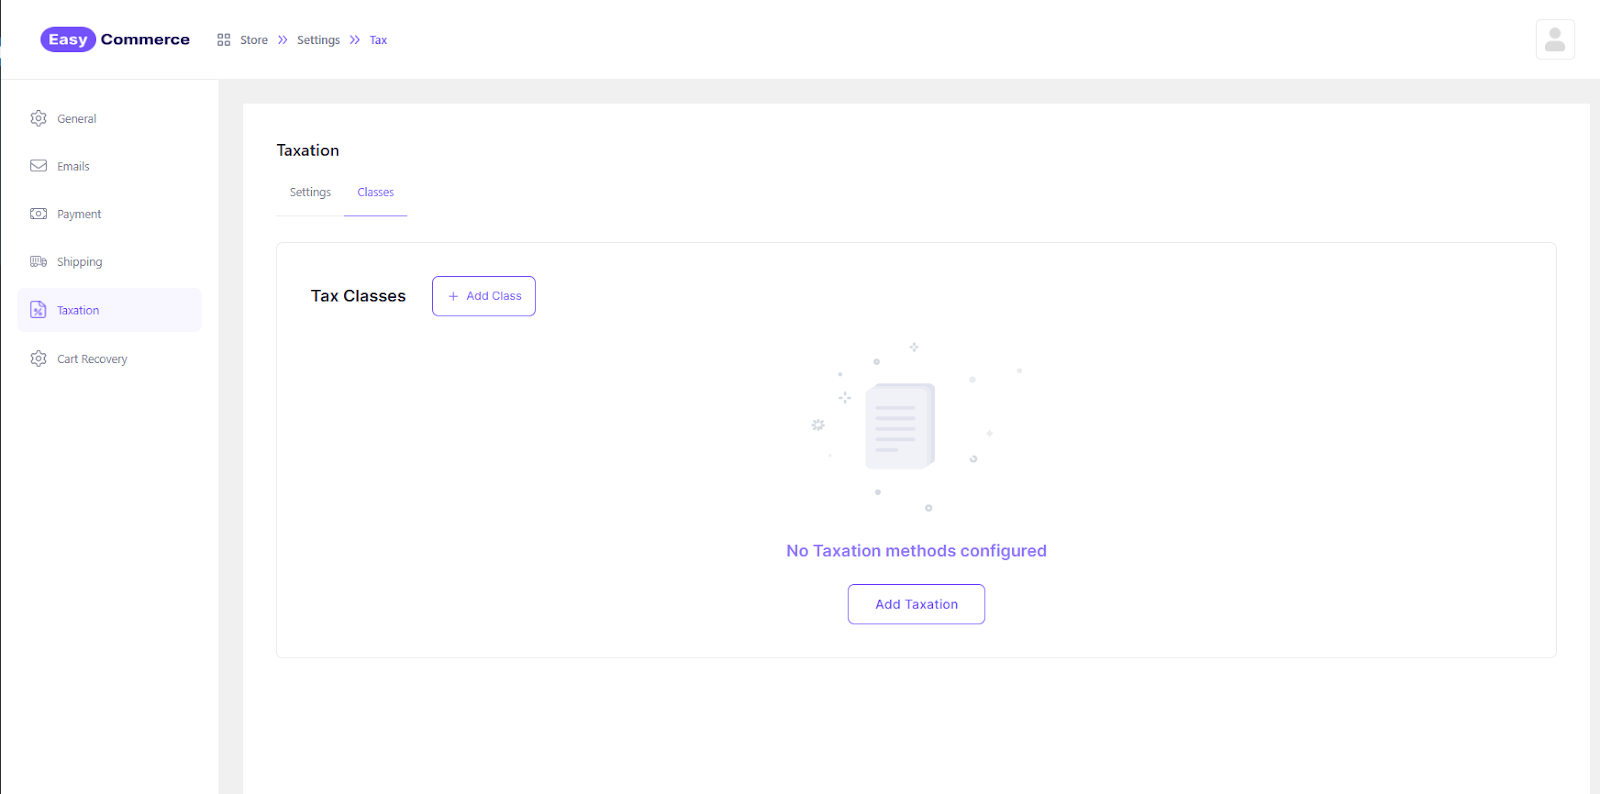
Step 3: Add Tax Class
Switch to the Classes tab to create a new tax class. Click the + Add Class button to add a new tax class.
Step 4: Enter Class Details
Provide the necessary details, such as the tax class name, applicable geographical areas, tax rates, and any additional information required.
* Name: Tax class name
* Description: Slightly longer description of the class
* Enable/Disable: Set Active/Inactive switch
* Rates: Tax area, tax rate, subordinated conditions, etc.
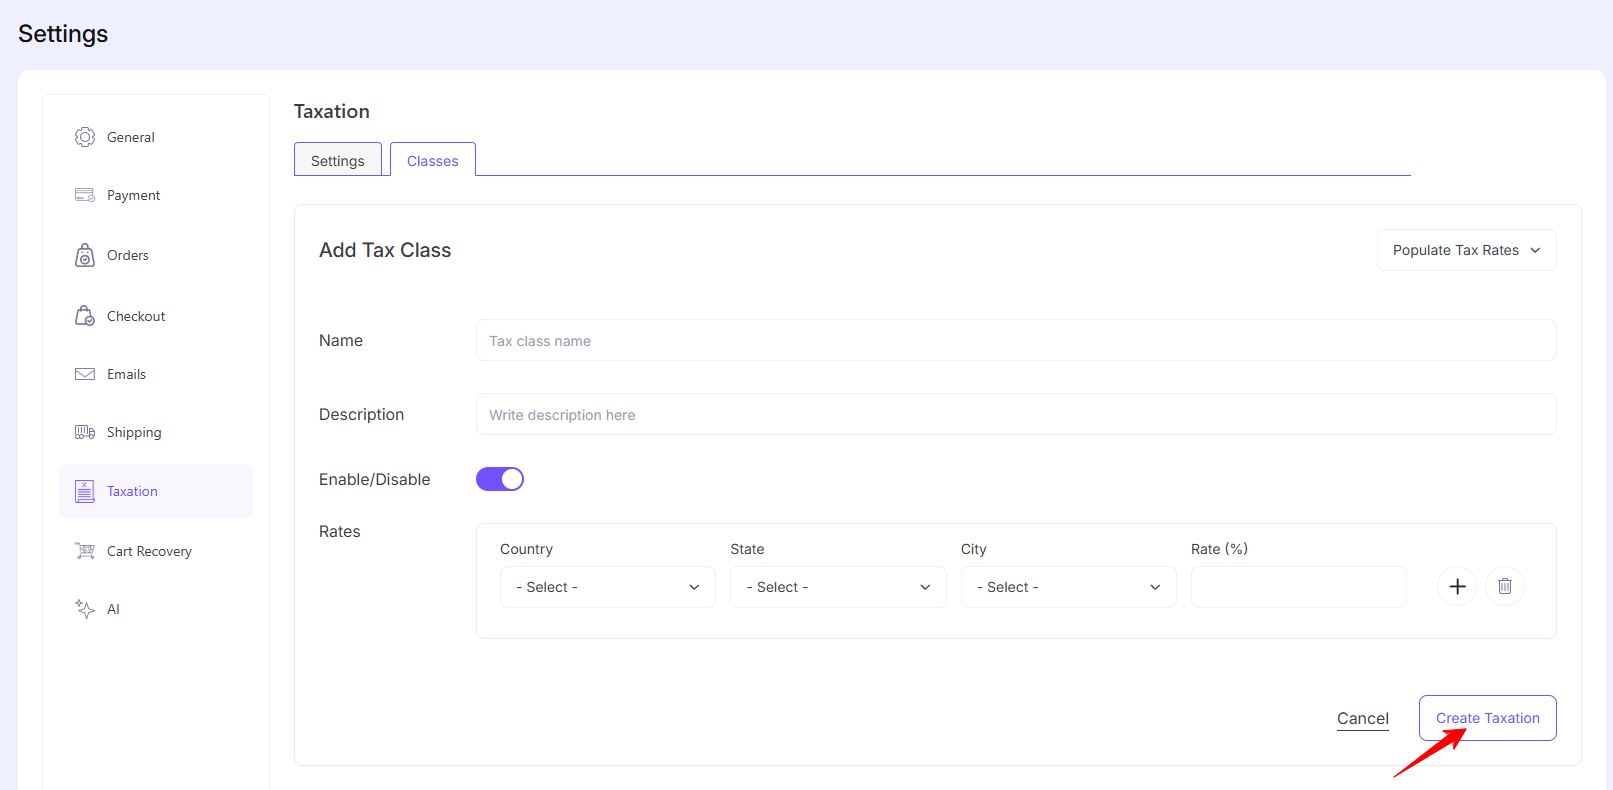
Step 5: Save Class
Click ‘Create Taxation’ to complete setting up the tax class.
Taxation Control
There are no absolute limits on the number of tax classes that can be set in EasyCommerce. You can create an infinite number of tax classes to cover various locations across the globe.
You can also seamlessly manage all your existing classes from a single, centralized screen, while also having the option to create new ones.
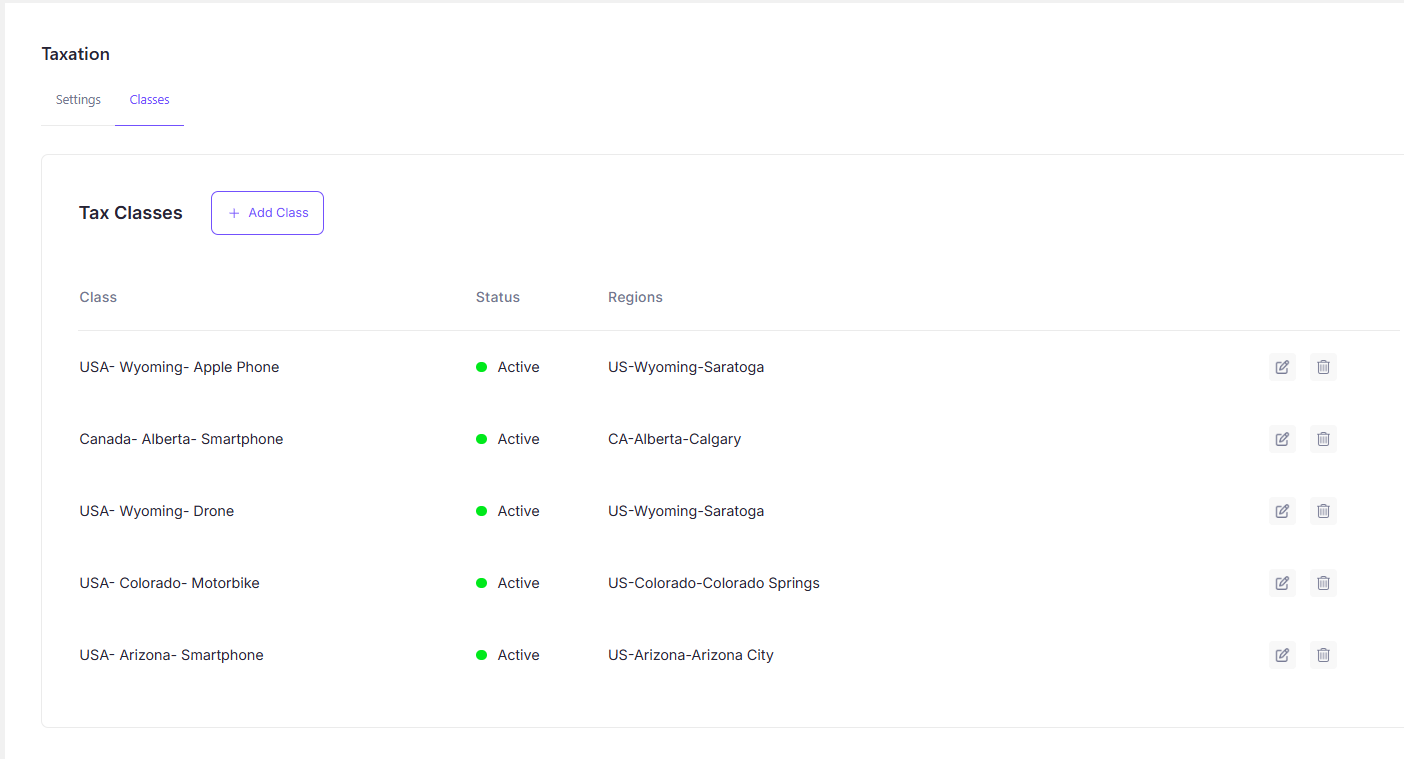
You can edit conditions using the ‘Modify’ icon next to the tax class or remove a class with the ‘Bin’ icon—anytime. Stay in full control with ease using EasyCommerce!
Was this doc helpful?