Google Sheets Sync
This integration lets you automatically store and manage your store's order data in a Google Sheet, simplifying your order tracking process.
Follow these steps to activate the Google Sheets Sync addon and configure the API settings for seamless synchronization of order data to Google Sheets.
N.B.: Make sure the EasyCommerce system is connected to your store with the API key.
Learn how to connect your store with EasyCommerce using an API key from here.
Step 1: Activate the Addon
- Sign in to your WordPress website’s dashboard.
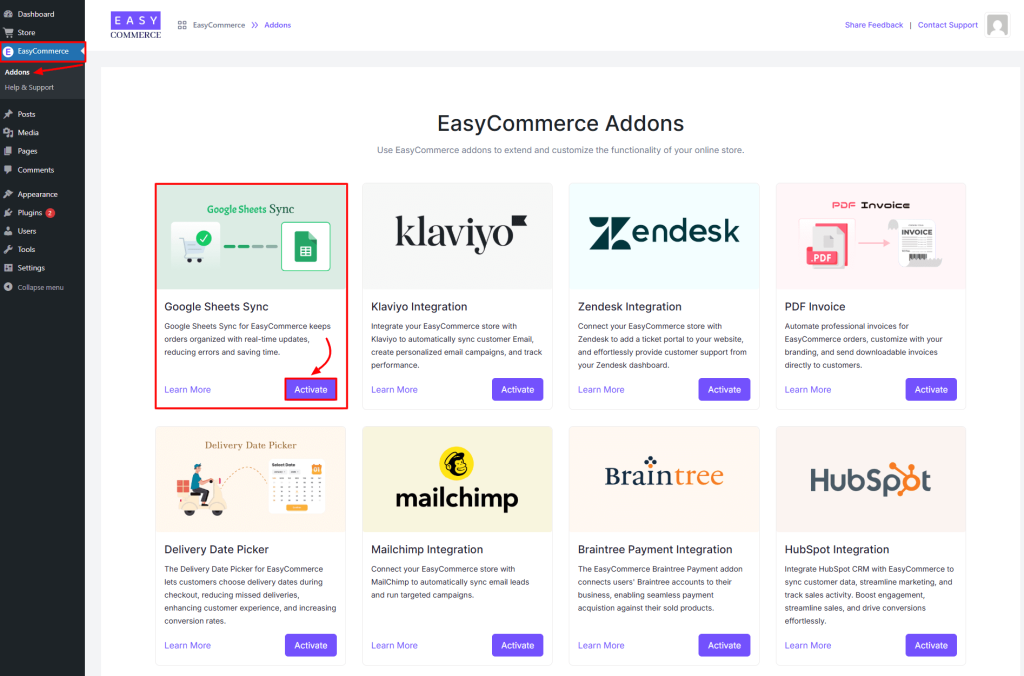
- Go to EasyCommerce > Addons section and click “Activate” under the Google Sheets Sync addon.
- Now, EasyCommerce will automatically download, install, and activate the Google Sheets Sync to your ecommerce store.

Step 2: Create a Google Cloud Account and Set Up API
1. Create a Google Cloud Account:
- Go to the Google Cloud Console.
- Sign up or sign in with your Google account.
2. Create a Google Cloud Project:
- Once logged in, click on Select a Project at the top of the console, then click New Project.
- Name your project and choose the organization (if applicable).
- Click Create.
3. Enable Google Sheets API:
- From the Google Cloud Console, go to API & Services > Library.
- Search for Google Sheets API.
- Click on it and enable it for your project.
4. Create a Service Account:
- Go to API & Services > Credentials.
- Click Create Credentials, then select Service Account.
- Give the service account a name and description (for example, "EasyCommerce Sheets Sync").
- After creating it, grant the service account the Owner role (or the necessary role for access).
- Finish the process and click Done.
5. Create Credentials:
- After creating the service account, click on it to manage it.
- Under Keys, click Add Key and select JSON. This will download a JSON file containing the necessary credentials for your API integration.
Step 3: Configure Google Sheets Sync in EasyCommerce
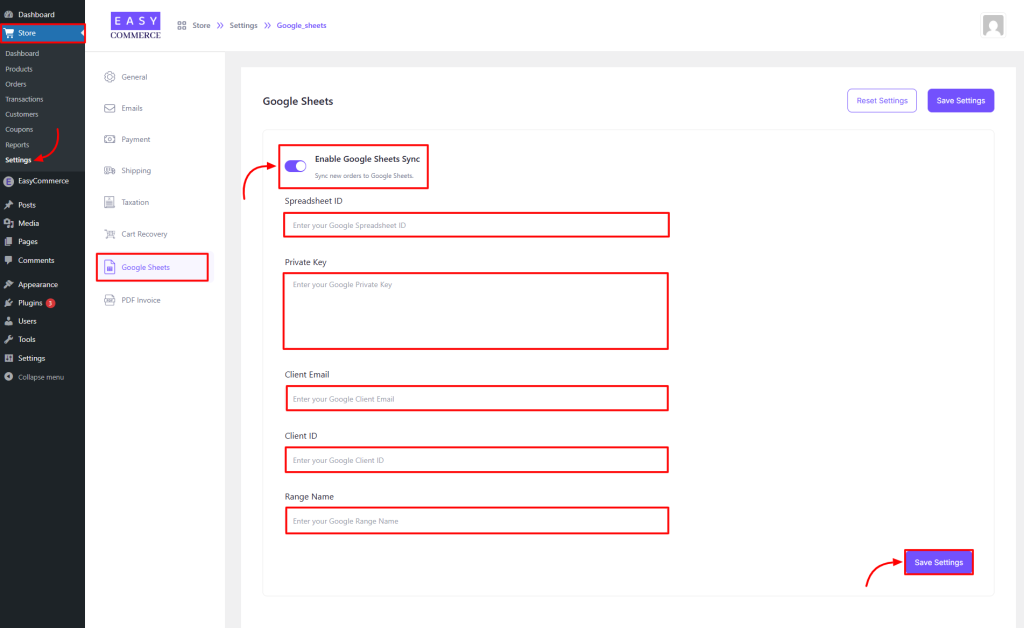
- Navigate to Wordpress Dashboard Store > Settings > Google Sheets.
- Toggle to enable Google Sheets Sync.
- Fill in the Google Sheets Sync Fields:
# Spreadsheet ID: Find this in the URL of the Google Sheet you want to sync (it’s the long string of characters between /d/ and /edit).
# Private Key: Open the downloaded JSON file from Google Cloud and find the private_key field. Copy and paste this key.
# Client Email: From the JSON file, copy the client_email field.
# Client ID: Also found in the JSON file, copy the client_id field.
# Range Name: This is the specific range in your Google Sheet but you do not need to specify the range; just insert the sheet's name (e.g., Sheet1).
- Save Settings: Once you have entered all the details, click Save Settings to store the configuration.

Step 4: Grant Google Sheets Access
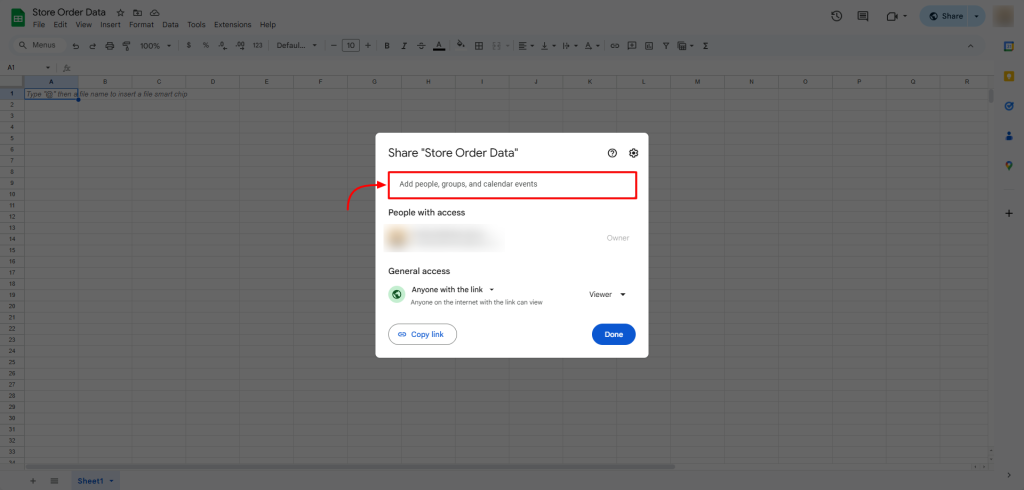
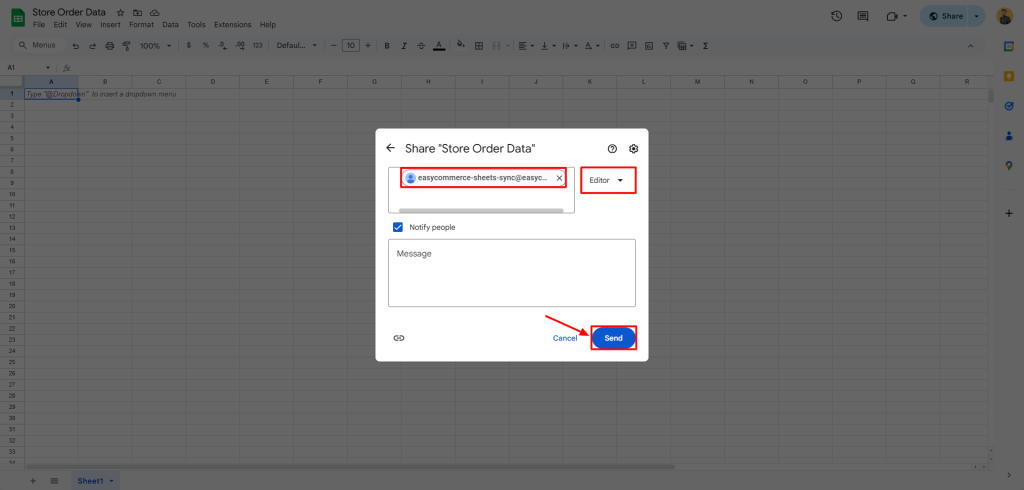
- Share your Google Sheet with the client_email found in your JSON file:


Now that you have synced your EasyCommerce Store with Google Sheets, you will get your order data in Google Sheets.
Was this doc helpful?


