


SureCart Migration
Migrating your online store from SureCart to EasyCommerce is a seamless process when done correctly. The EasyCommerce SureCart Migration addon makes this process just a matter of few clicks.
Follow the instructions below these steps to install and configure SureCart Migration addon.
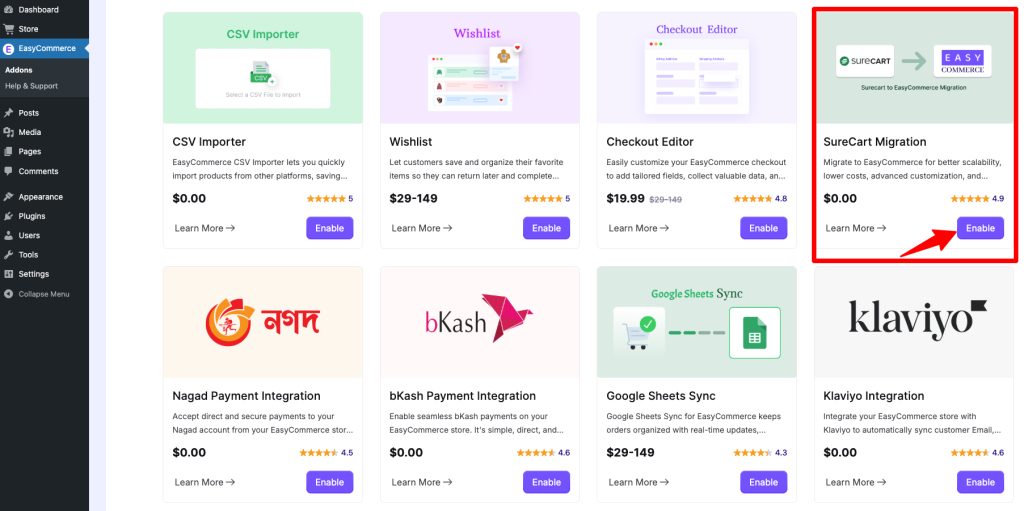
Step 1: Activate the Addon
- Sign in to your WordPress website’s dashboard.
- Go to EasyCommerce > Addons section and click “Enable” under the SureCart Migration.
- Now, EasyCommerce will automatically download, install, and activate the SureCart Migration addon to your Ecommerce store.
Read another documentation on how to install and activate a paid addon on EasyCommerce.
Step 2: Get Your SureCart API Token
- Log in to your SureCart account.
- Navigate to API > Click Secret Token.
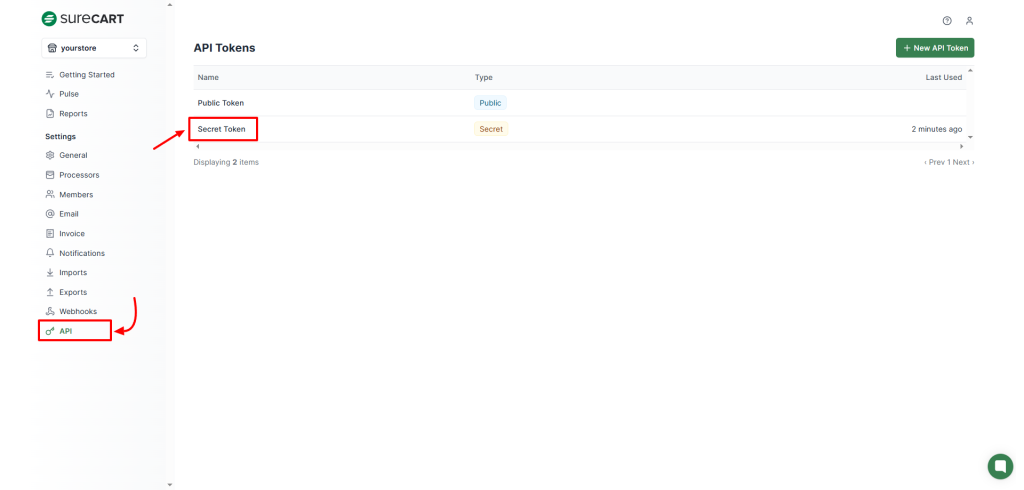
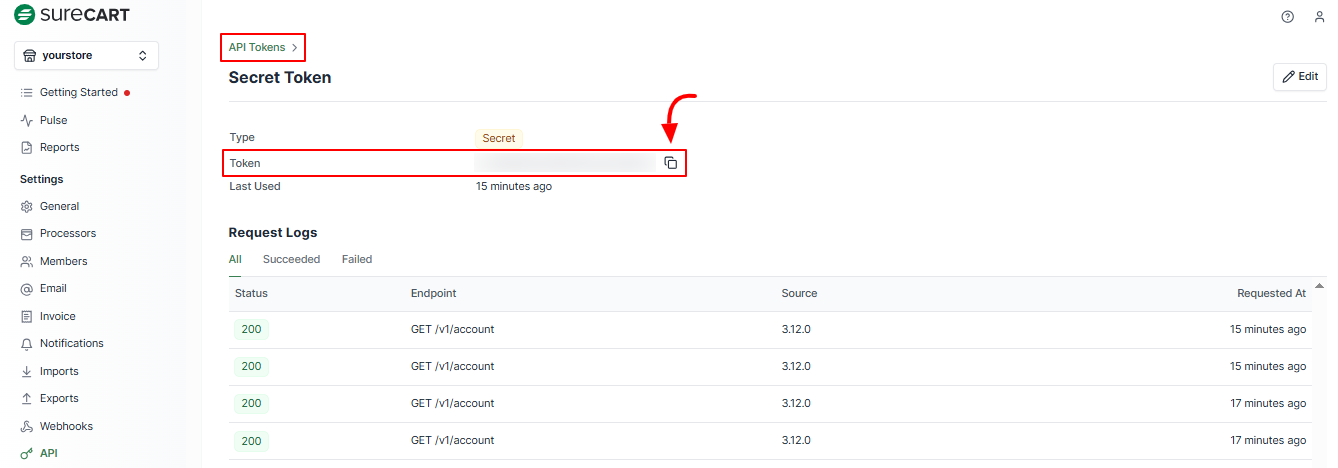
- Copy the generated API token
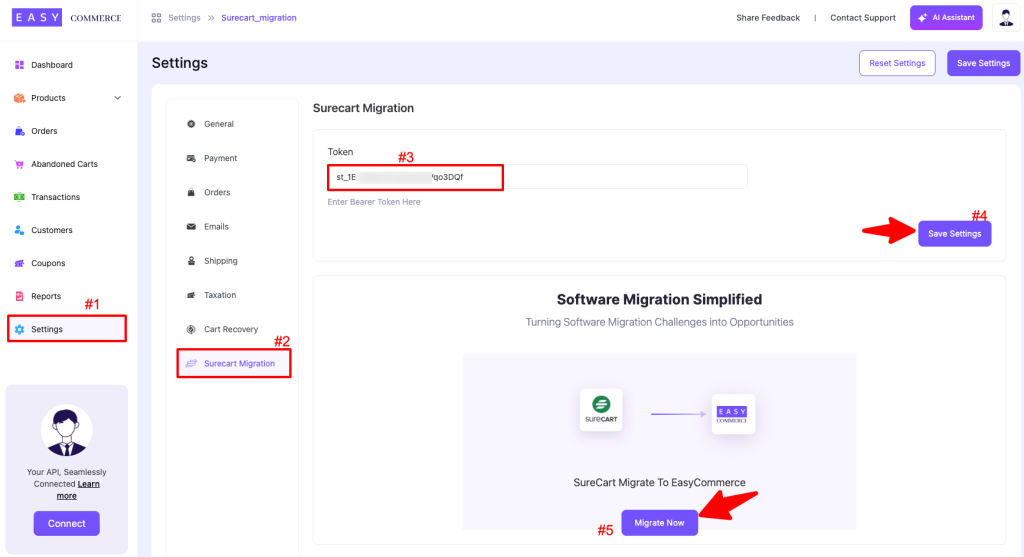
Step 3: Insert the API Token in WordPress
- In your WordPress Dashboard, go to Store > Settings > SureCart Migration.
- Paste the copied API token into the designated field.
- Click “Save Settings” to complete the migration setup.
- Click on the “Migrate Now” Button.
Step 4: Migration Complete
Once the migration is complete, you will be confirmed with a text message: “Migration completed successfully!”
EasyCommerce will automatically detect your existing SureCart store and begin migrating the products, orders, and customer data.
Step 5: Test the Migration
- After the migration is complete, ensure everything is transferred correctly by reviewing products, orders, and customer data on your new store.
Step 6: Deactivating SureCart (Optional)
- Anytime you want to deactivate SureCart Migration from your EasyCommerce store, go back to EasyCommerce > Addons, find SureCart Migration from the addon list and tap 'Disable'.
Was this doc helpful?