


How to Create Pages ( Shop, Checkout, Customer Dashboard) with EasyCommerce
You’ll need three pages to complete essential tasks on your ecommerce site: a Shop Page to showcase products, a Checkout Page for seamless purchases, and a Customer Dashboard Page for users to manage their accounts and orders. If you haven’t followed the Setup Wizard process, then this guide is for you.
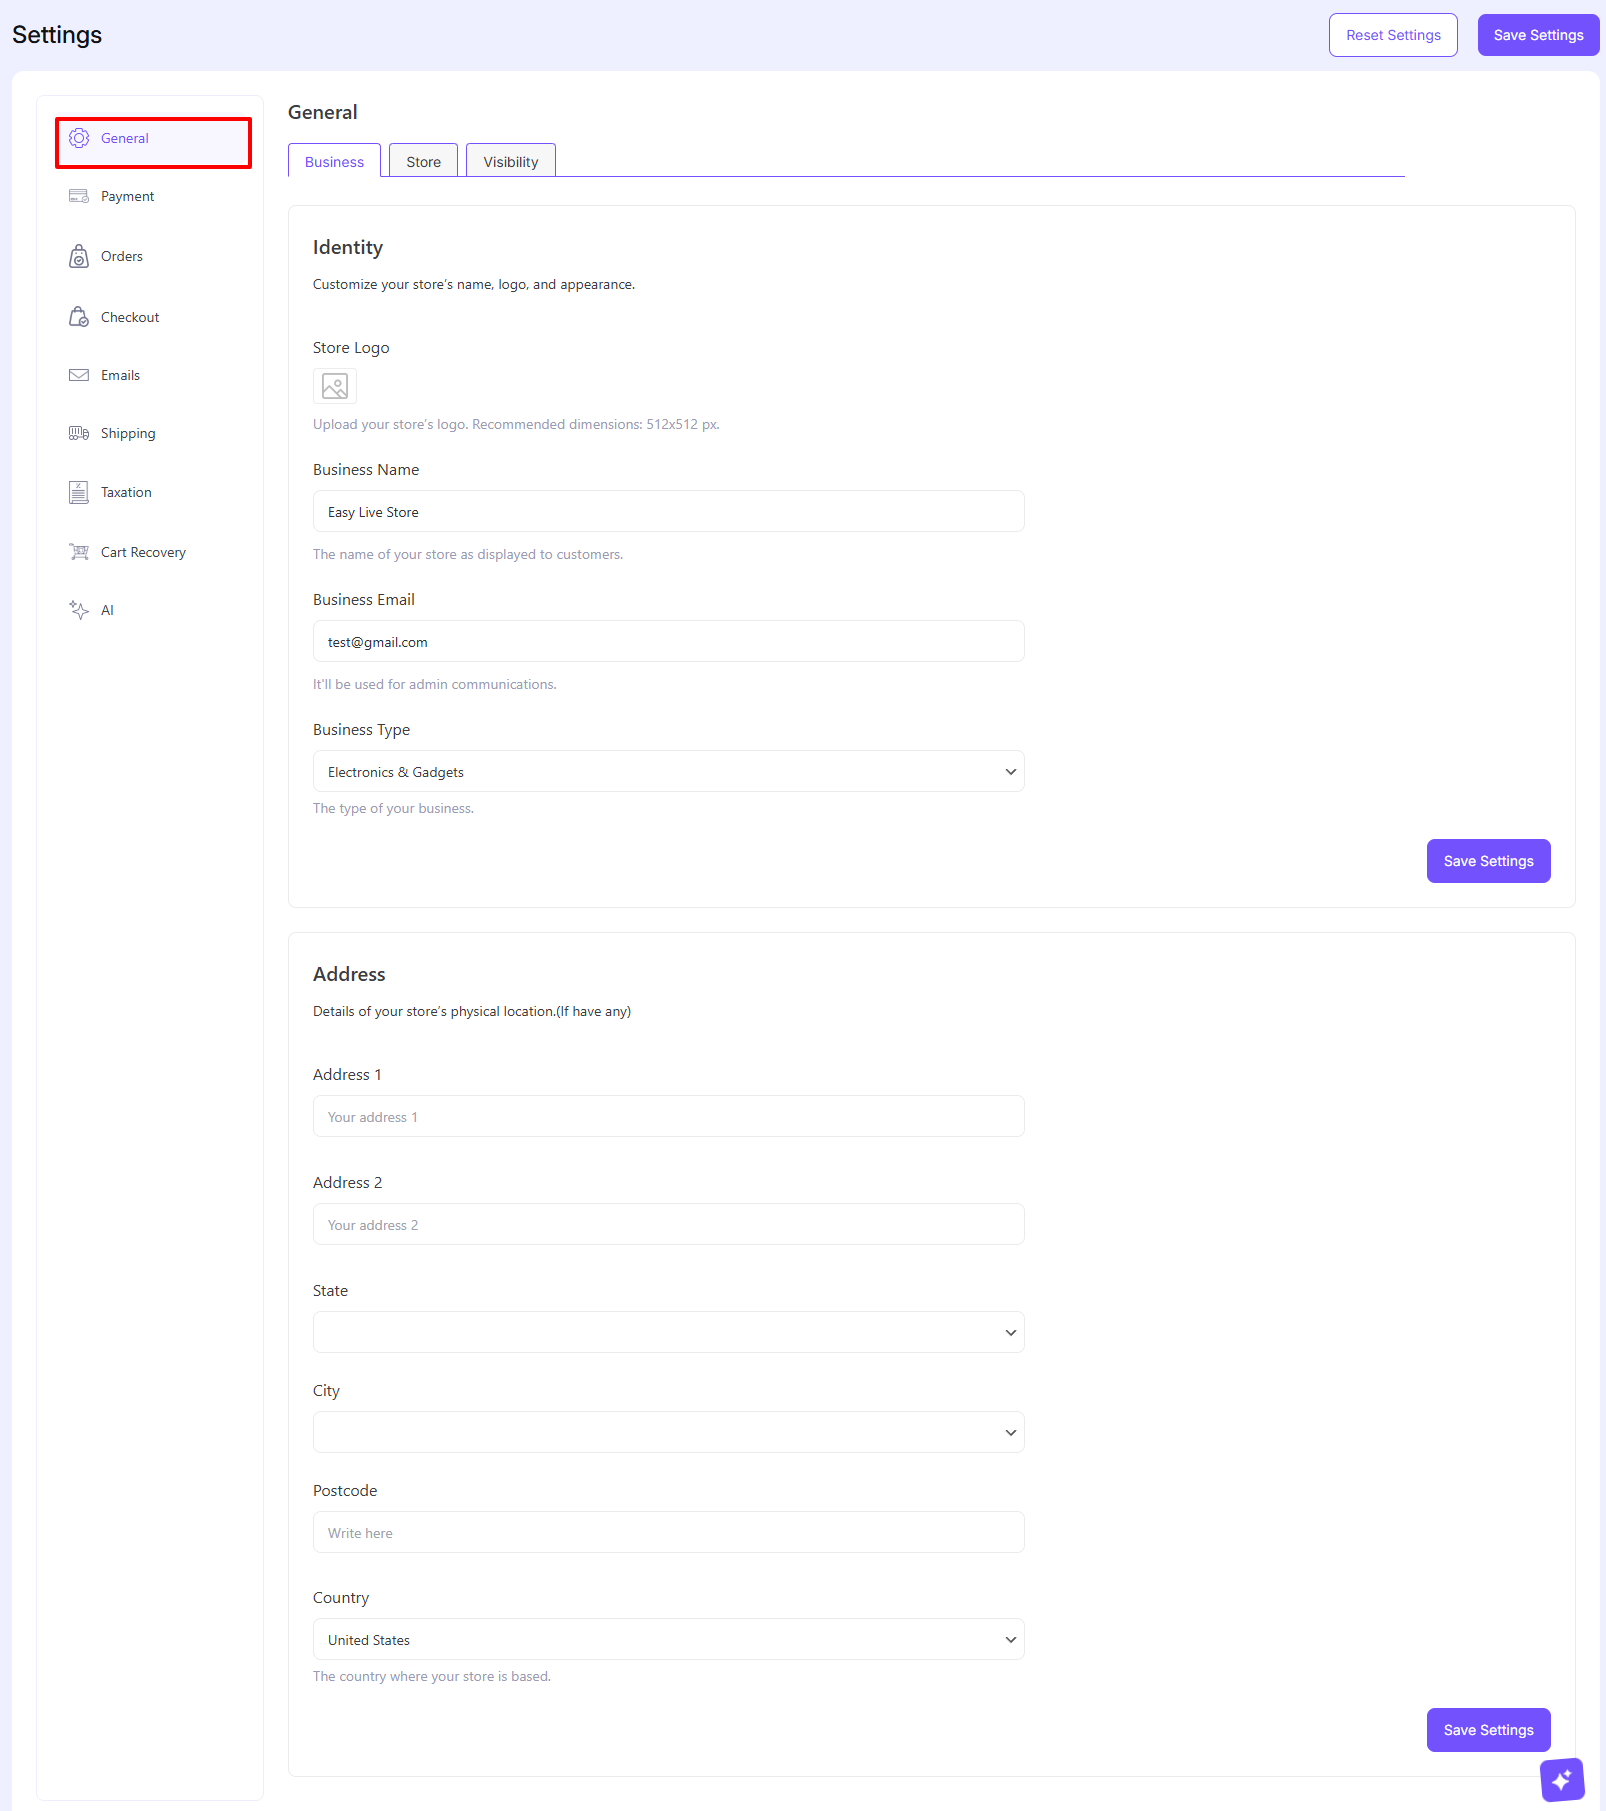
In the general settings, put your store logo, business name and address
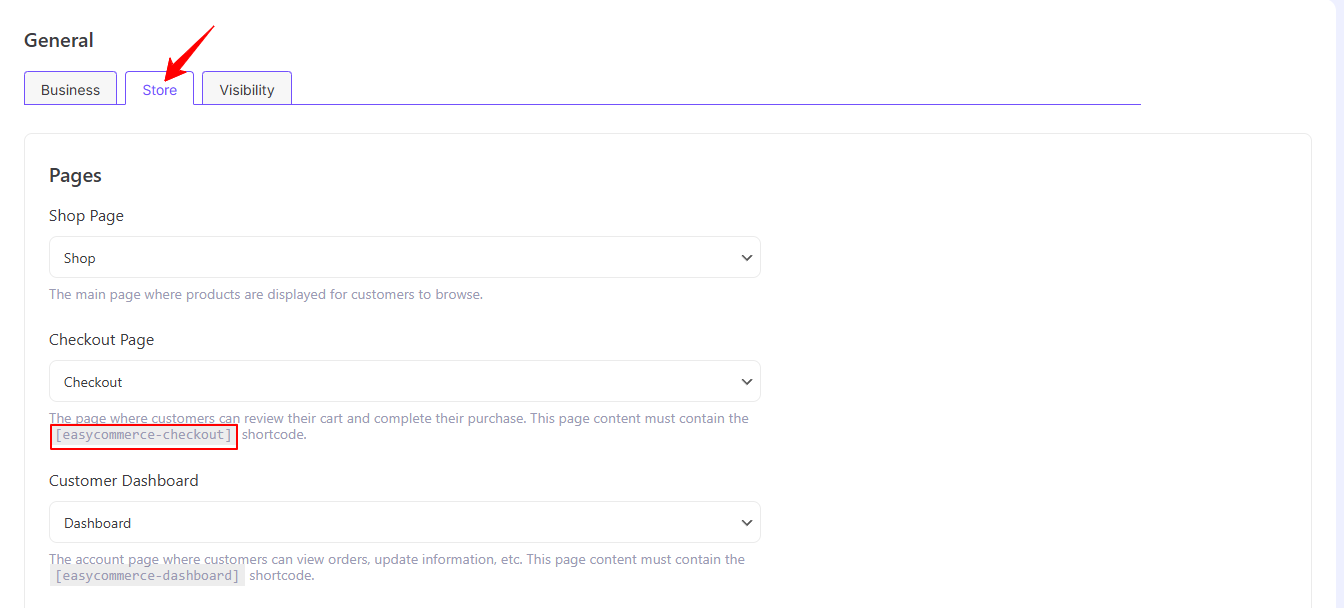
After that please click on the store tab
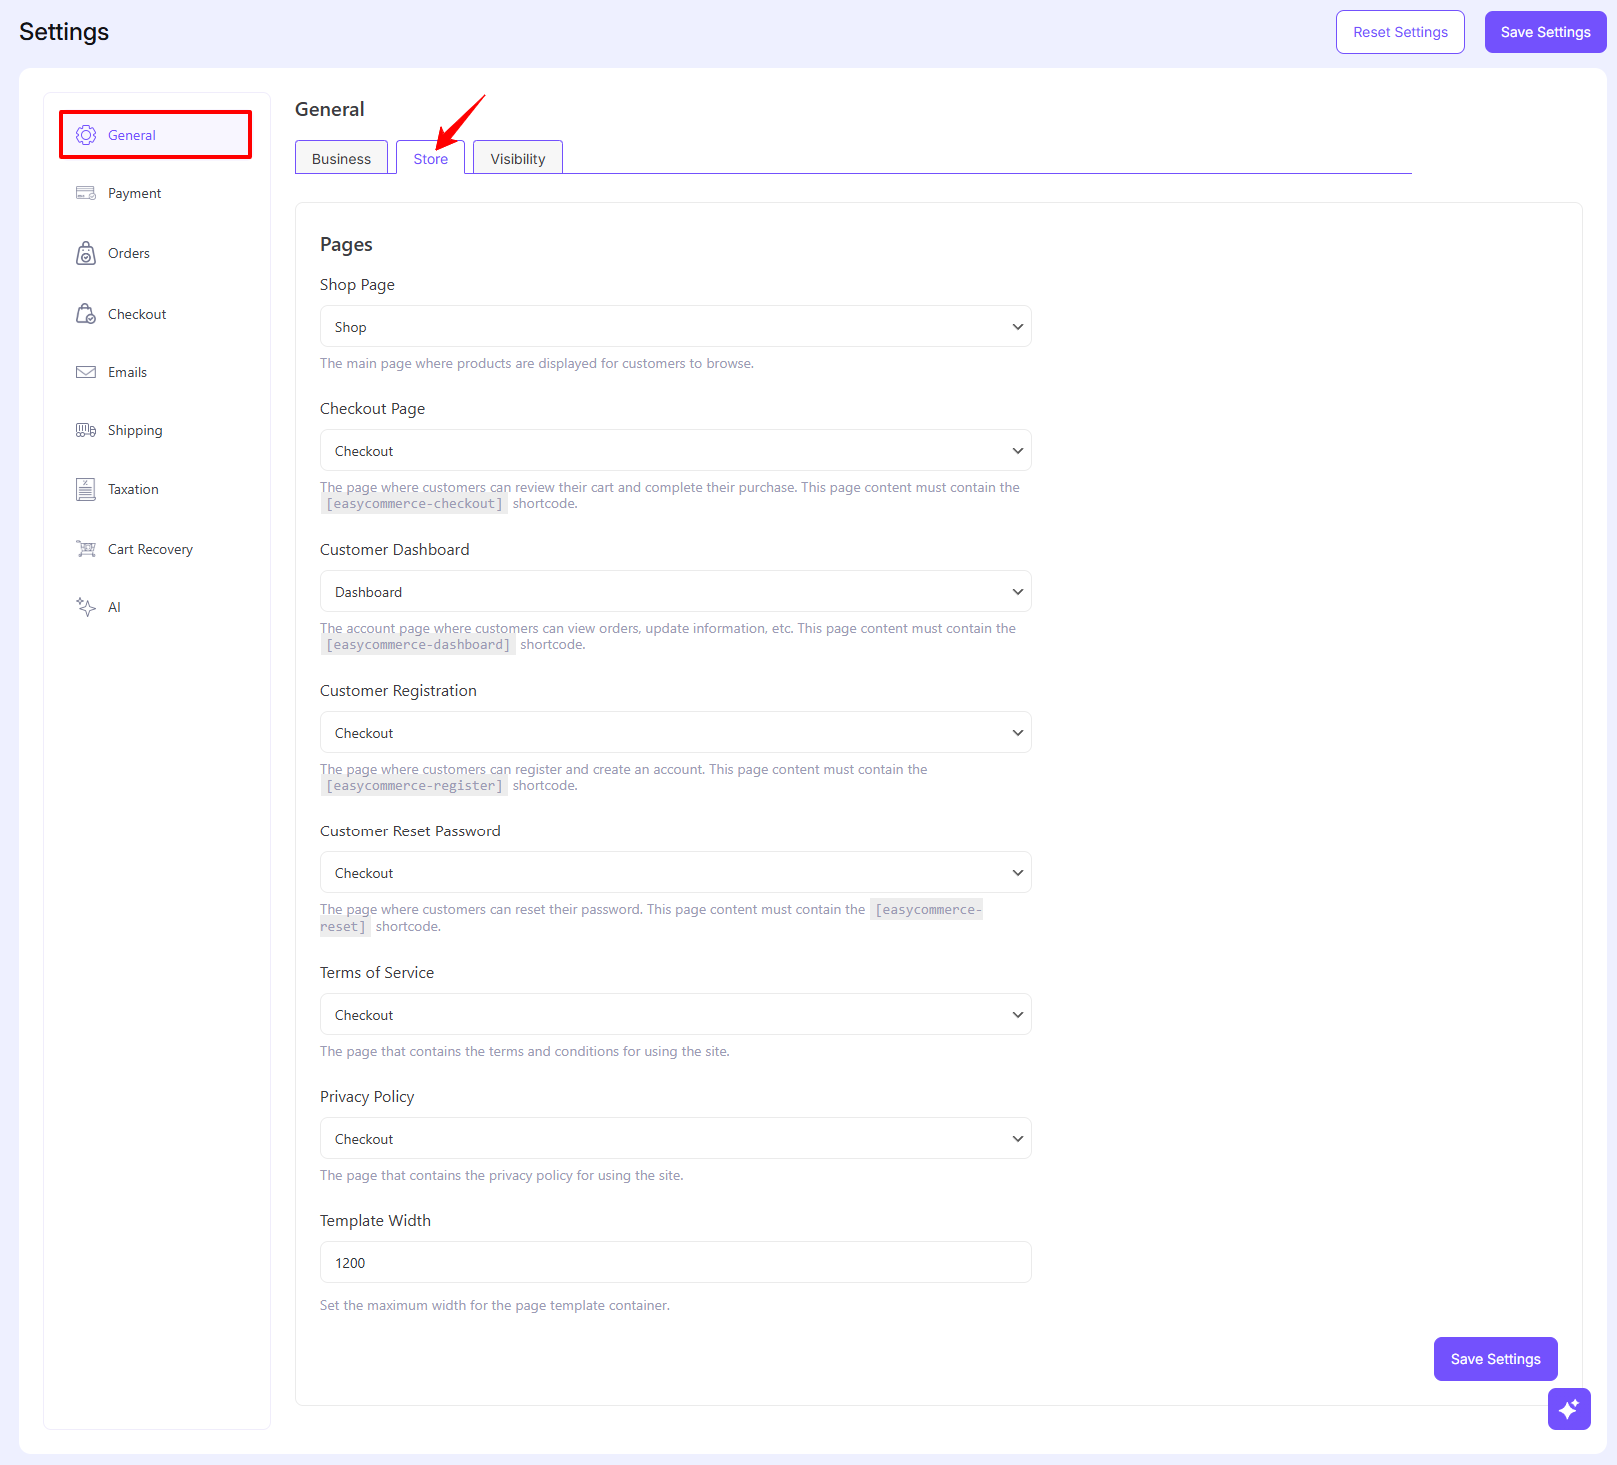
Please do manually insert a special shortcode into the pages to acquire the desired functionality and here’s how you do it.
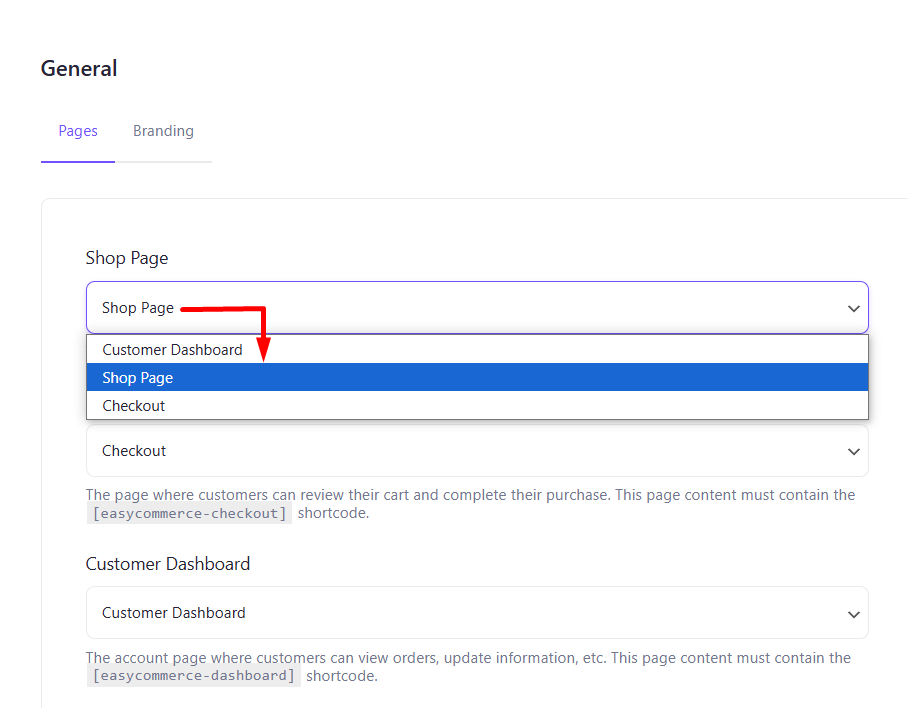
Start by logging in to your WordPress dashboard, then navigate to Settings > General > Pages from the side menu.
Shop Page
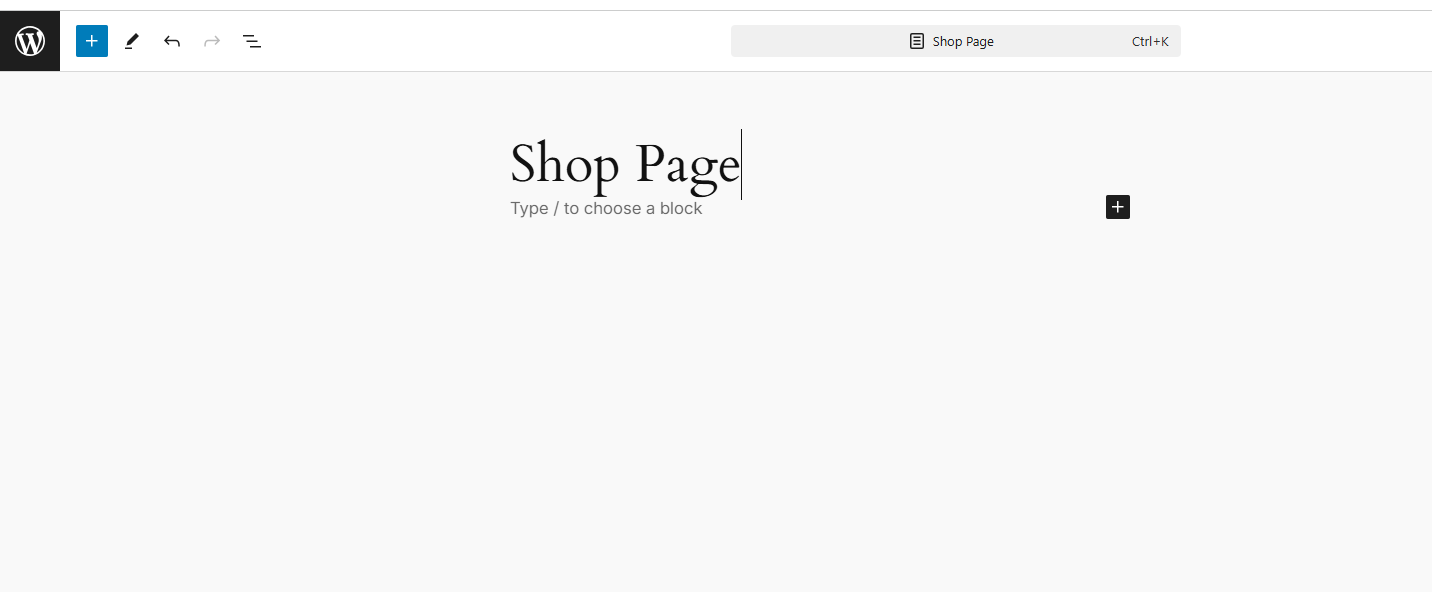
Step 1: Create a Shop Page
Click Add New Page to create a designated page for your shop, typically titled Shop or Shop Page.
Ignore this step if you have already made a page while setting up the setup wizard.
Step 2: Add Shop Block
Click the + icon near the block section or in the top-left bar. Use the search bar to find Shop and select the result to add a shop block.
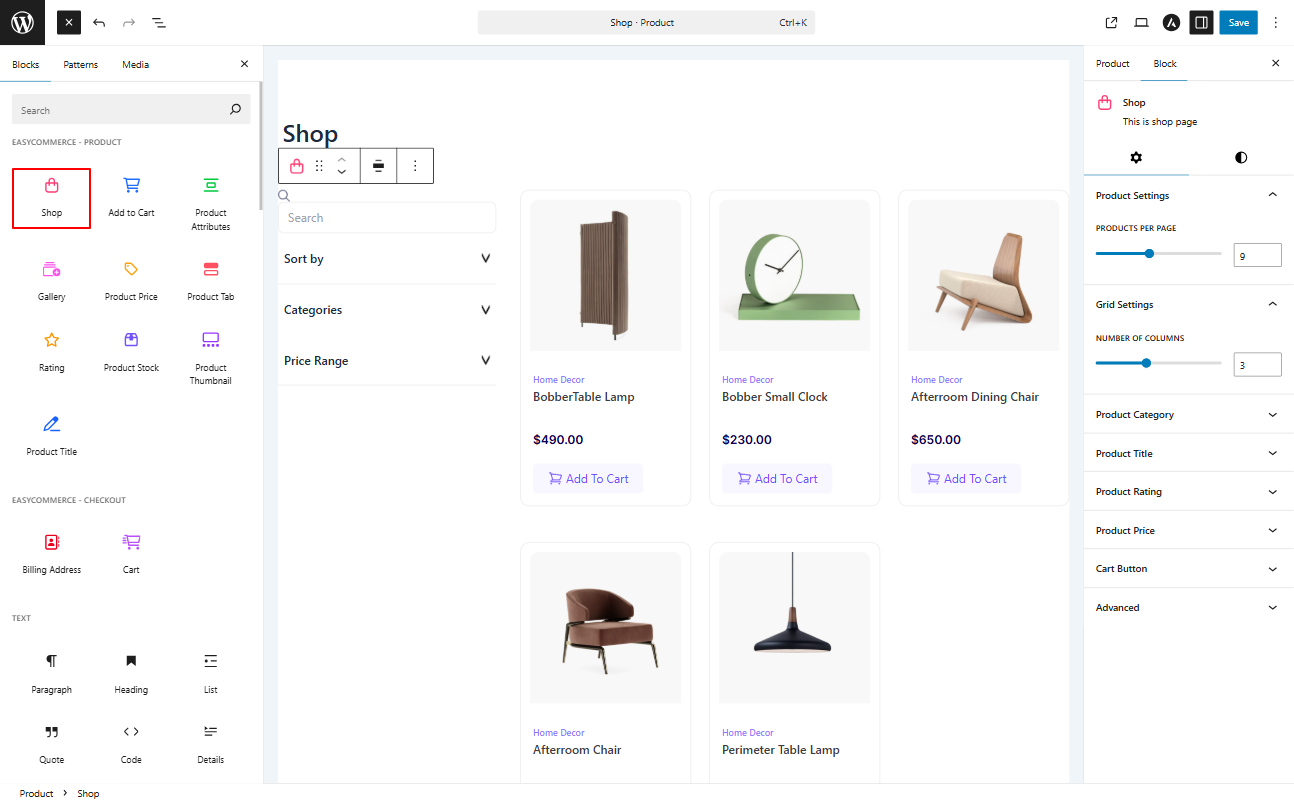
Step 3: Save Changes
Once the shop block is set, click Save in the top-left bar or press Ctrl+S on your keyboard to finalize the changes.
Checkout Page
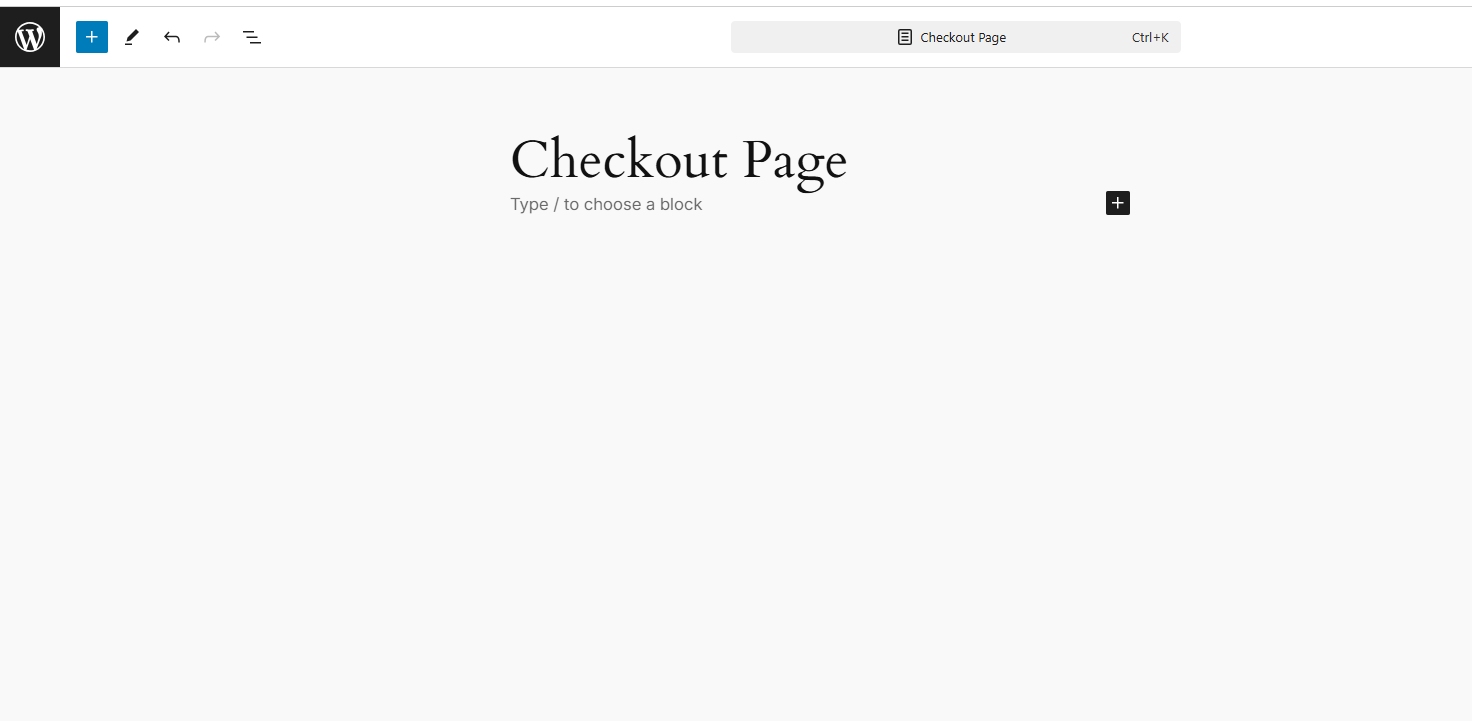
Step 1: Create a Checkout Page
Click Add New Page to create a designated page for your shop, typically named Checkout or Checkout Page.
Ignore this step if you have already made a page while setting up the setup wizard.
Step 2: Find Shortcode Block
Click the + icon near the block section or in the top-left bar. Use the search bar to look for Shortcode and select the result to add a shortcode block field.
Step 3: Enter Checkout Shortcode
The shortcode [easycommerce-checkout] is mentioned on the Settings > General page, under the checkout page selector field. Copy it from there and paste it onto the checkout page shortcode field.
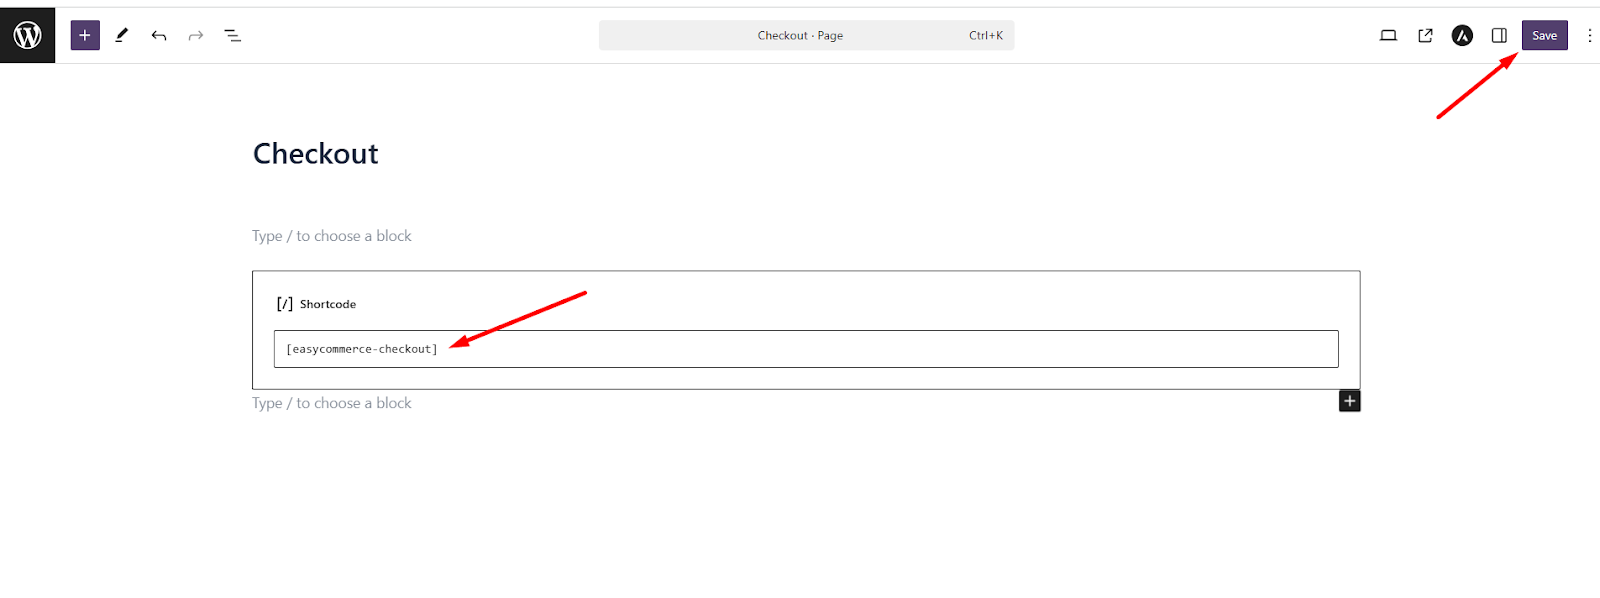
Step 4: Save Changes
Once you’re done, click Save or press Ctrl+S to finalize the changes.
Customer Dashboard
Step 1: Create a Customer Dashboard
Click Add New Page to create a designated page for your shop, typically titled Customer Dashboard. Ignore this step if you have already made a page while setting up the setup wizard.

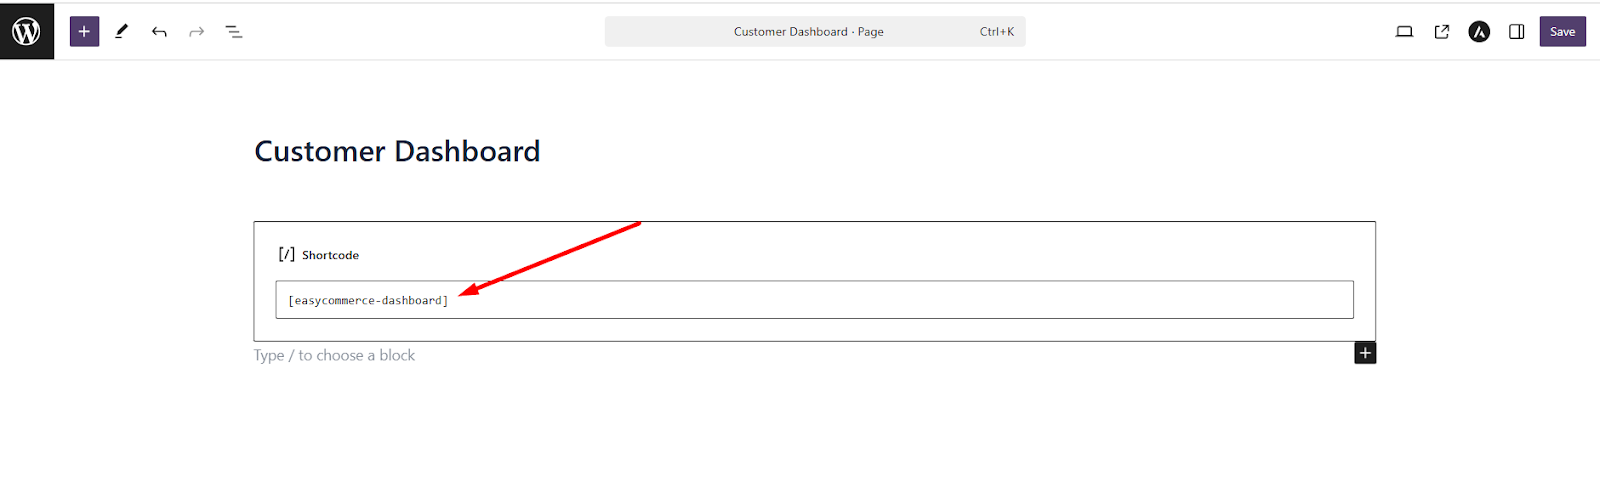
Step 2: Find Shortcode Block
Click the + icon near the block section or in the top-left bar. Use the search bar to look for Shortcode and select the result to add a shortcode block field.
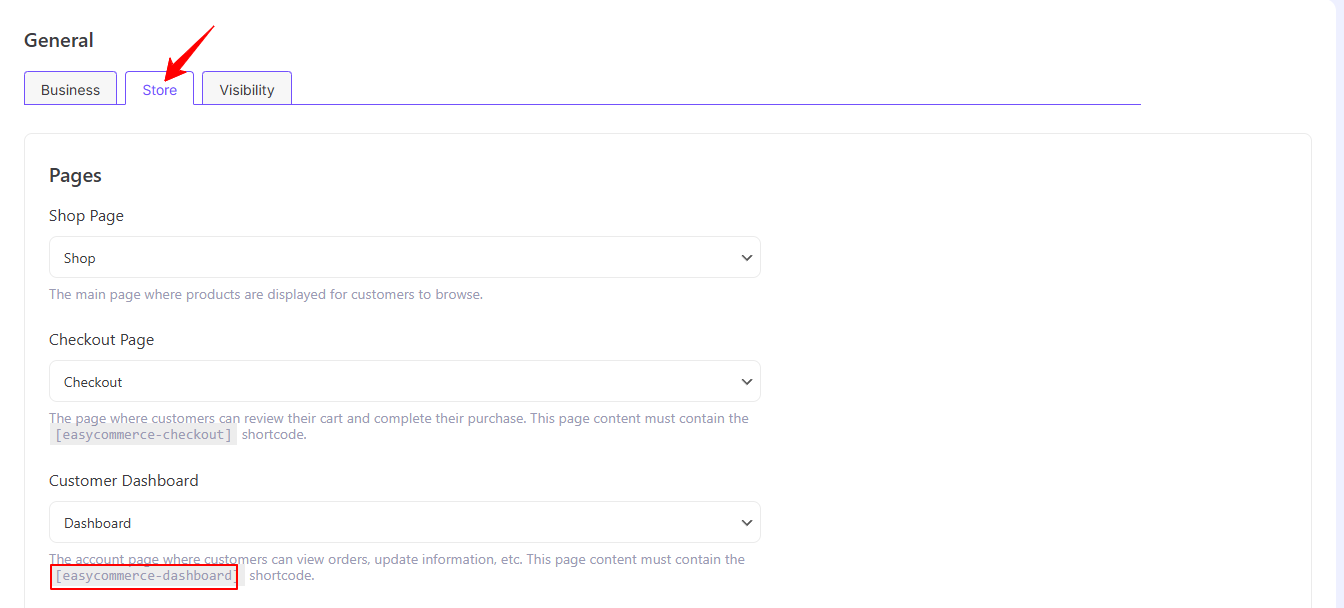
Step 3: Enter Dashboard Shortcode
The shortcode [easycommerce-dashboard] is mentioned on the Settings > General page, under the customer dashboard page selector field. Copy it from there and paste it onto the customer dashboard page shortcode field.
Step 4: Store Visibility
On visibility tab there is option to change mode for Live or Test
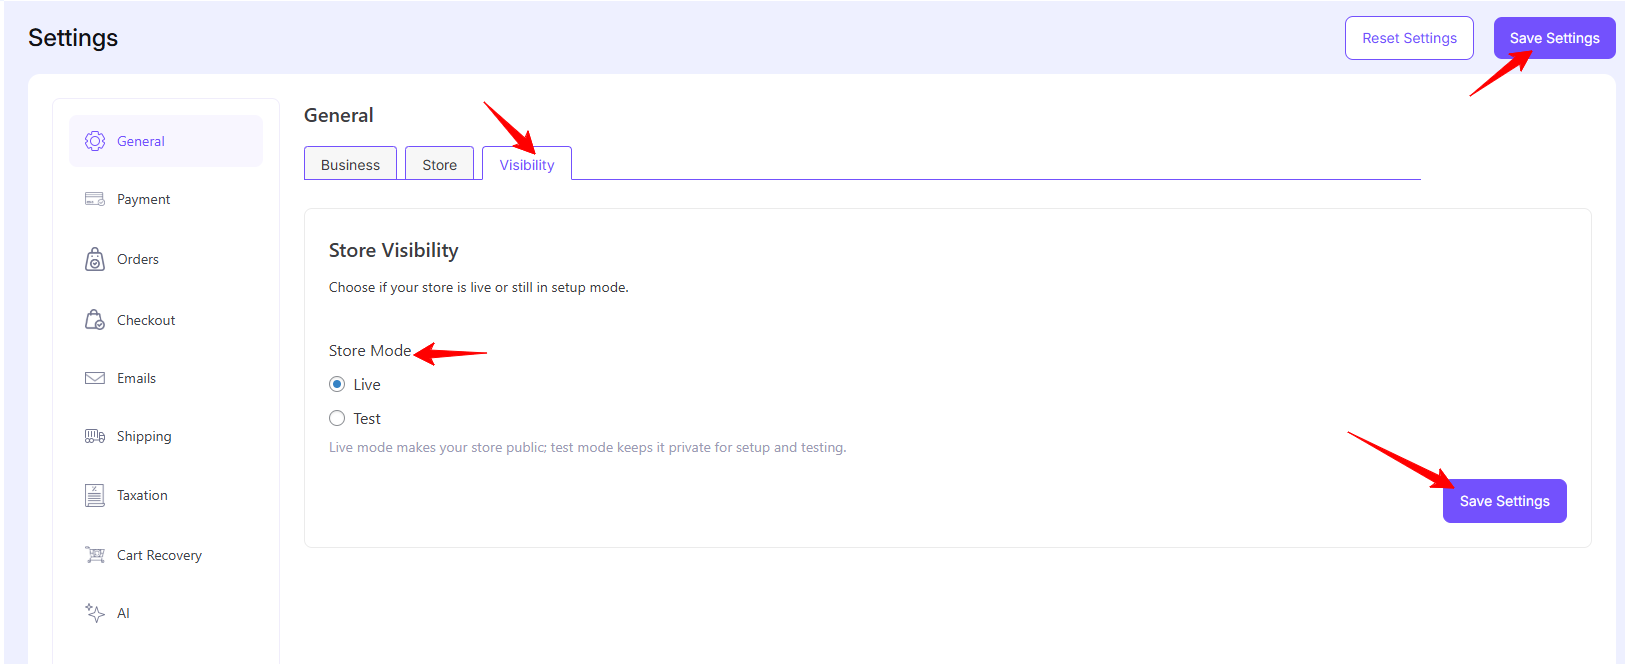
Step 5: Save Changes
Click Save or press Ctrl+S to finalize the changes.
Once the pages are created, go to Settings > General again and check if each page is properly assigned to its corresponding section.
Was this doc helpful?