


How to Integrate Payment Gateways in EasyCommerce
EasyCommerce lets you integrate various payment gateways into your ecommerce website. Just install and activate any of the plugins on your WordPress website, set individual credentials, and find your website equipped with that payment gateway.
Some additional steps include –
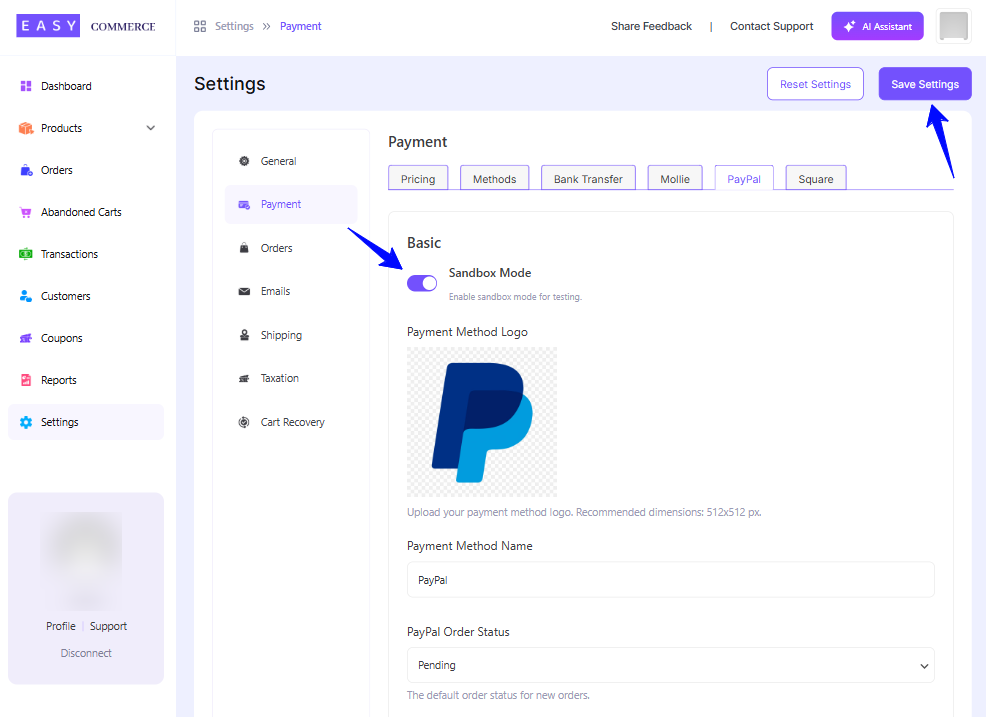
Step 1: Test Mode
Activate it to test payment gateways (Mollie, PayPal, Square) in a Sandbox Environment or Test mode (Safe mode to test web applications). Go to EasyCommerce > Dashboard > Settings > Payment and select the particular gateways to set Sandbox Environment or Test mode. And then click on Save Settings.
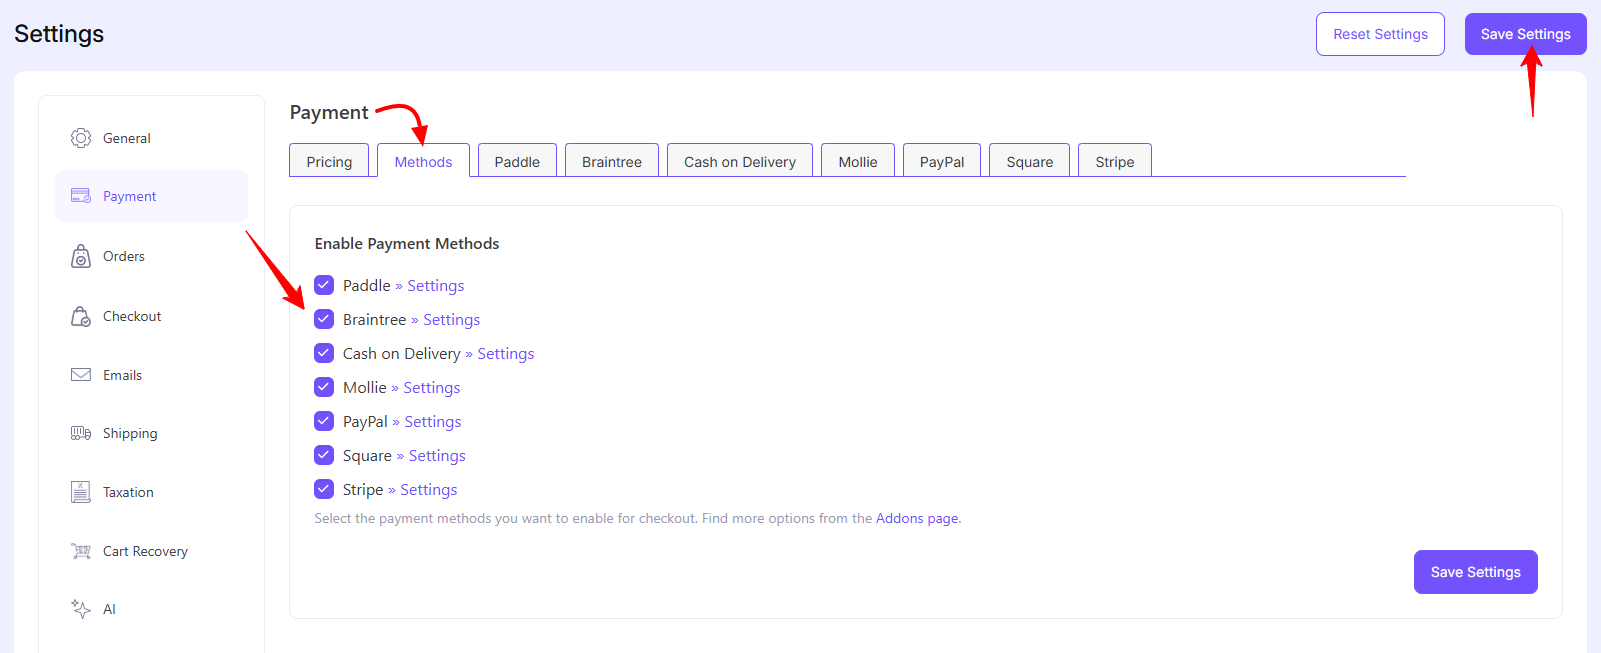
Step 2: Enable Payment Methods
From Payment > Methods, you can select the checkboxes to enable the desired payment gateways. Unselect anytime to remove them from active use. Remember to click Save Settings to ensure your updates are saved after making any changes.
Step 3: Payment Credential Setup
There are several payment methods you can integrate with your EasyCommerce store, follow the guide below to set up your preferred payment gateway.
1. Stripe
Stripe payment use Stripe Connect to send funds directly to affiliates’ Stripe accounts. For this section, there are also some required fields, like PayPal. Take a look at it.
To enable affiliate payouts via Stripe using the WC Affiliate plugin, you’ll need to connect your Stripe account by entering your Publishable Key, Secret Key and Webhook Secret Key. Follow the steps below for Stripe configuration:
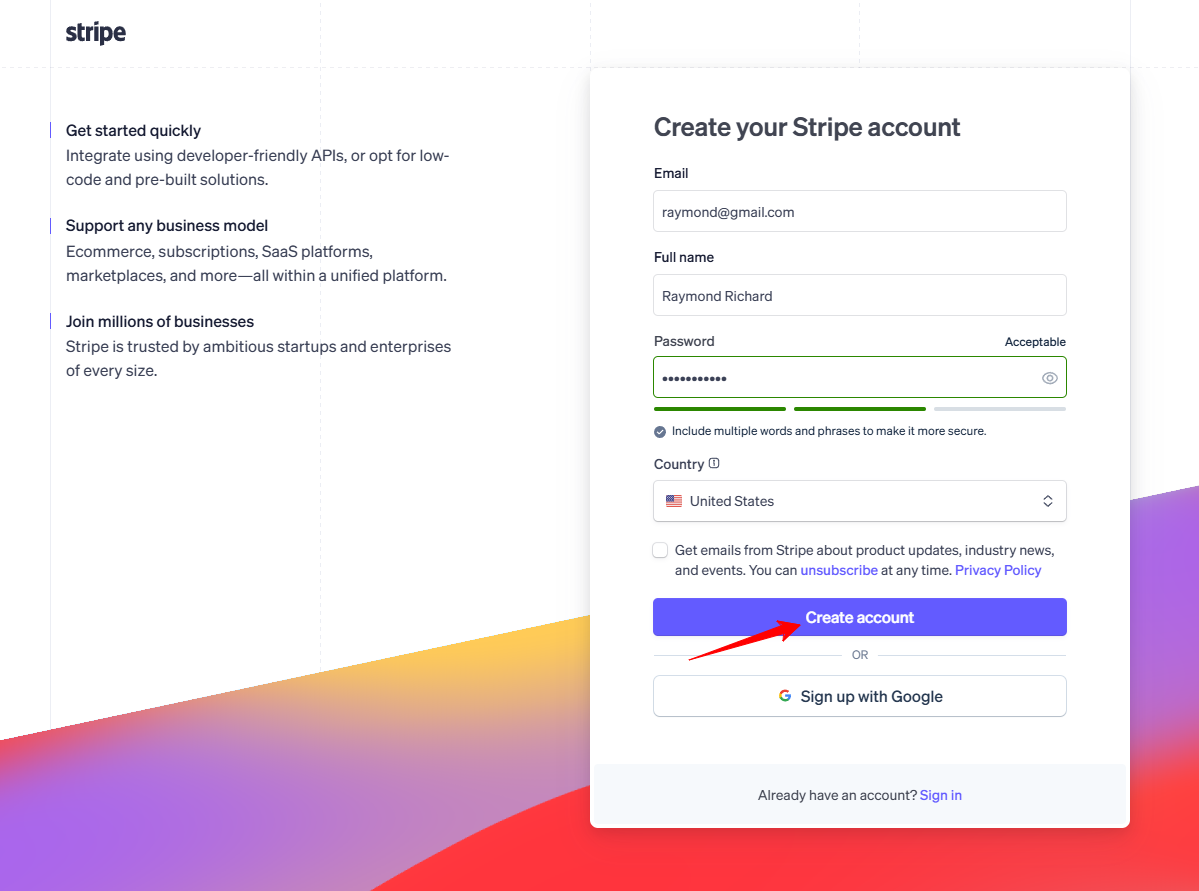
Stripe Account Creation:
At first, you have to go to stripe signup page. After clicking the create account button with proper email, password, etc., it will redirect to the next step
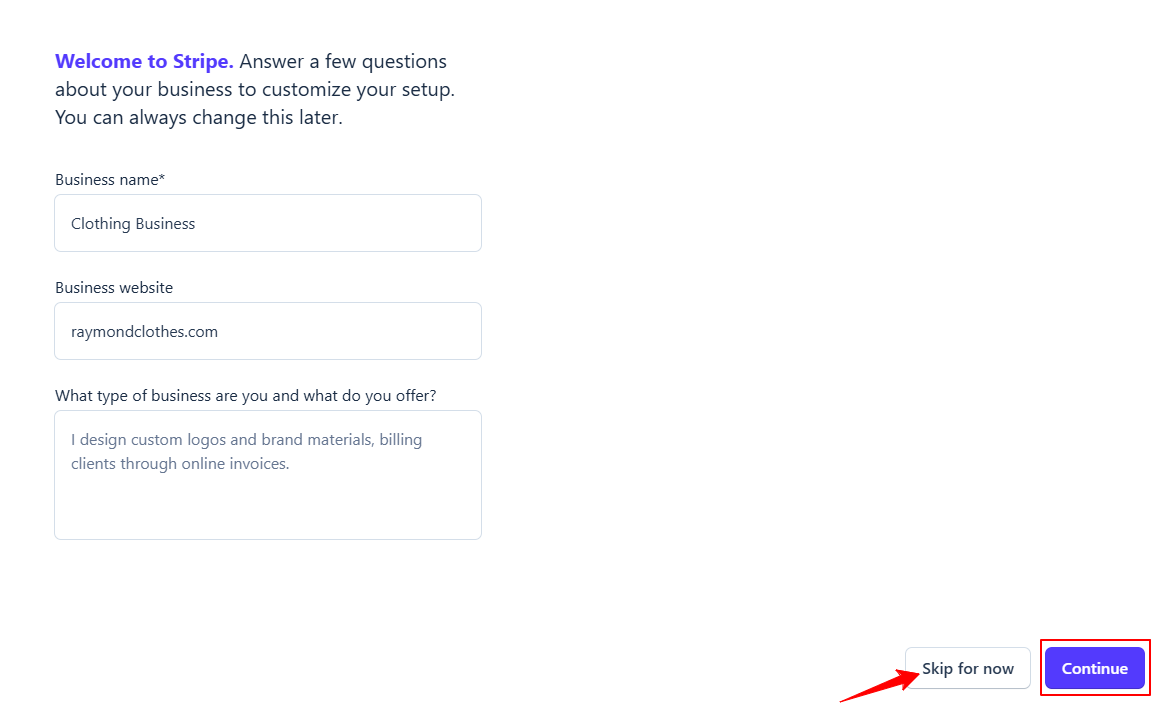
You can Skip for now button or click Continue button by completing all fields
Please select your preferred checkbox from below

After selecting the checkbox, please click the Continue button, and it will redirect to the last step.
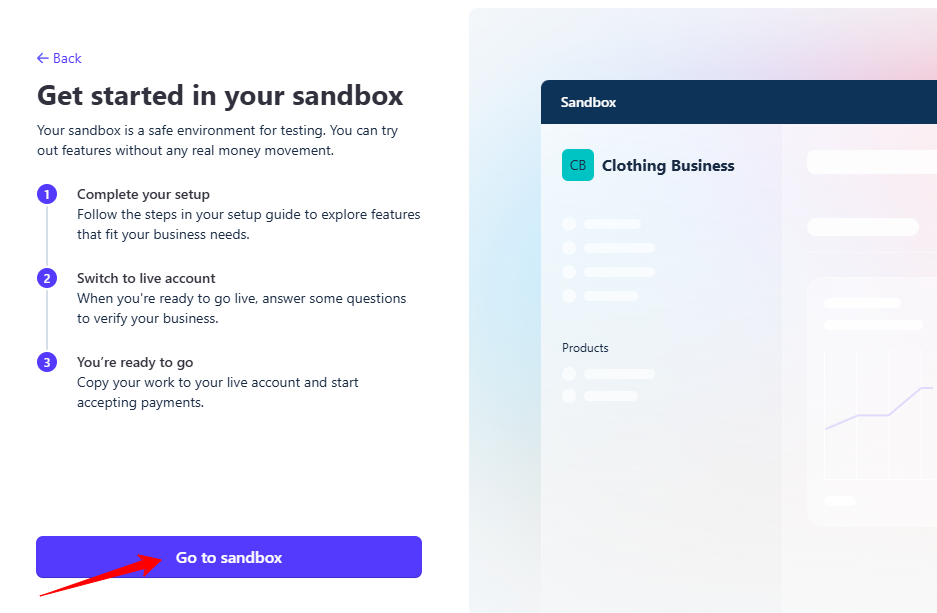
Now your sandbox is ready.
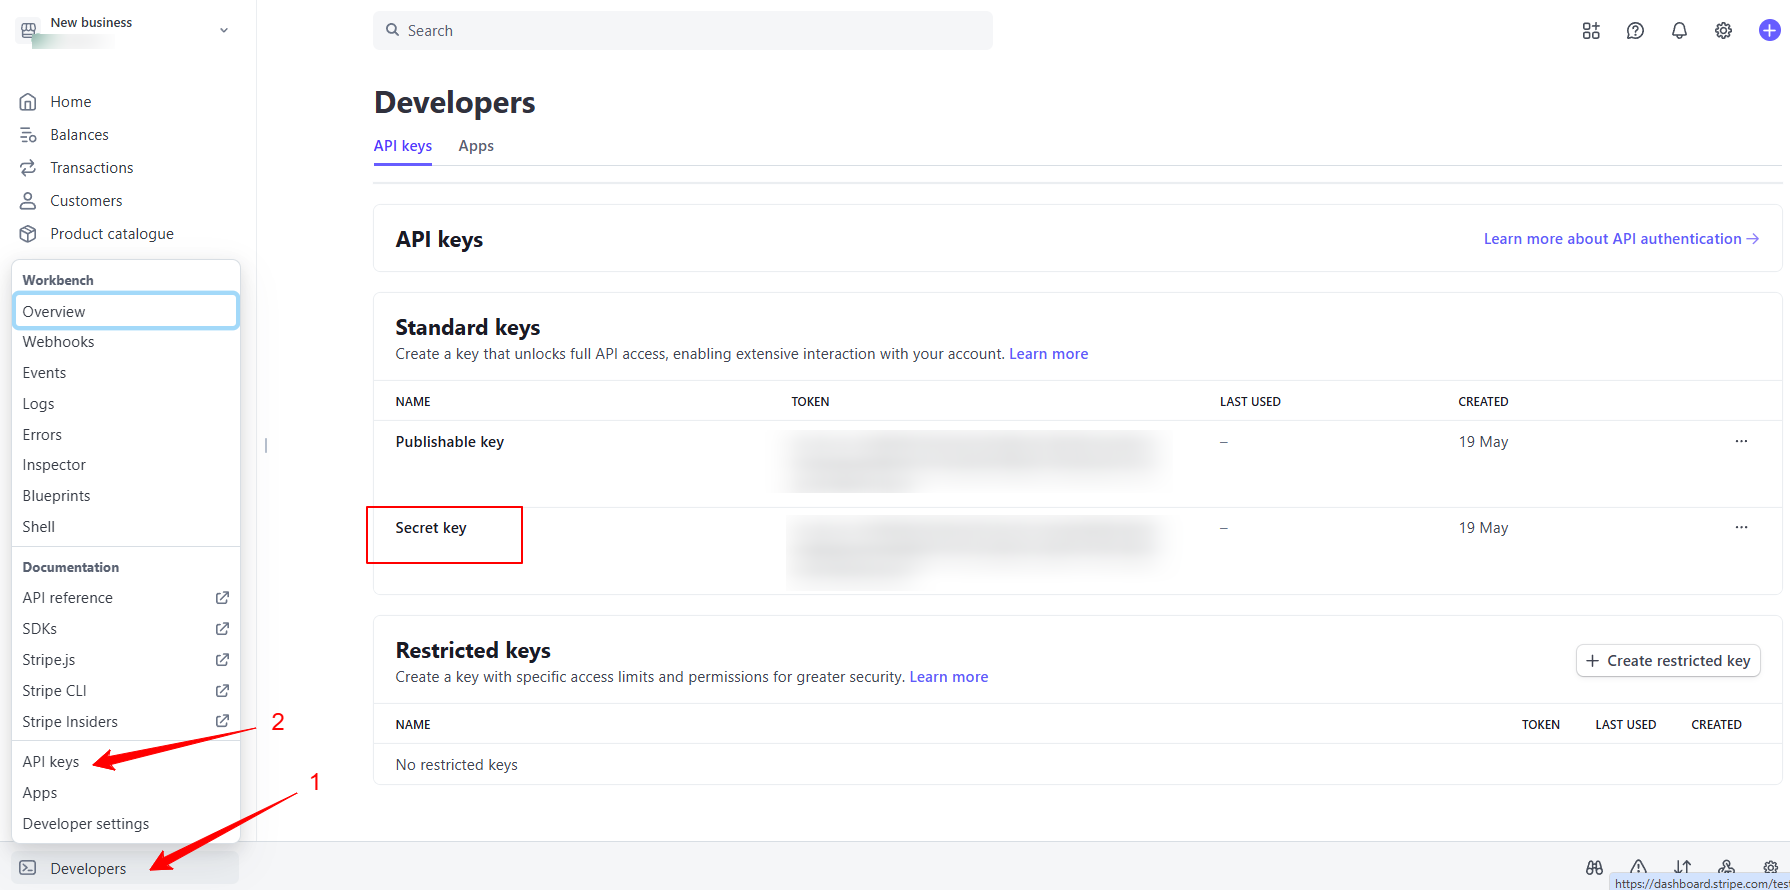
From the left sidebar, go to Developers > API keys. Under the Standard Keys section, you can collect the Secret Key and Publishable Key for easily.
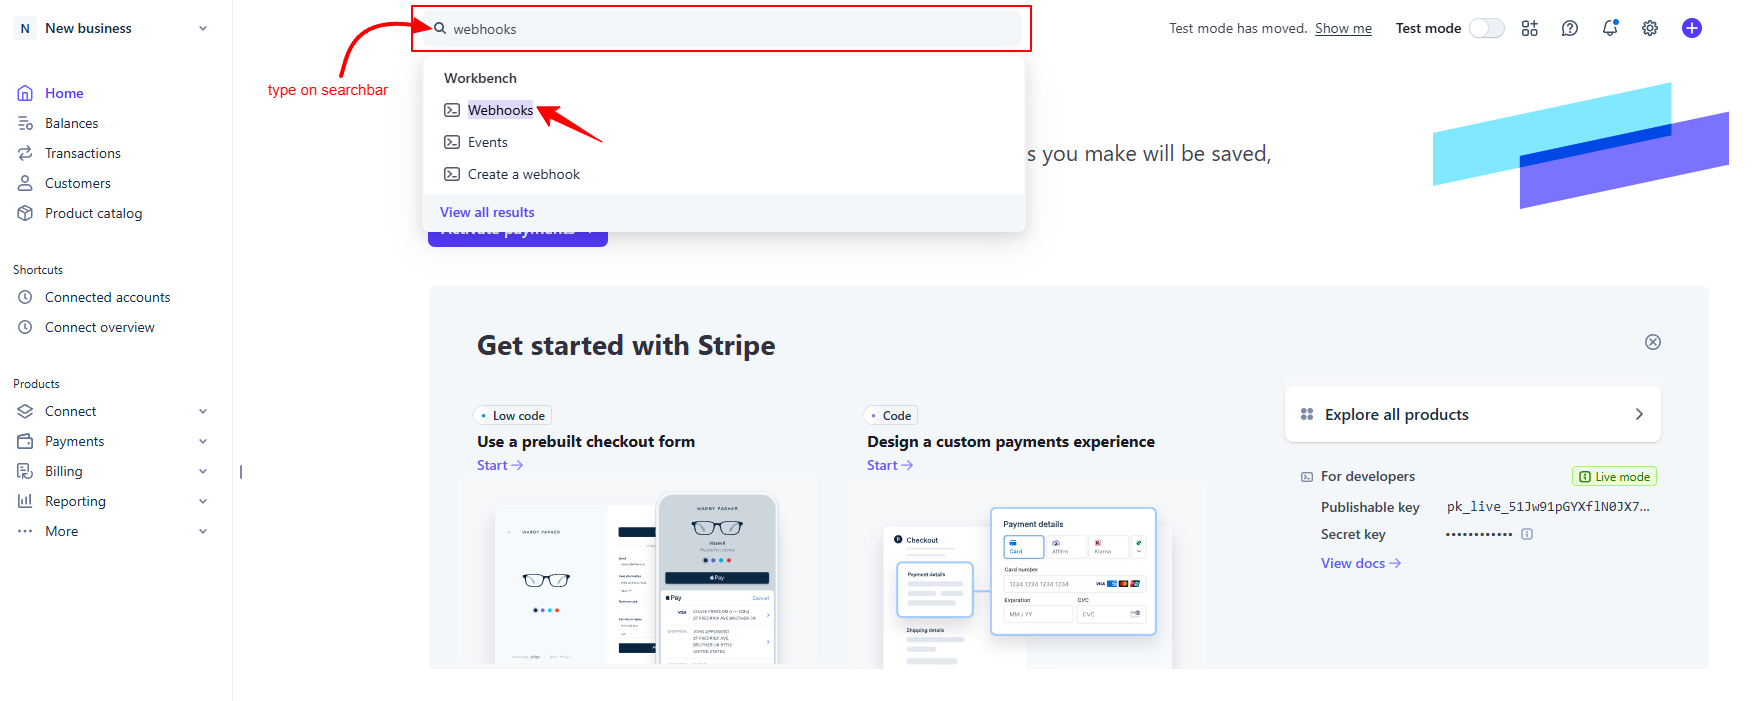
To obtain the Webhook Secret Key, type “Webhooks” in the search bar and select Webhooks from the results list.
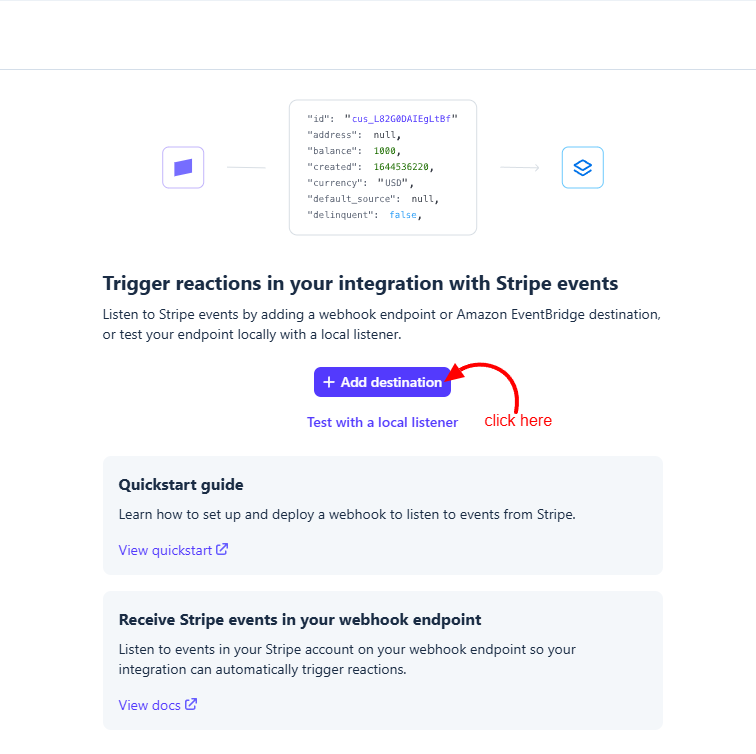
After selecting Webhooks, a popup will appear simply click the Add Destination button.
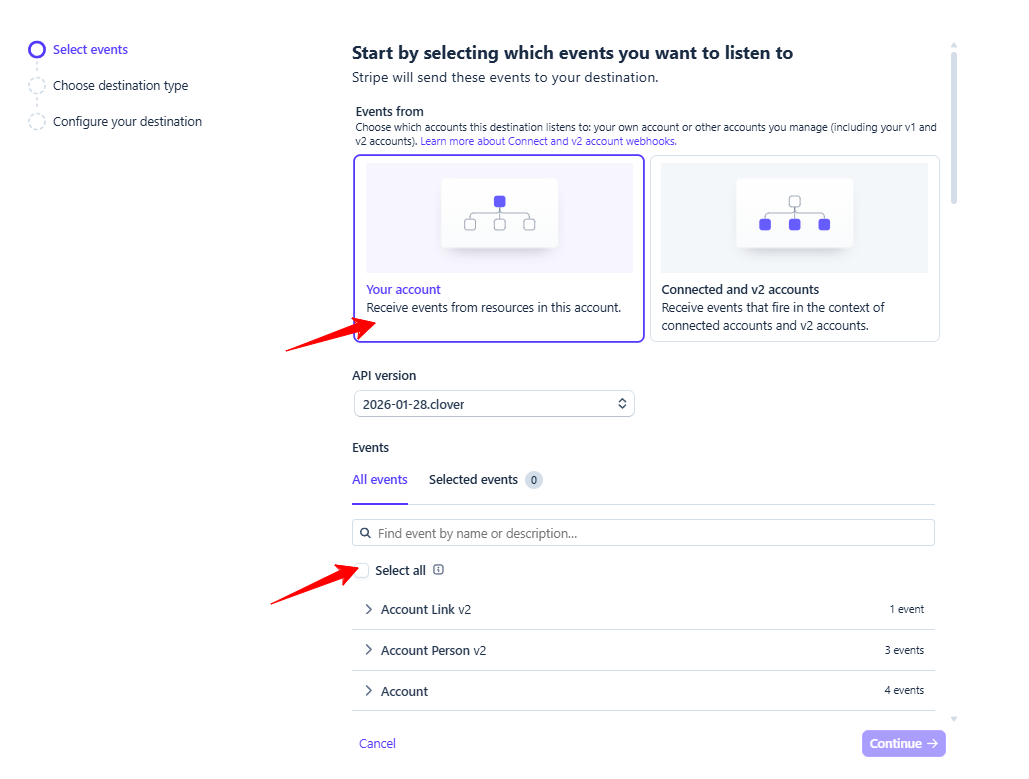
After clicking the Add Destination button, select your account from the options below and choose All Events or the specific events you need and then click the Continue button to proceed.
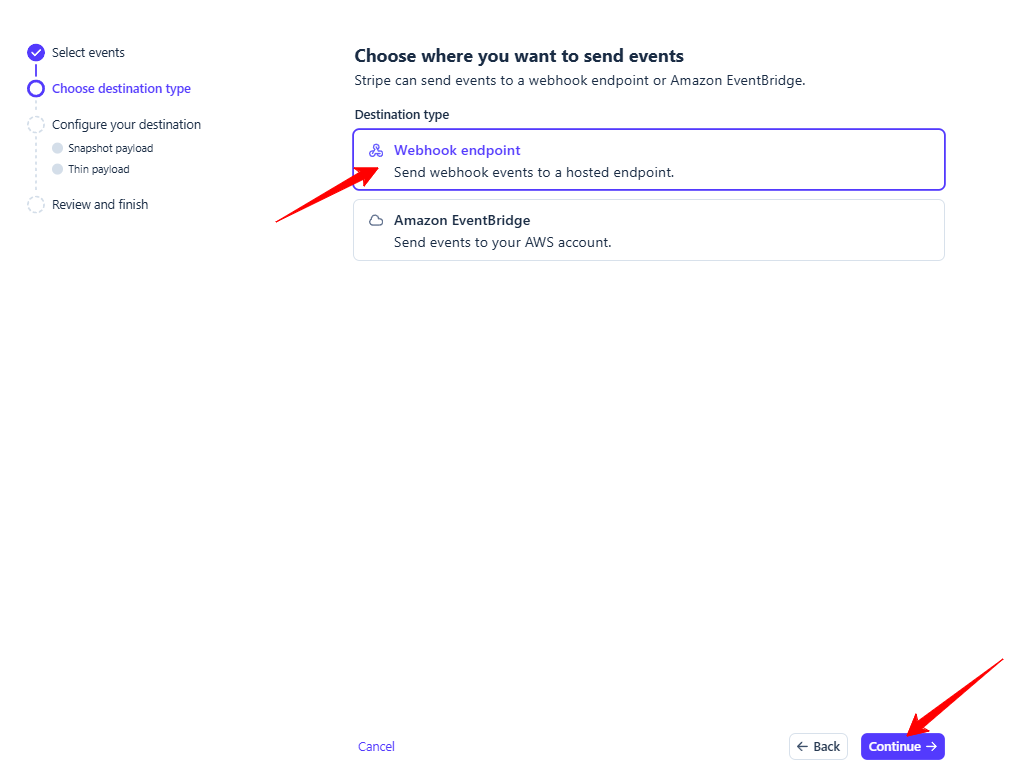
Here simply select Webhook Endpoint and click the Continue button.
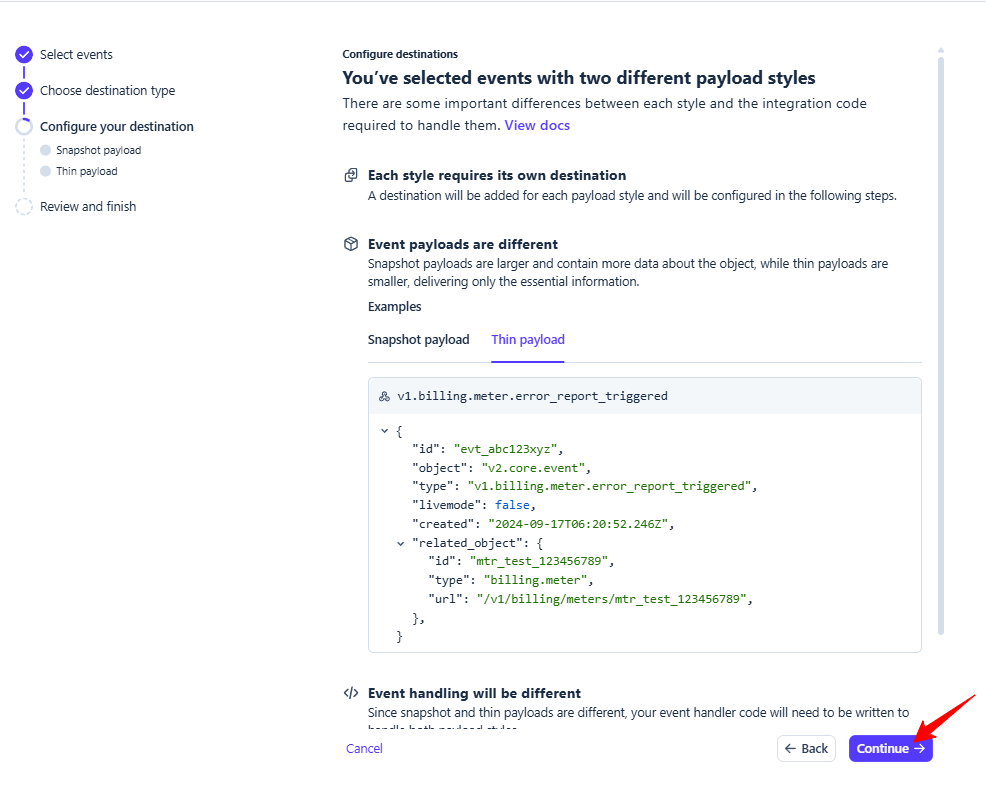
please click the Continue button to move next
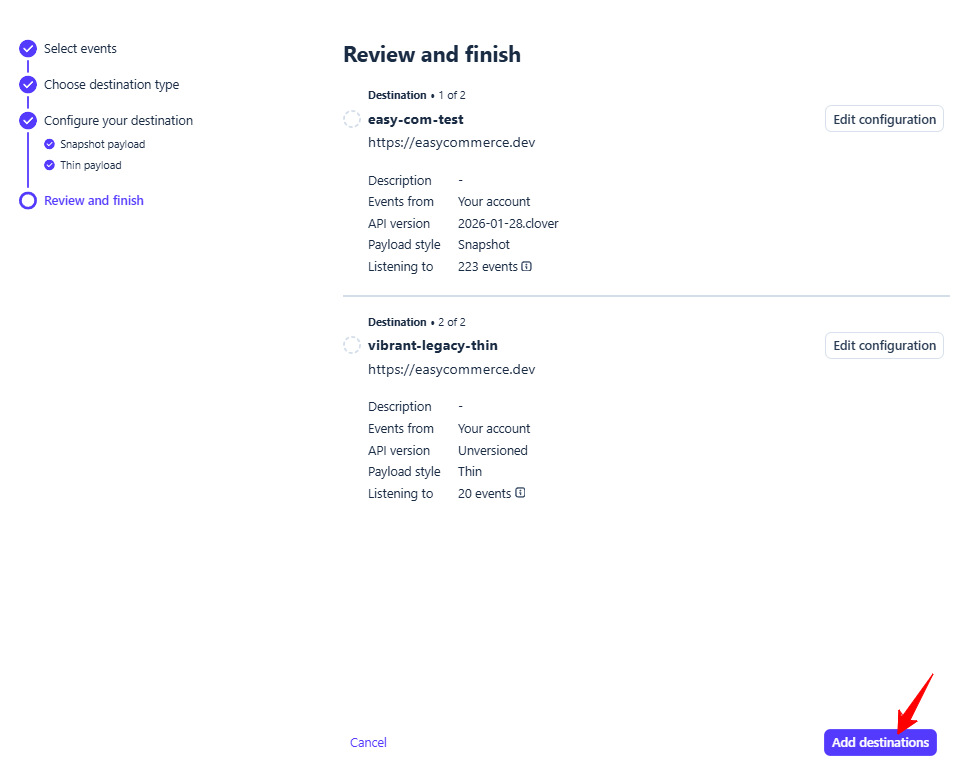
Enter the Destination Name and Endpoint URL and then click the Continue button.

After providing the Destination Name and Endpoint URL, simply click the Add Destination button to complete the setup
Now you will get Webhook Secret Key just copy it and click the done button
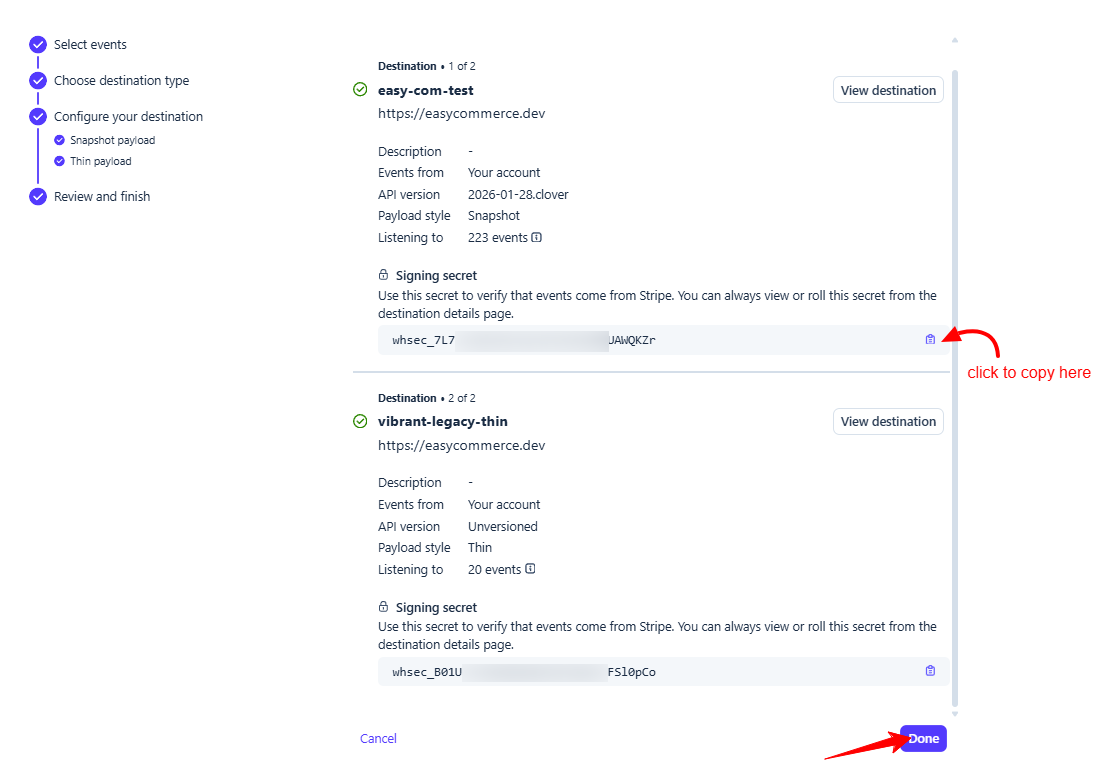
After obtaining the Publishable Key, Secret Key and Webhook Secret, navigate to EasyCommerce → Settings → Payment and paste those keys into the Stripe Payment Credentials section.
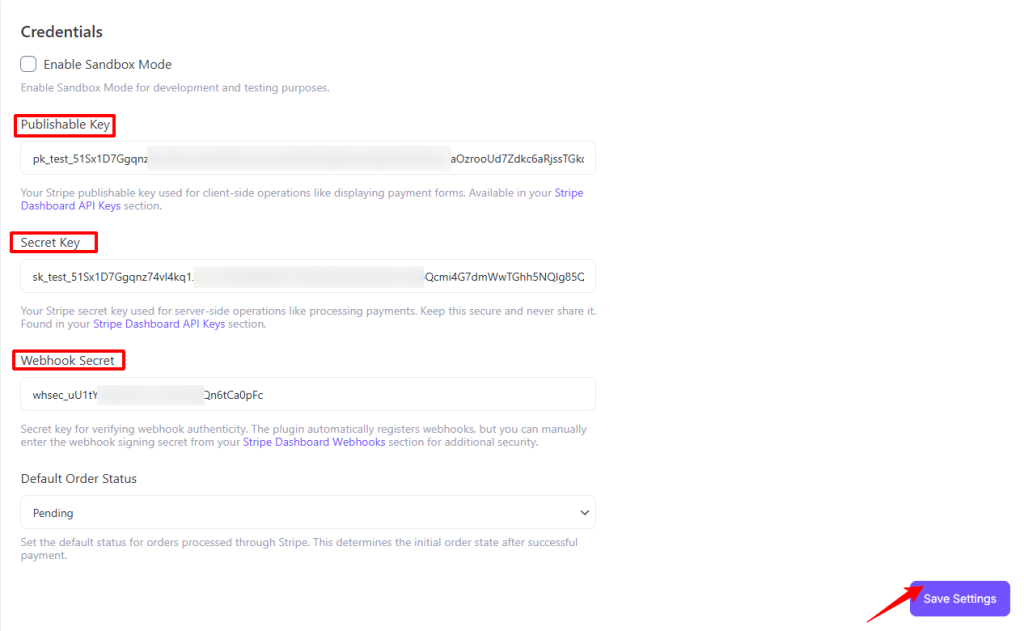
All done! Your Stripe payment setup is complete and ready to use.
2. PayPal
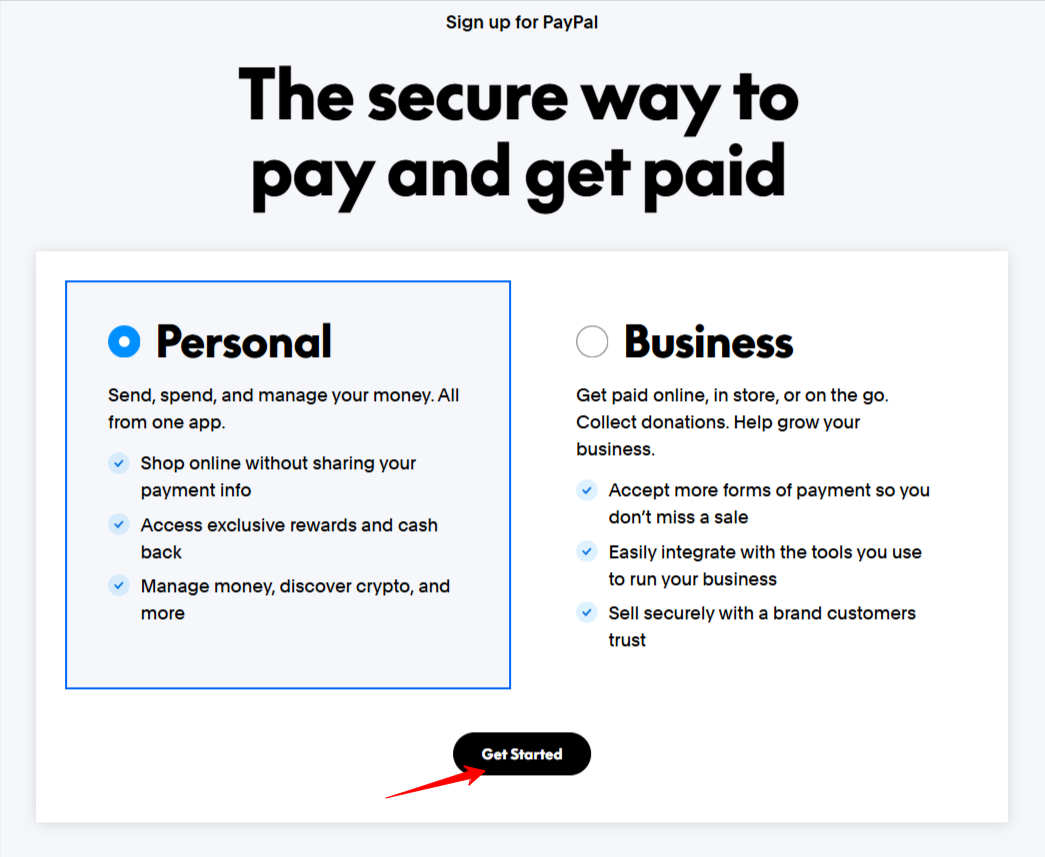
If you do not already have a PayPal account, you will need to create one first. To get started, click the Get Started button and choose either a Personal or Business account depending on your needs.
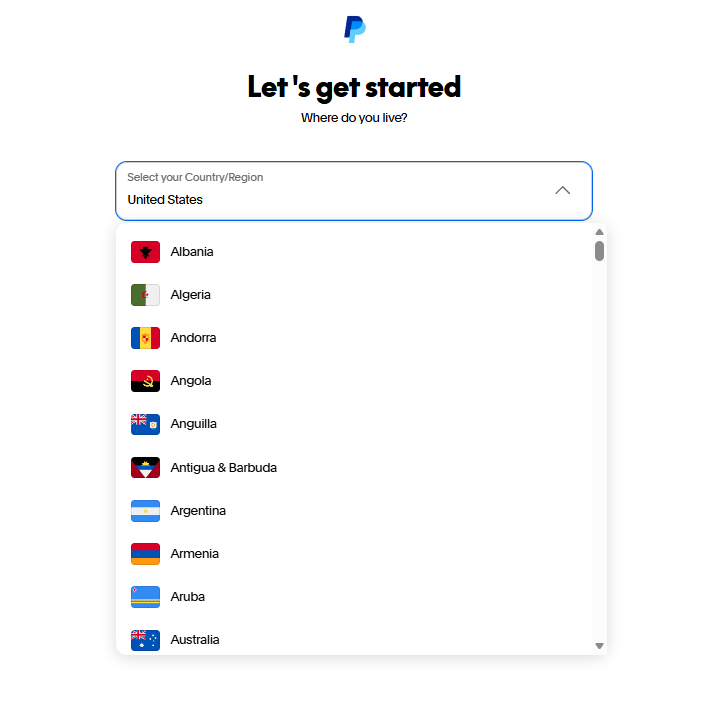
Then select your country from the dropdown list and provide the required information, such as your email address and phone number.
Once you complete the registration process and verify your details, your PayPal account will be successfully set up. To enable PayPal payment, you must connect your PayPal developer credentials. There are some required fields for this section.
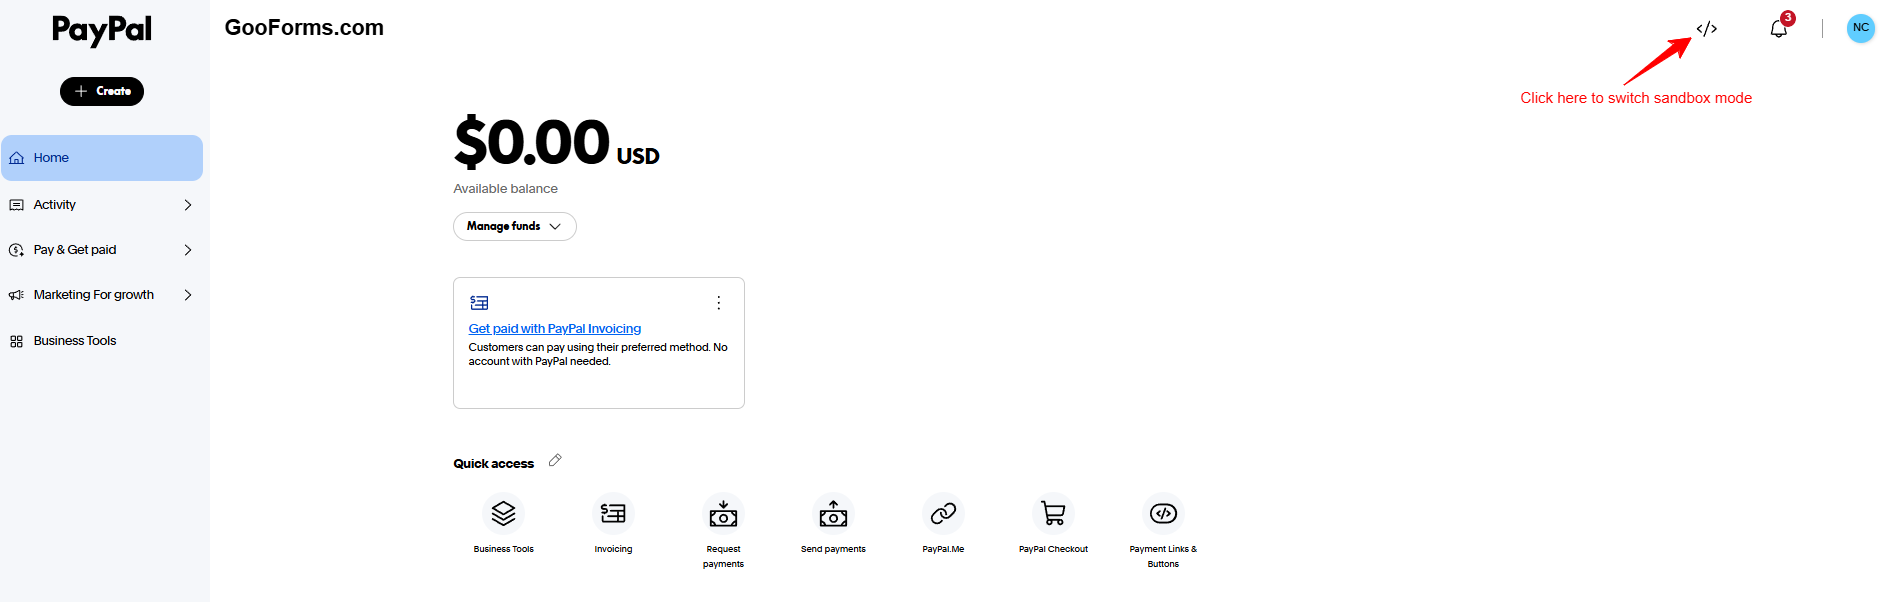
After clicking, you will be redirected to Sandbox mode
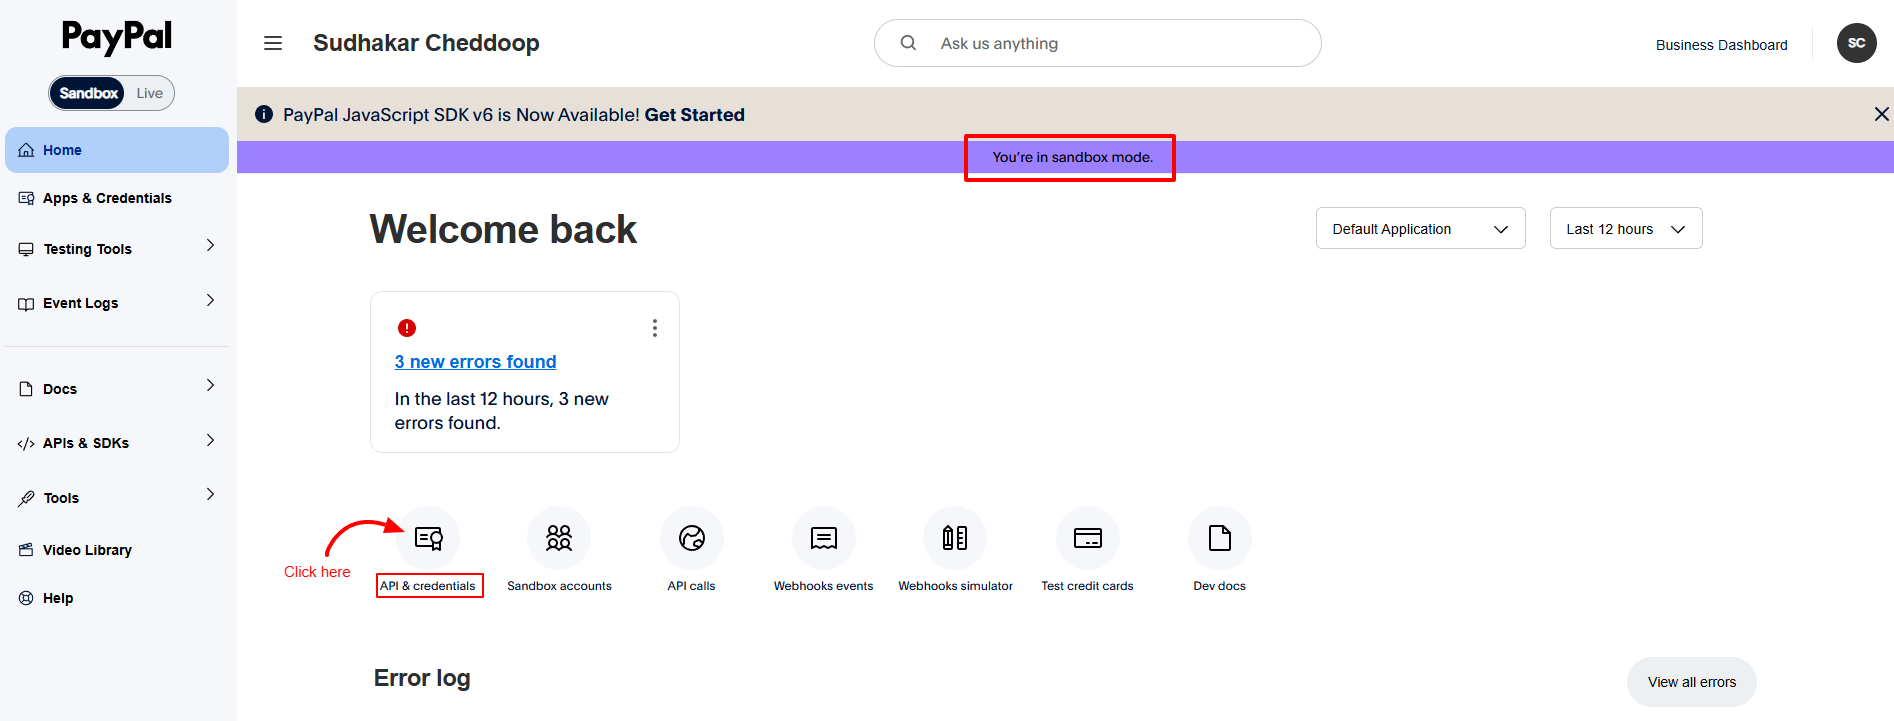
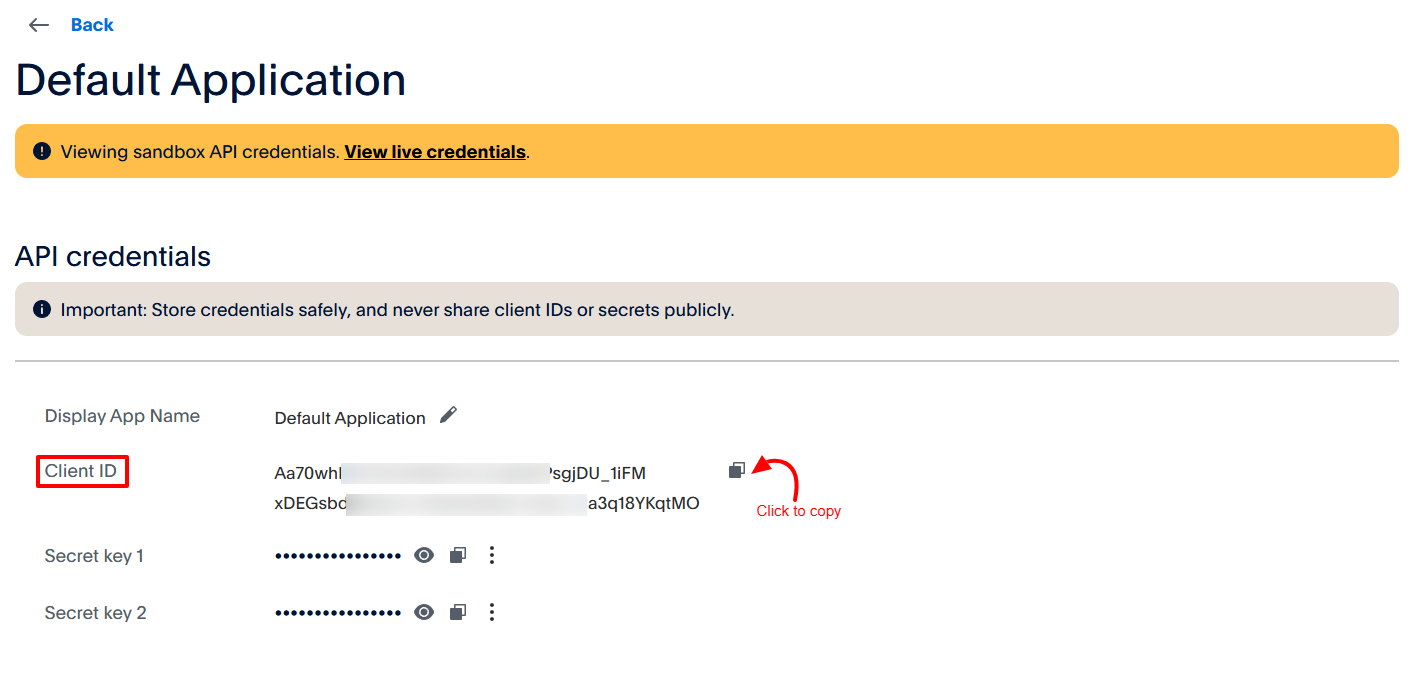
Now click to Api and Credentials to get Client Id, Secret Key and PayPal Merchant ID
Client ID & Secret Key
- Found in your PayPal Developer Dashboard
- Located under your app credentials
- Keep this key secure and do not share it with anyone
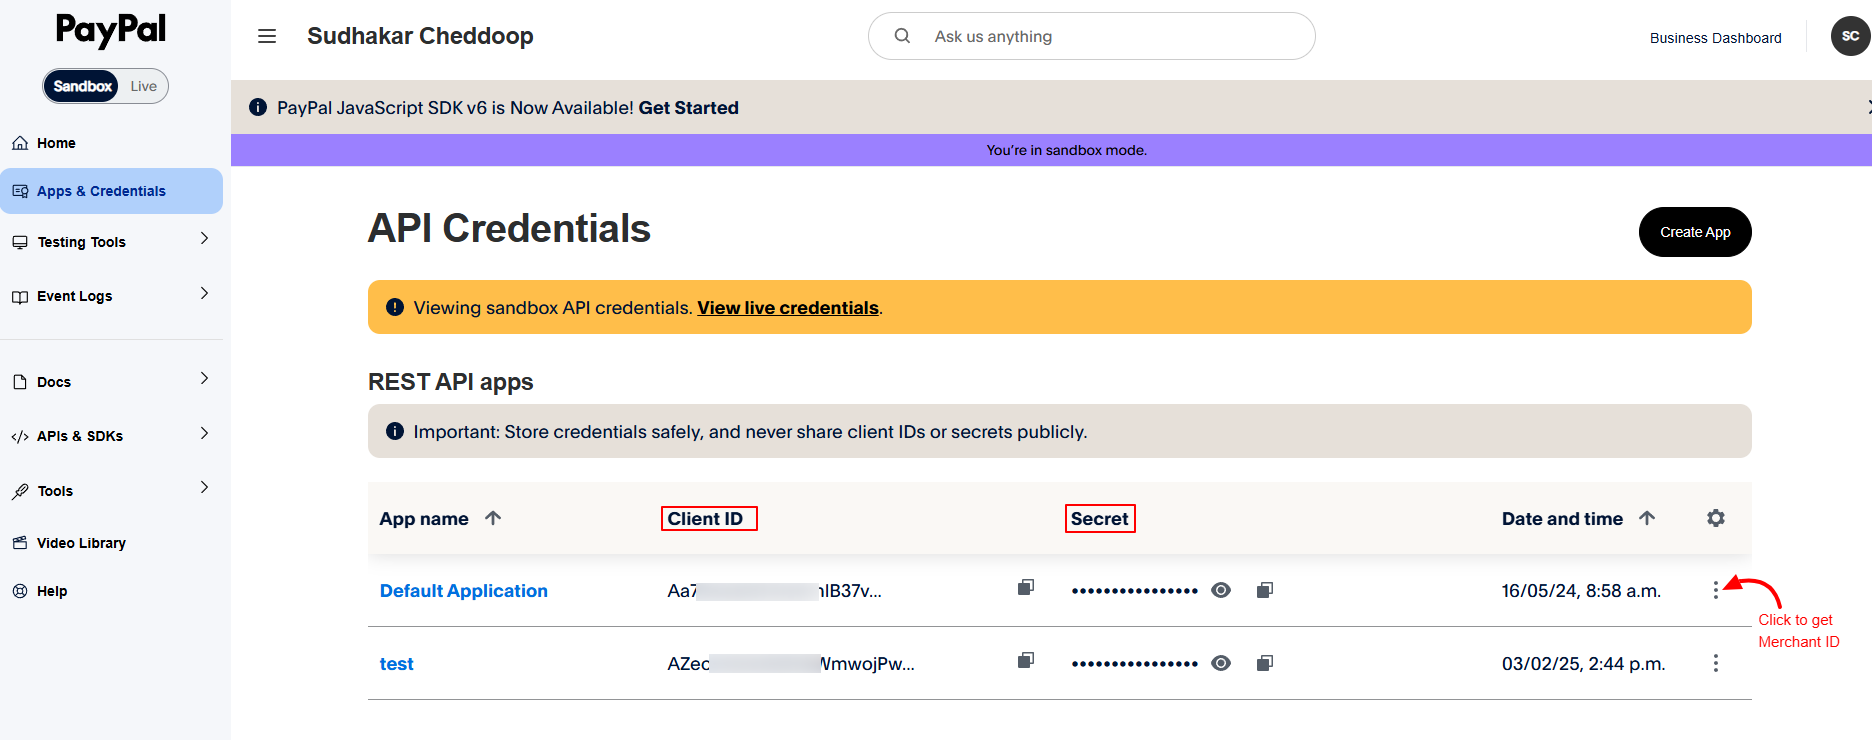
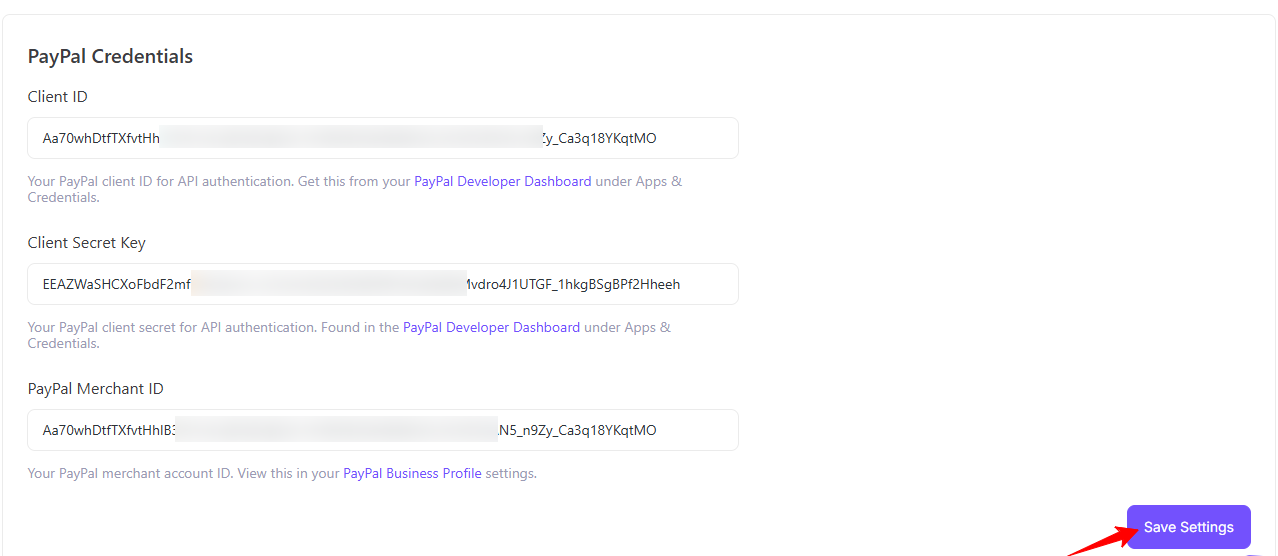
And now click to edit button to get PayPal Merchant ID
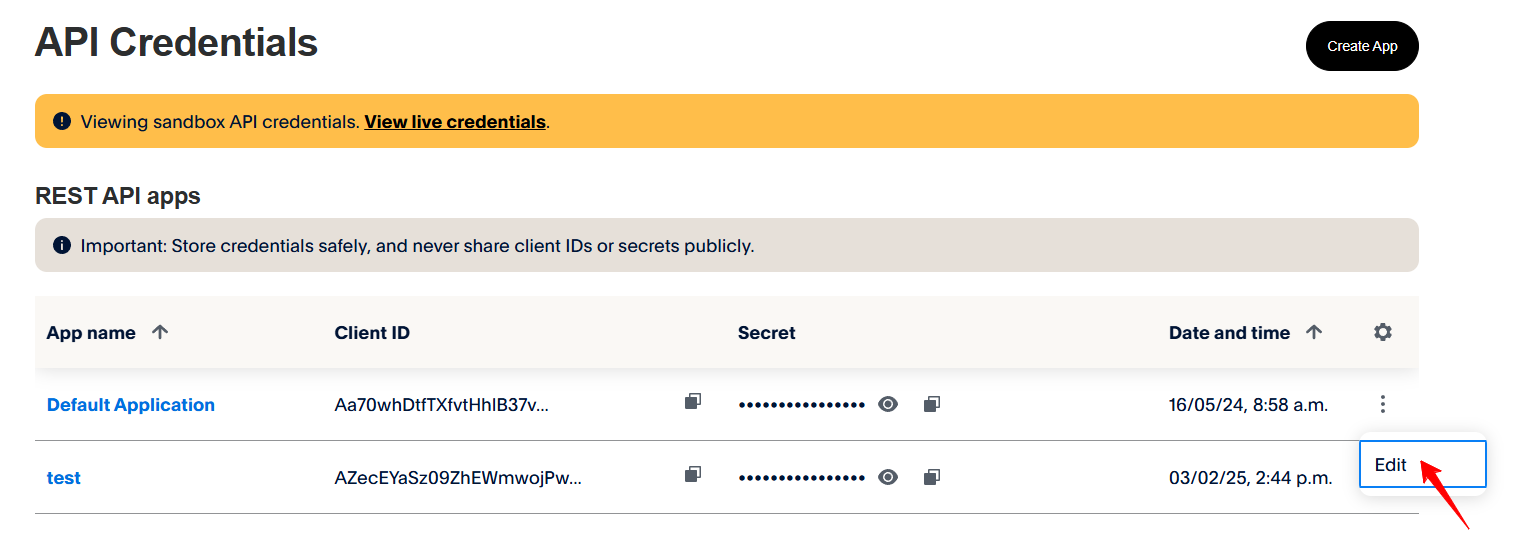
Copy and paste the Client ID and Secret Key and PayPal Merchant ID into the corresponding fields under PayPal Credentials Section from EasyCommerce > Settings > Payment. And finally Click Save Settings button.
3. Braintree
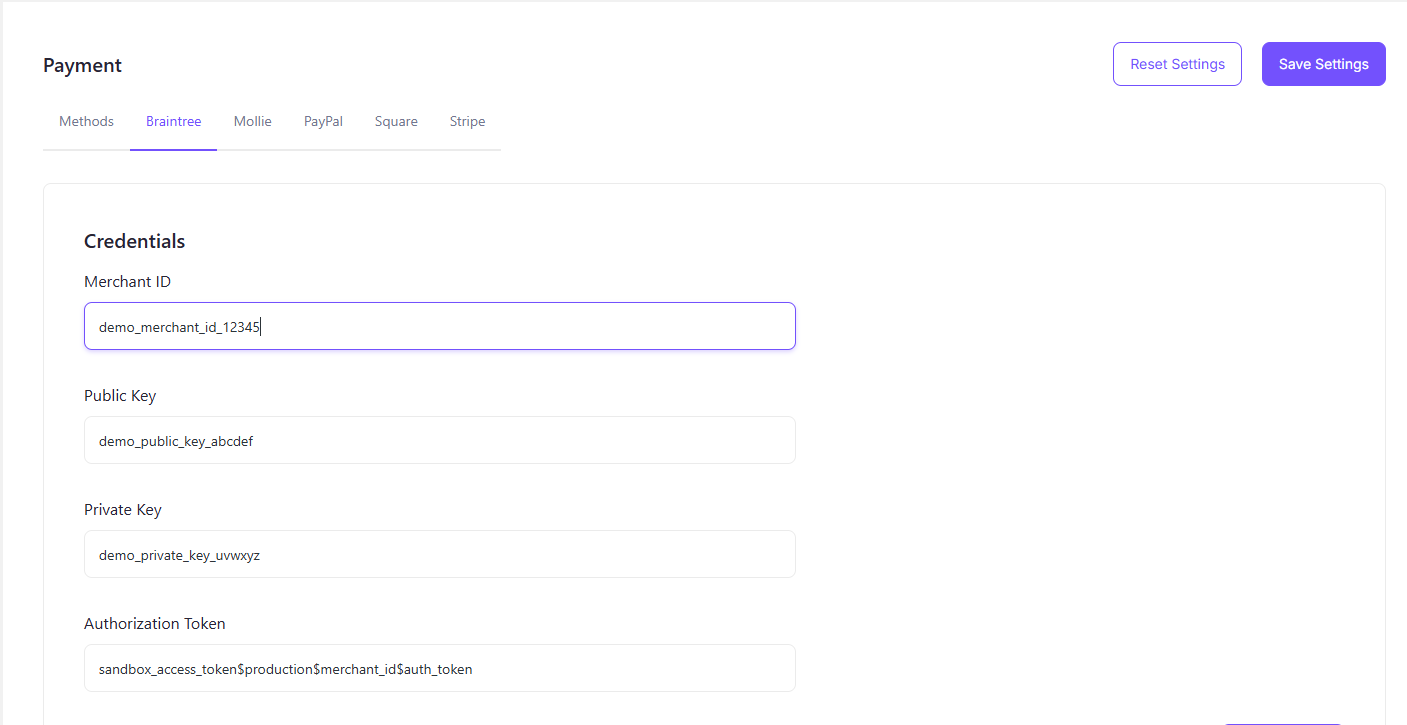
Braintree by PayPal also offers a versatile ecommerce payment gateway solution which you can avail of by creating an enterprise account. Message their Sales Team to get started with Braintree account, payment, and pricing-related queries.
4. Mollie
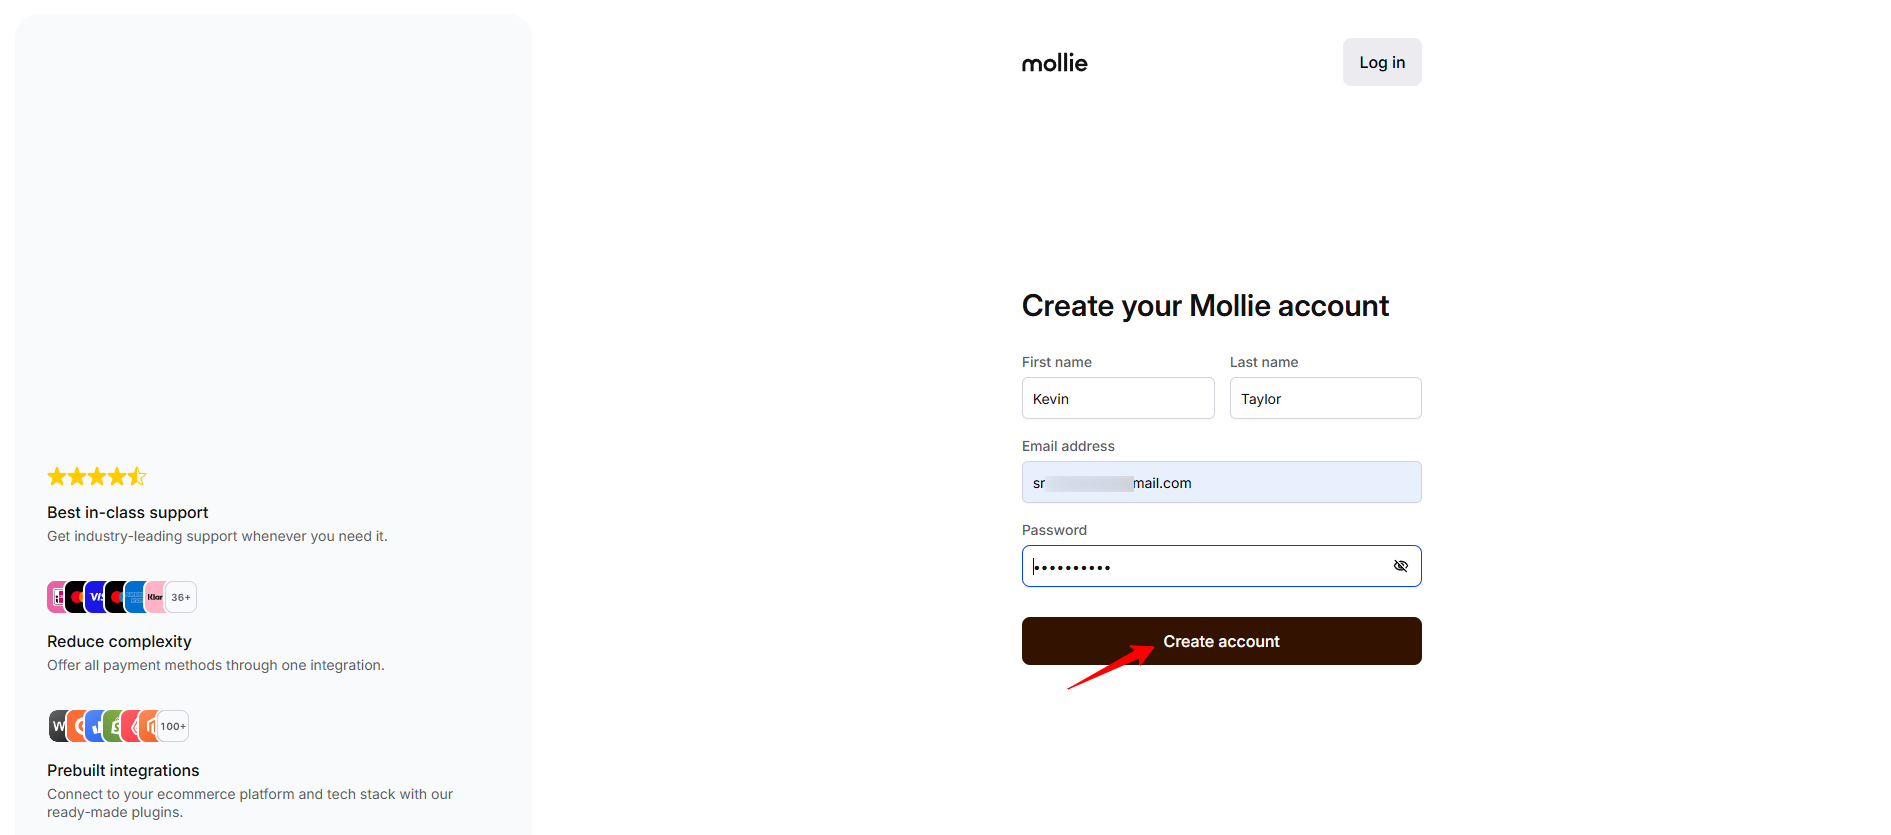
First, you need to create a Mollie account if you don’t already have one. Please click the Sign Up button to create your Mollie account.

After clicking the Sign Up button, you will be redirected to the account creation page. Simply enter your first name, last name, email address and password and then click the Create Account button.
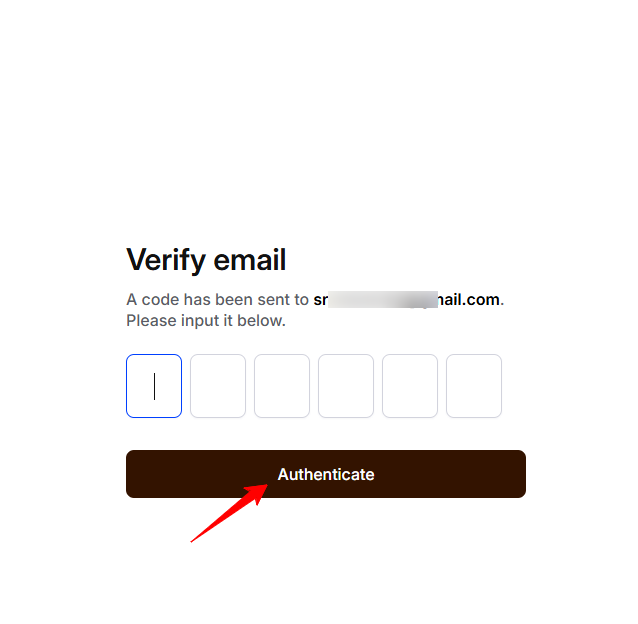
Now you will need to verify your email address. Simply click the Get Verification Code button

After receiving the verification code, simply enter the code and authenticate it.
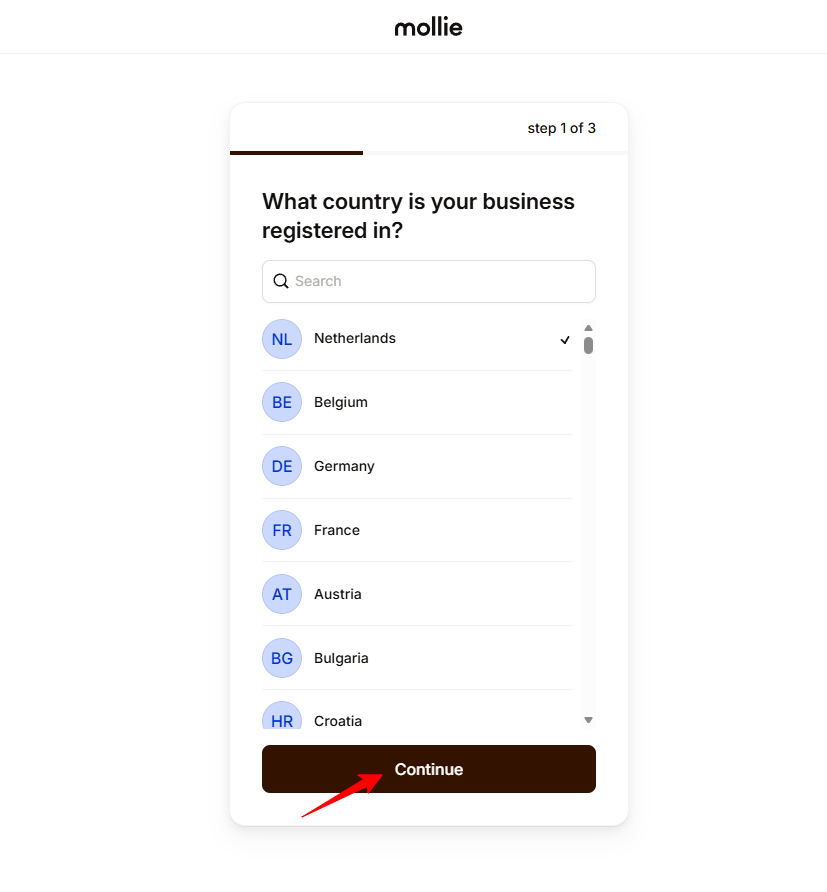
Here, select your country from drop down list and click the Continue button
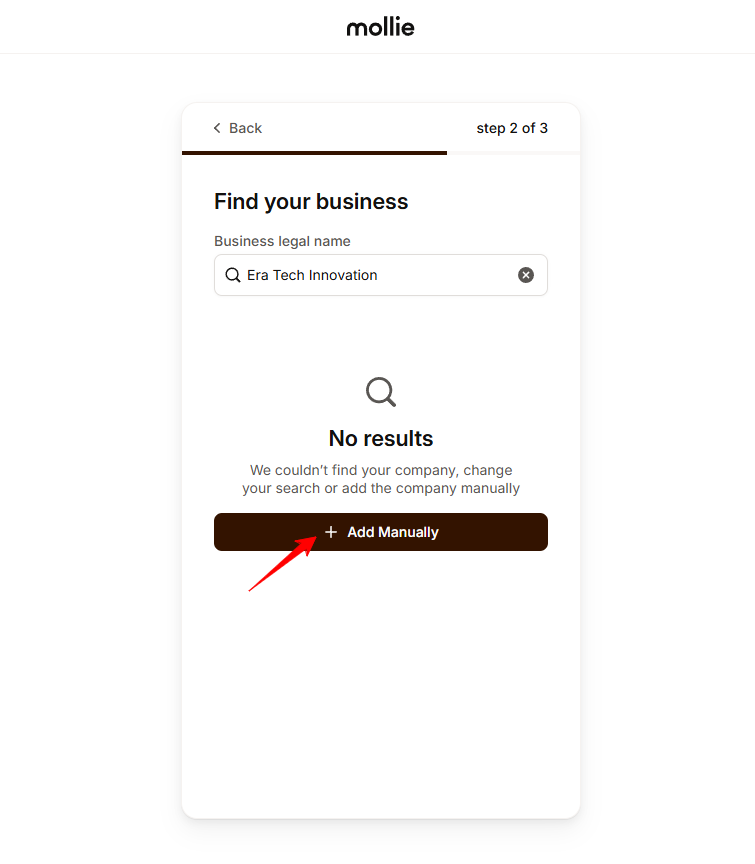
Enter your business name and click Add Manually button to continue
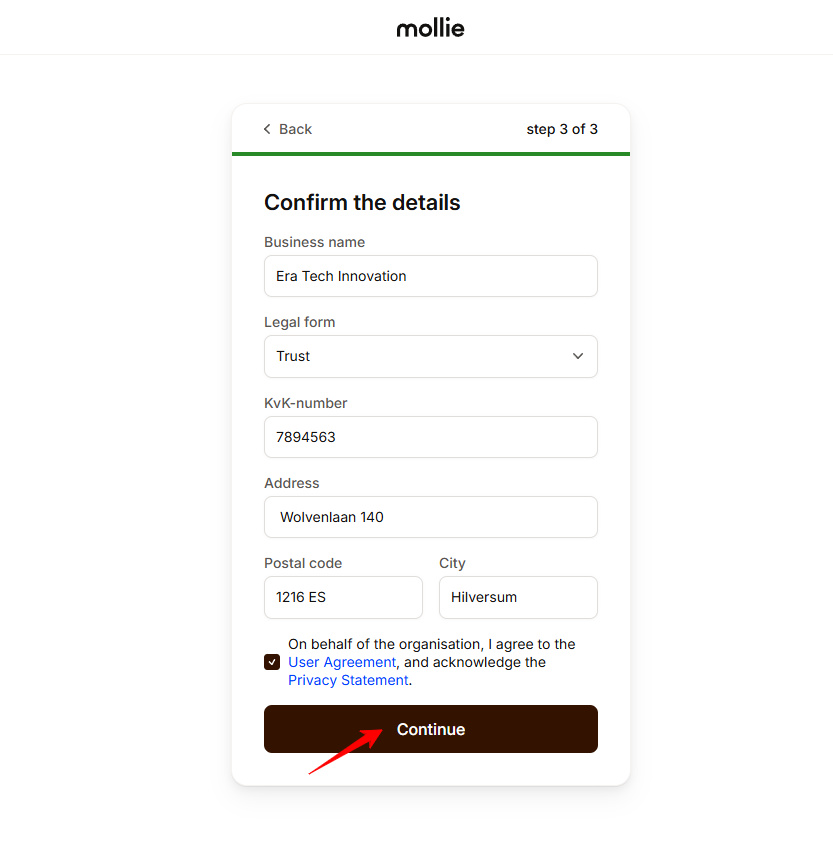
On this page, confirm your business details by entering the required information such as Business Name, Legal Form, KvK Number, Address, Postal Code and City and then agree to the terms and click the Continue button
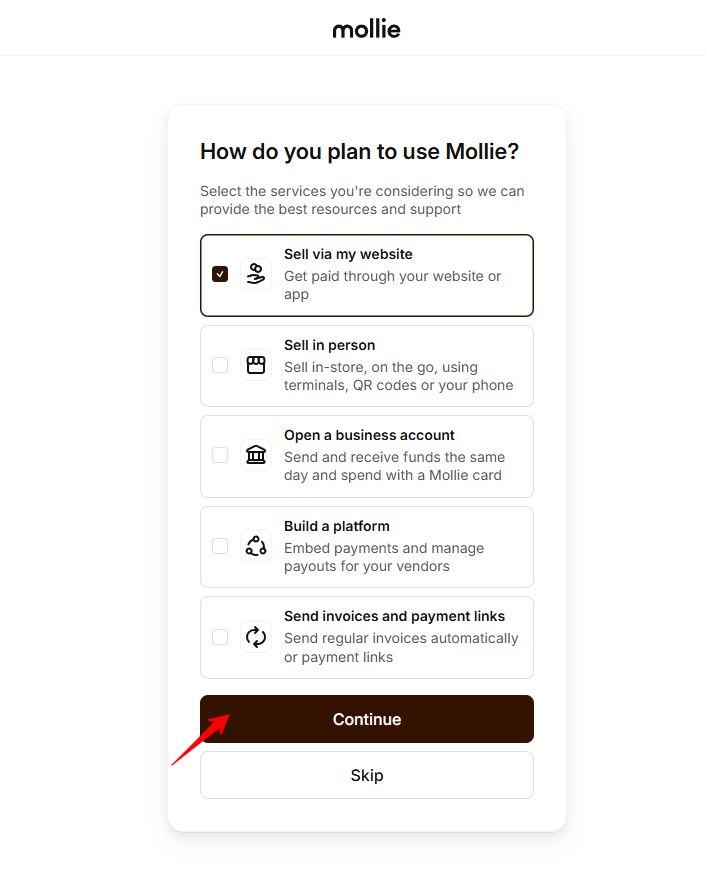
By selecting your plan just click to Continue button
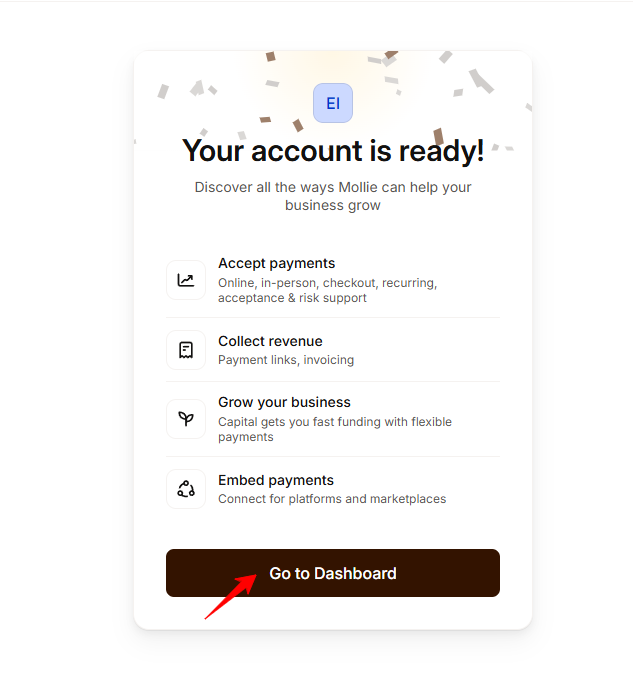
Your account is ready to use now. Click to Go to Dashboard button
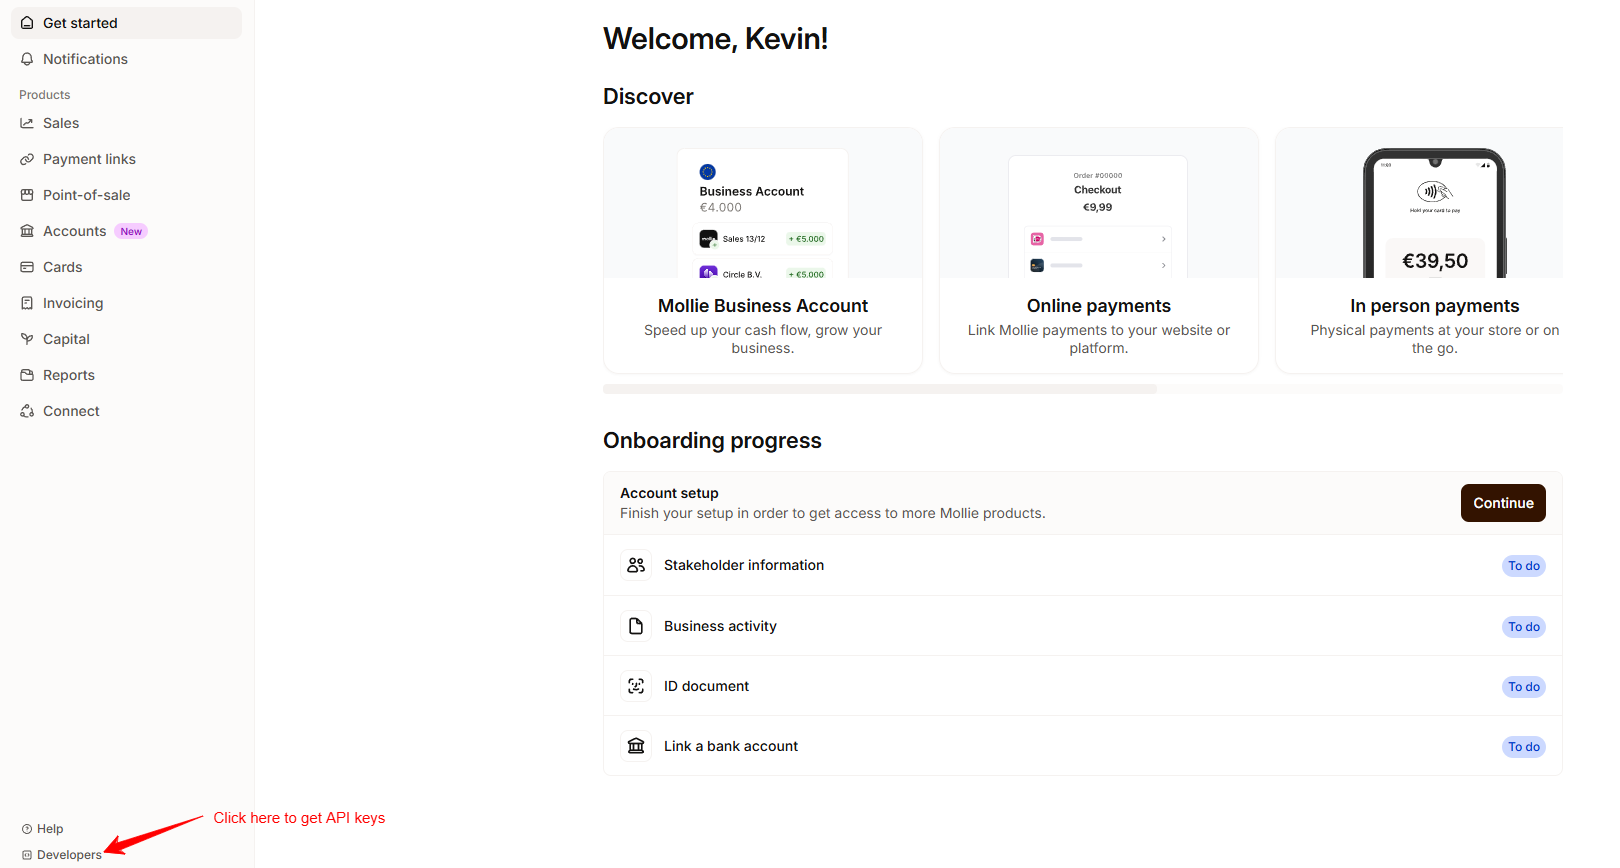
After redirecting Dashboard, click to Developers to get API keys
In the Developer page, you will get API key and Profile ID
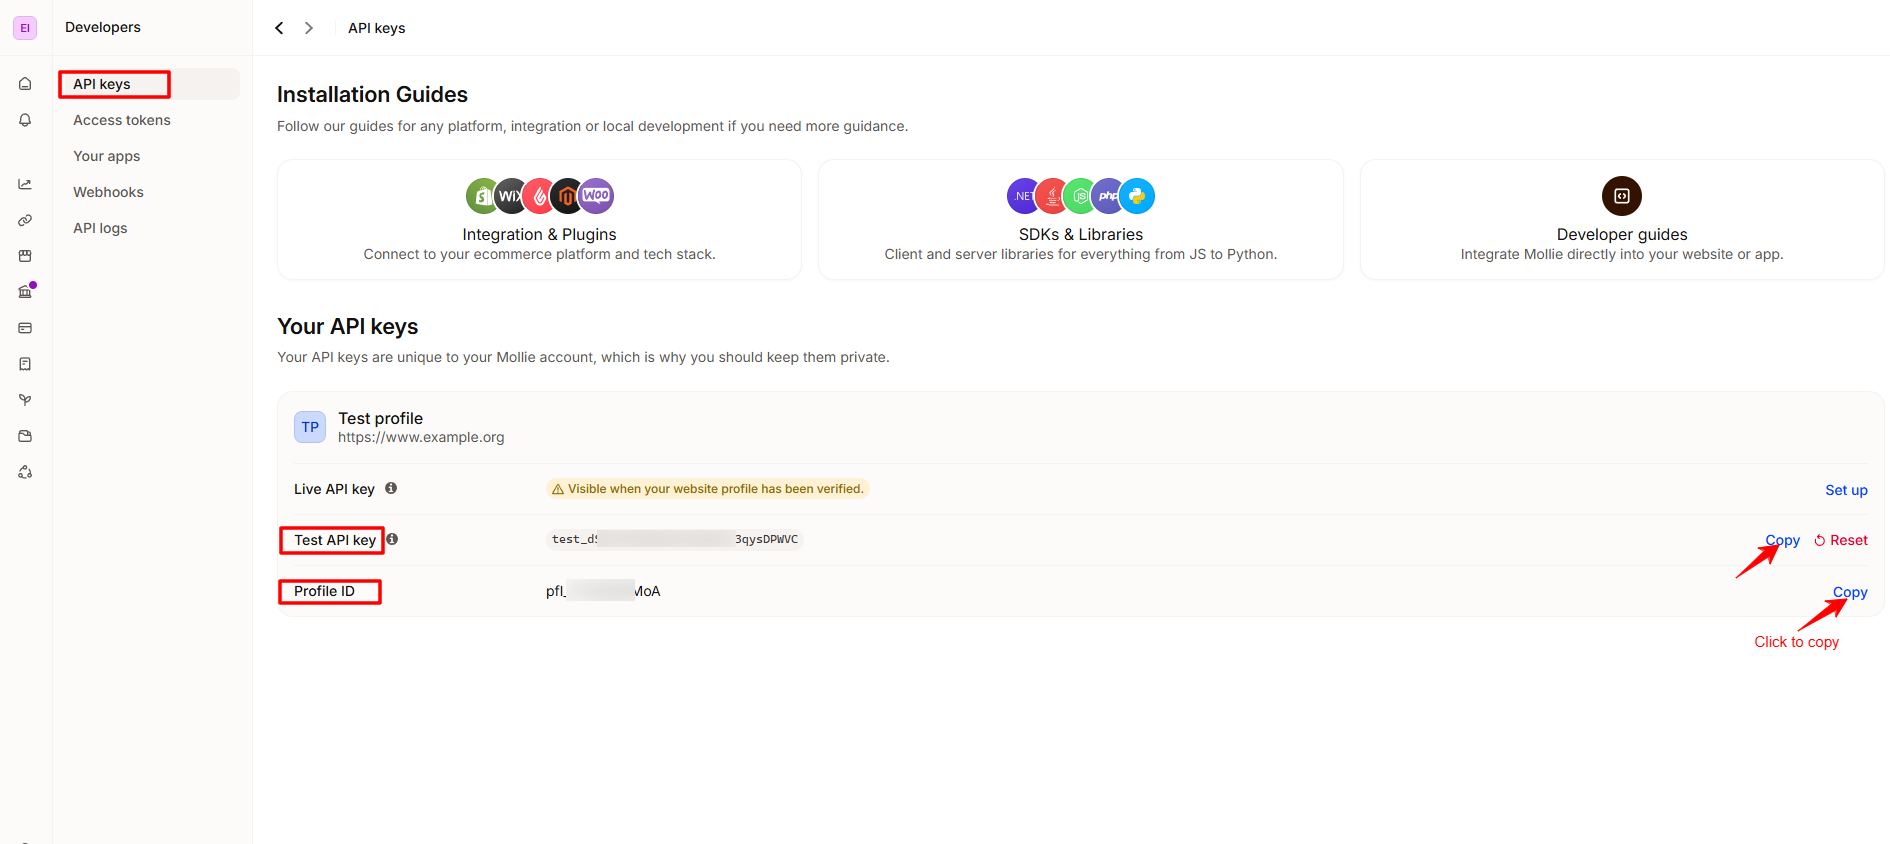
Copy and paste the API key and Profile ID into the corresponding fields under Mollie Credentials Section from EasyCommerce > Settings > Payment. And finally Click Save Settings button.
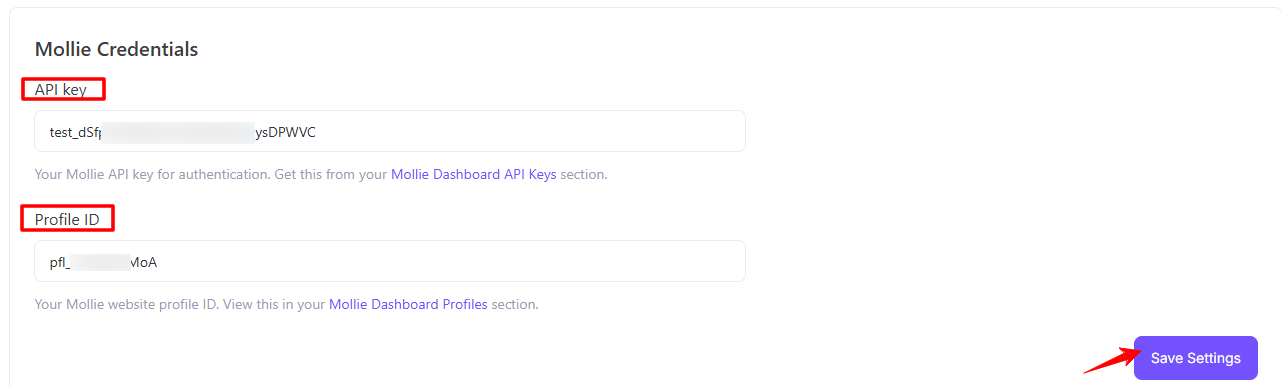
All done! Your Mollie payment setup is complete and ready to use.
5. Square
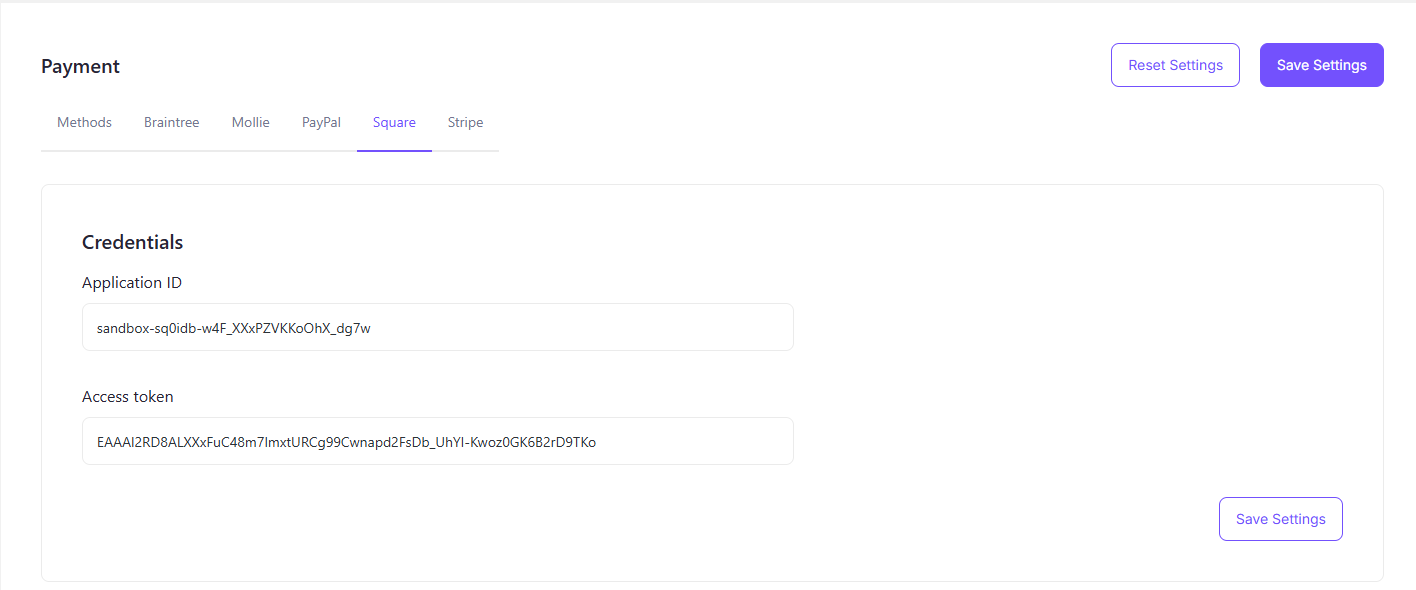
Square is one of the most popular payment gateways for ecommerce. If you want to transition from Square to Stripe for a seamless payment processing experience, this guide will help you get started.
Was this doc helpful?