


Shipping Settings
How to Add a Shipping Class in EasyCommerce
You need to configure shipping classes to apply delivery charges based on specific areas. Once they’re set, the system will automatically calculate and apply the shipping cost when a customer provides a delivery location within the defined areas.
In this guide, you will learn how to add shipping classes for your store using EasyCommerce.
Step 1: Navigate to Shipping Settings
Go to EasyCommerce Store > Settings > Shipping and then Settings tab.
Step 2: Choose Shipping Countries
Select the countries you wish to serve by scrolling through the list or typing the country name. Tap Save Settings to store the changes.
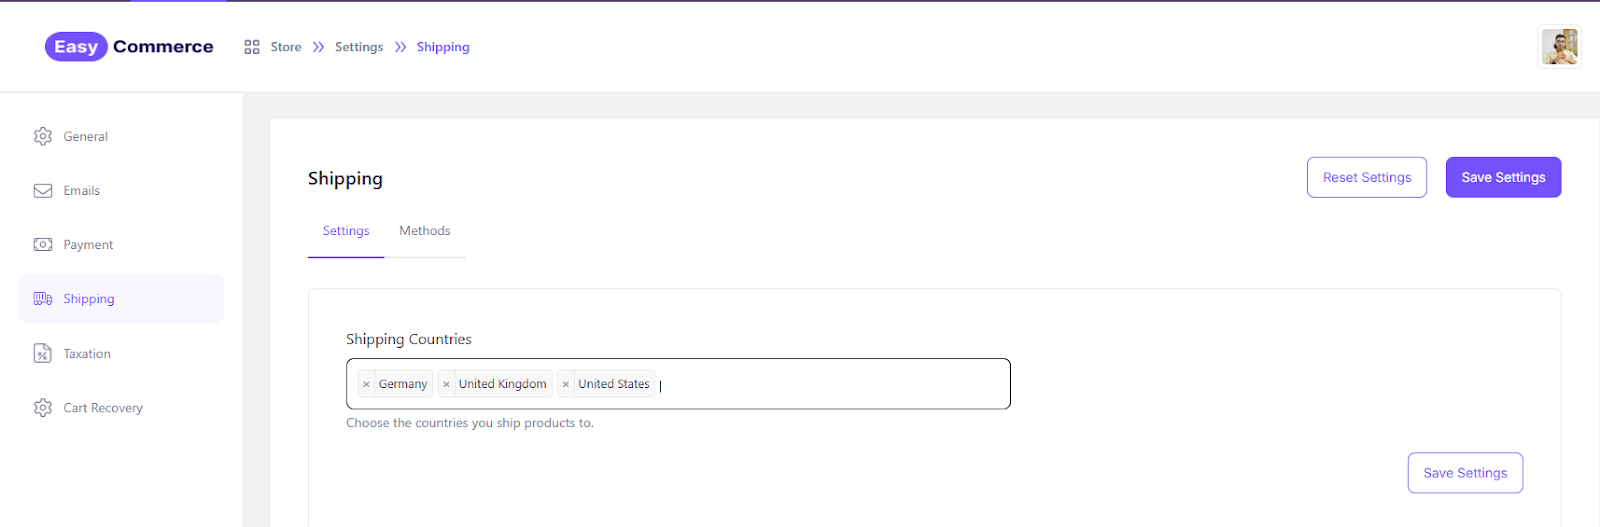
To remove a selected country, simply click the cross icon previous to its name.
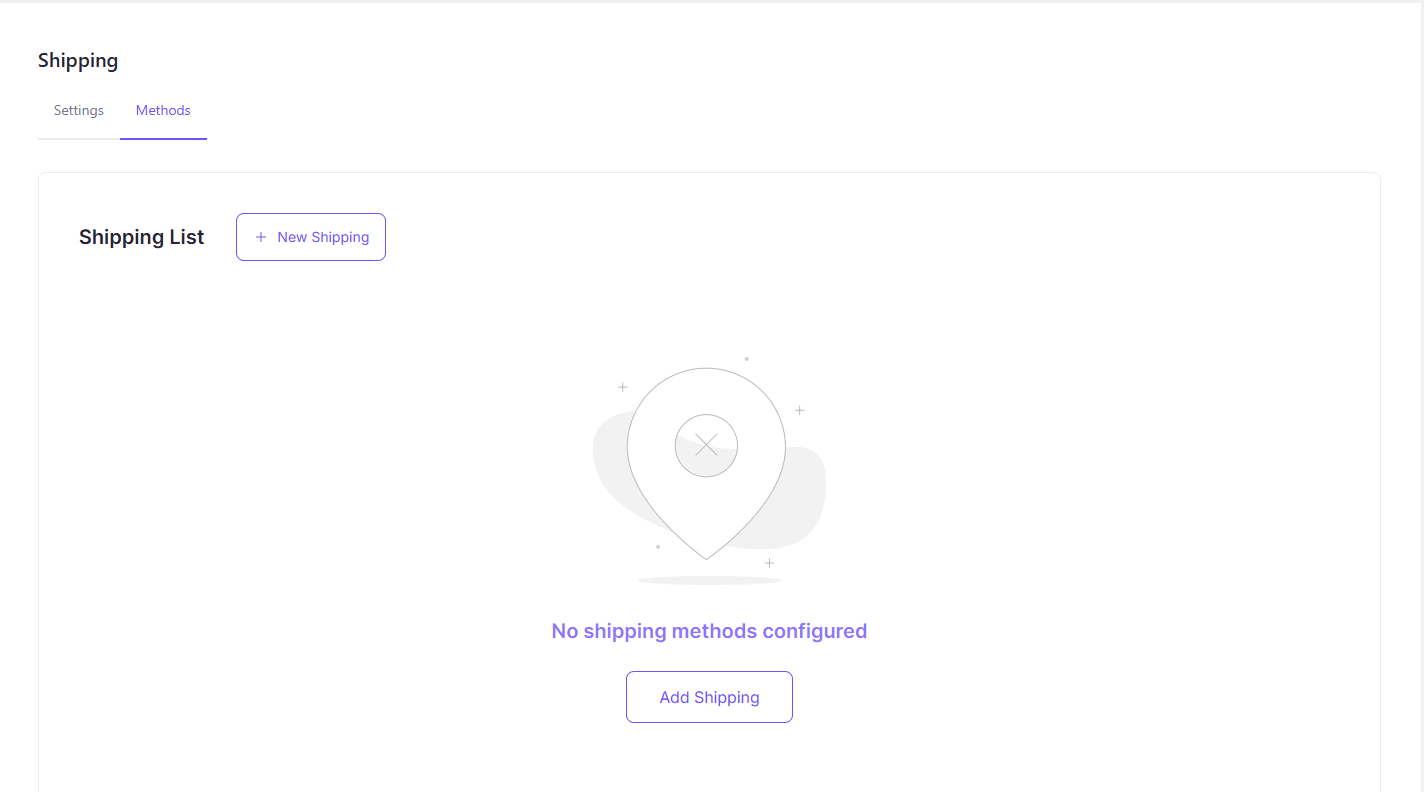
Step 3: Add Shipping Methods
Now switch to the Methods tab to create a class. You will find the list empty when accessing it for the first time. Click the New Shipping button to open a new class.
Step 4: Enter Shipping Details
Now you need to fill up some information to set up this shipping method.
* Name: Shipping class name
* Description: Slightly longer description of the class
* Status: Set Active/Inactive status
* Regions: Geological location i.e. Country, State, City, etc.
* Taxable: If the shipping charge is taxable.
* Calculation Base: Shipping charge calculation base.
* Method: Name, Shipping Charge, Minimum, and Maximum expenditure limits.

Step 5: Create to Save
Click ‘Create Shipping’ to complete setting up the shipping class.
Shipping Methods Control
You can access and manage all your shipping classes from the Shipping List section in Methods.
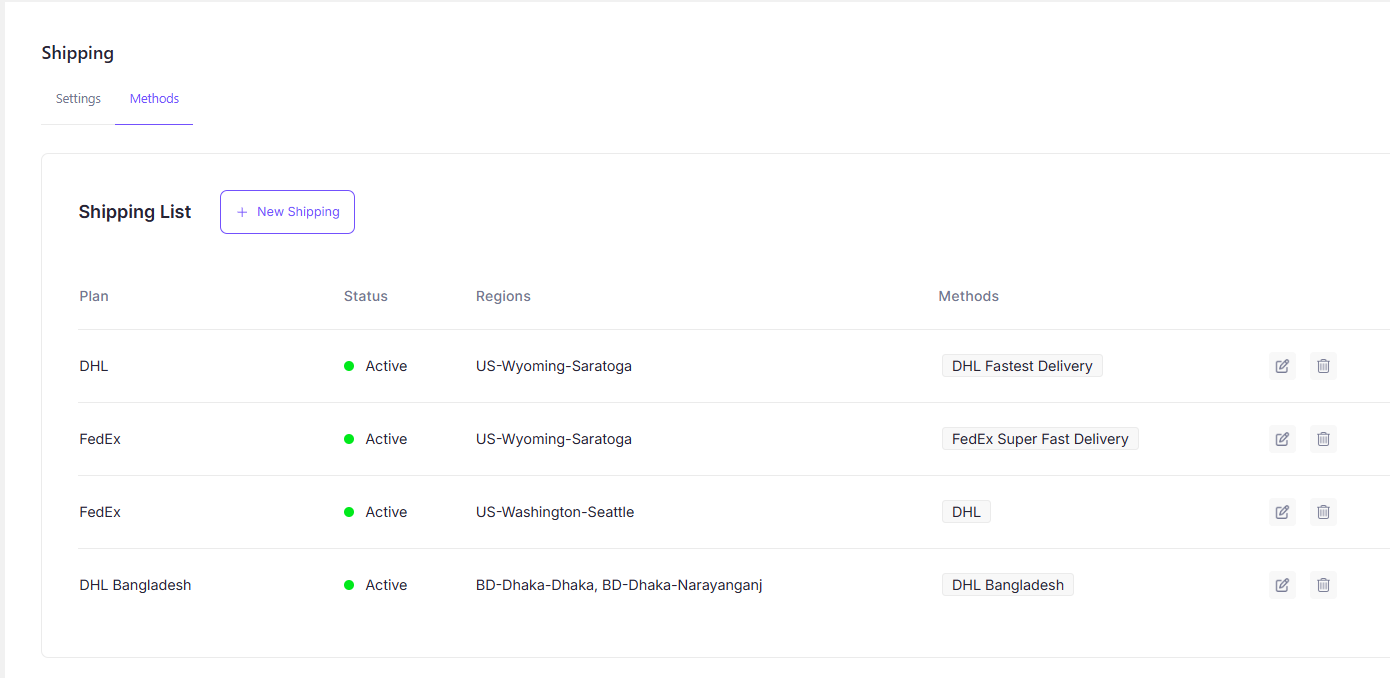
Edit them as needed with the Edit button or delete them by clicking the Bin icon on the far right.
Was this doc helpful?