


EasyCommerce lets you create, manage, and display products from a single, streamlined screen. Its simple layout makes it easy for anyone to use without requiring any technical skill. This task becomes even easier with the help of AI-powered automation.
Follow these steps to add or edit a product in your store:
1. Open the Product Editor
From your WordPress dashboard, go to Store > Products > Add Product.

2. Add Product Name and Summary
- At the top, enter your Product Title.
- In the Product Summary section, write a short highlight of your product, like its top features or unique value.
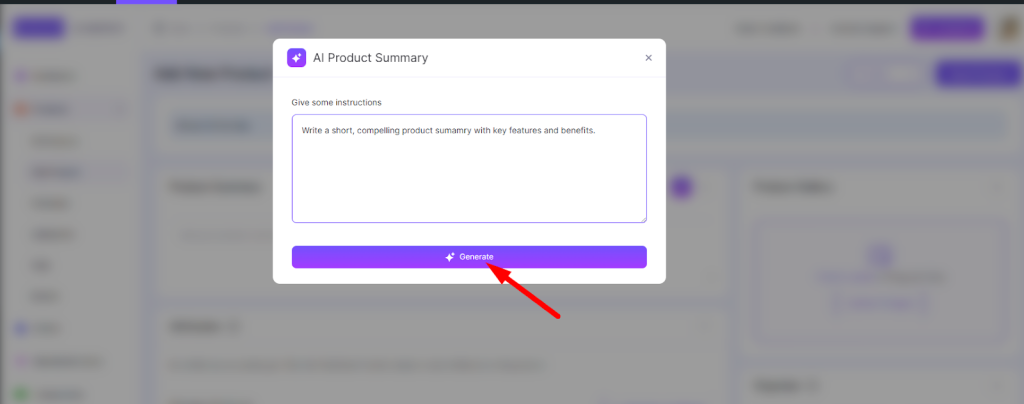
Write via AI:
- In case you want AI to write the summary for you-
- Just click on the AI assistant icon to the right.
- A pop-up showing a pre-generated prompt should appear.
- If the prompt seems suitable, just hit the ‘Generate’ button and wait a few seconds.
- A short overview of that product should be visible on the summary field.
From now on, you can fill in any information you want. Let’s start with the images.
3. Upload Product Images
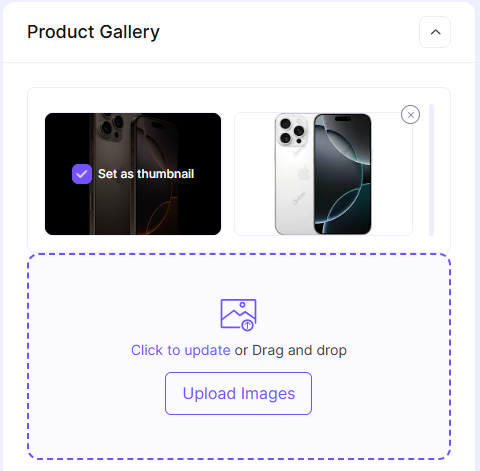
- Initiate uploading the image by clicking the ‘Upload Images’ button to your right.
- A pop-up will appear showing your WordPress site’s media library. Select the right images.
- In case the media library doesn’t have those images, use the upload tab to import and then tap ‘Insert’.
- Hover over an image and click ‘Set as Thumbnail’ to set it as the display image.
4. Set Categories, Brands, and Tags
Under the Organize section, assign the relevant Categories, Brands, and Tags.
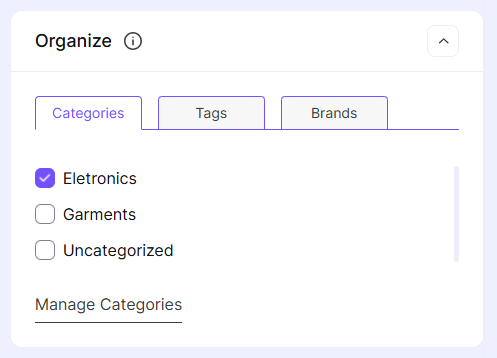
You can manage (create, edit, delete) these labels using the Manage Categories option.
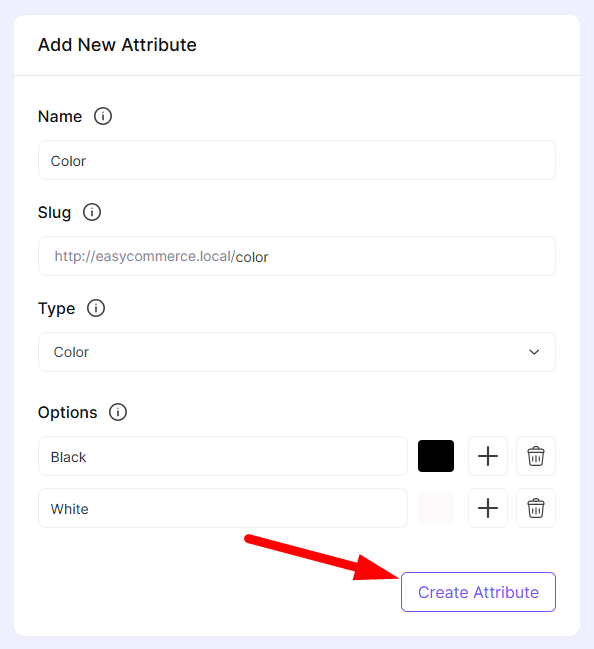
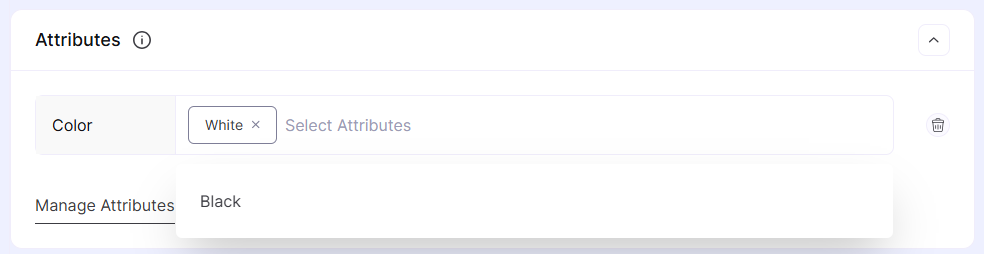
5. Add Attributes
Now, use the Attributes panel to define product variant differentiation options like size, color, or material used. EasyCommerce has a unique attribute management option where you can create commonly used attributes and set their levels. These attributes can be reused repetitively across similar products very easily.
When adding an attribute for the first time-
- Click on the ‘Manage Attribute’ option.
- Fill in the information on your right side (Name, type, option) and click ‘Create Attribute’.
(Example purposes only)
- Go back to the product listing tab and click ‘Set New Attribute’ to open up an attribute input field.
- Click on the dropdown and select the right attribute class you just created.
(Example purposes only)
6. Add Pricing and Variants
Now you’ll need to add a price for each of the product variants. To do that, first let’s create the variants. You can do this one at a time or all at once.
One at a time:
- Click on the ‘+Add New Price’ button to open a new pricing variant.
- Extend its fields by clicking the ‘+’ icon.
- Fill in the details like variant name, attributes included, sale price, SKU, Tax class (if any), products in stock, product dimension, etc.
Auto-Generate Variants:
Click Auto Generate Variants to create multiple pricing blocks automatically based on attribute combinations.
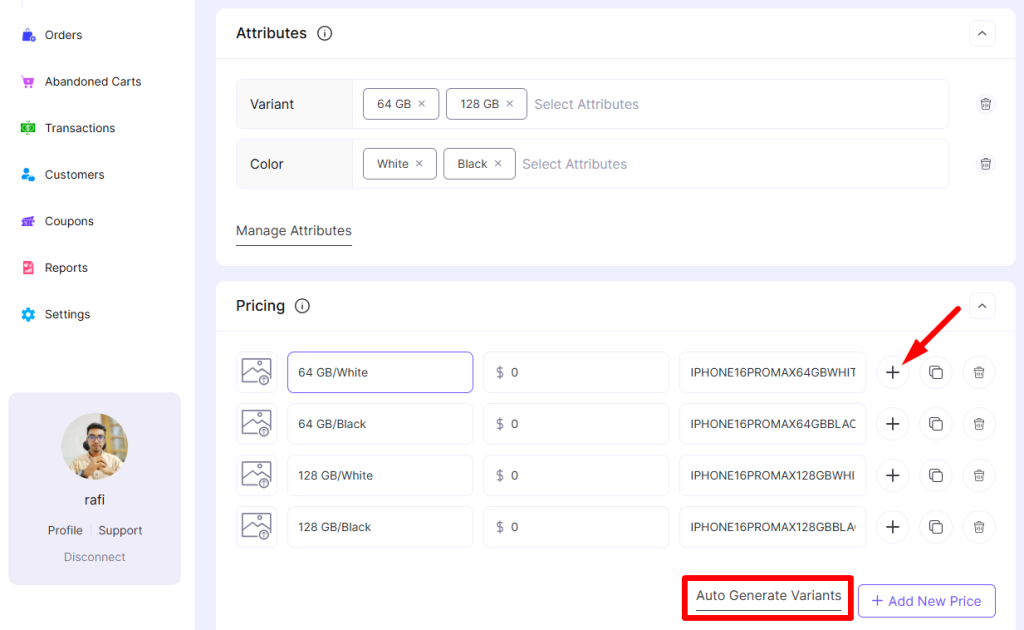
- Add a pricing block for each variant.
- Choose Physical or Digital product type.
- Set Attributes, Regular Price, Sale Price, and Tax Class.
- Add Stock Count, and declare Low Stock Limit limit.
- Enter Dimensions (height, width, length, weight) with appropriate units.
Tip: For digital products, the process is mostly the same, except you don’t need to enter inventory or dimensions. Just upload the file after setting the price.
7. Add Product Description
Every ecommerce product comes with a long product description covering all its general, technical details. You can proceed with your pre-made description, or to keep things easier, you can also use EasyCommerce AI, which requires the same process as creating the product summary. [See step #2]
8. Customize Product Page View
The Product View section includes ready-made templates tailored to suit different product page styles. Just pick one to control how your product appears to shoppers.
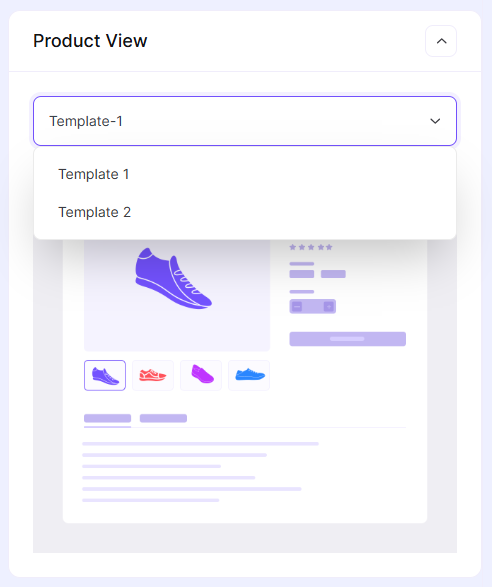
Note: You can also further customize it using the product builder.
9. Adjust Settings
In the Settings panel:
- Slug – Set the product’s custom URL.
- Visibility – Choose to hide the product from the shop or search engines.
- Review – Enable/disable customer reviews and set review text as mandatory.
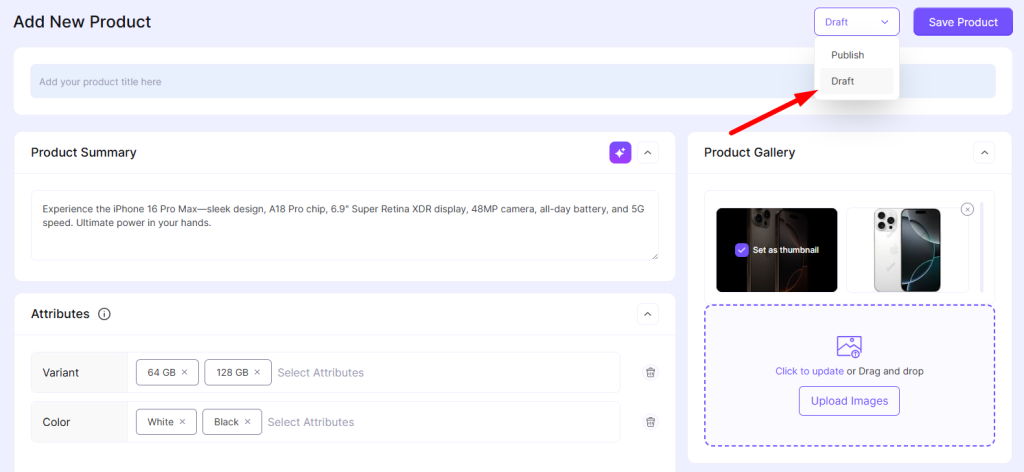
Creating a product isn’t always a one-time task. You can save your progress by keeping the product as a ‘Draft’ and coming back to finish it anytime.
Once you’re done with all the steps mentioned above, do a final review and hit the ‘Save Product’ button at the top.
Was this doc helpful?