


The EasyCommerce Licensing Addon lets you generate and manage license keys for digital products. It’s ideal for selling software, plugins, themes, or any downloadable items that require activation control.
⚠️ This is a premium addon. You’ll need a valid license key to activate and use it after installation. Here’s the guide to purchase premium addons and activate the license.
Follow the steps below to install, activate, and start using the Licensing Addon on your EasyCommerce store.
Step 1: Install & Activate the Addon
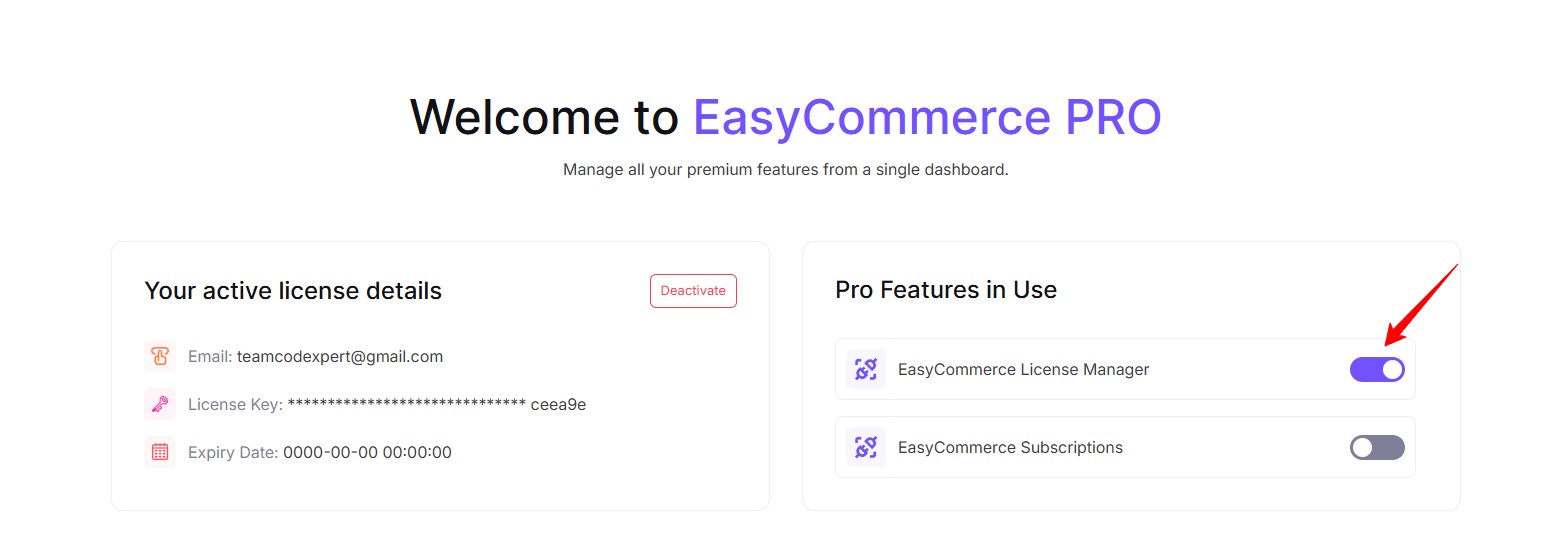
- After verifying email and license key the Pro version of EasCommerce is ready.
- Navigate to EasyCommerce > Pro.
- Find the EasyCommerce License Manager Addon, then click Enable.
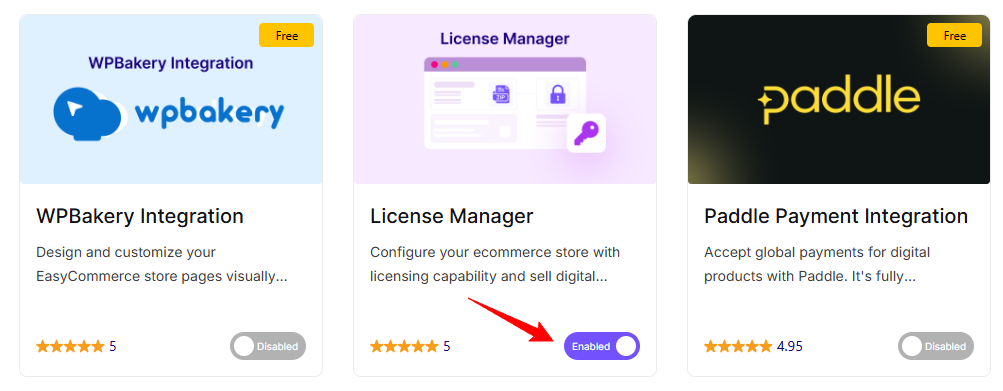
Or You can Enable it from EasyCommerce > Addons section and click “Enabled” under the EasyCommerce License Manager addon
Step 2: Enable Licensing for a Product
Go to Store > Products and either create a new digital product or edit an existing one.
Under the Pricing section, check the box for Generate License.
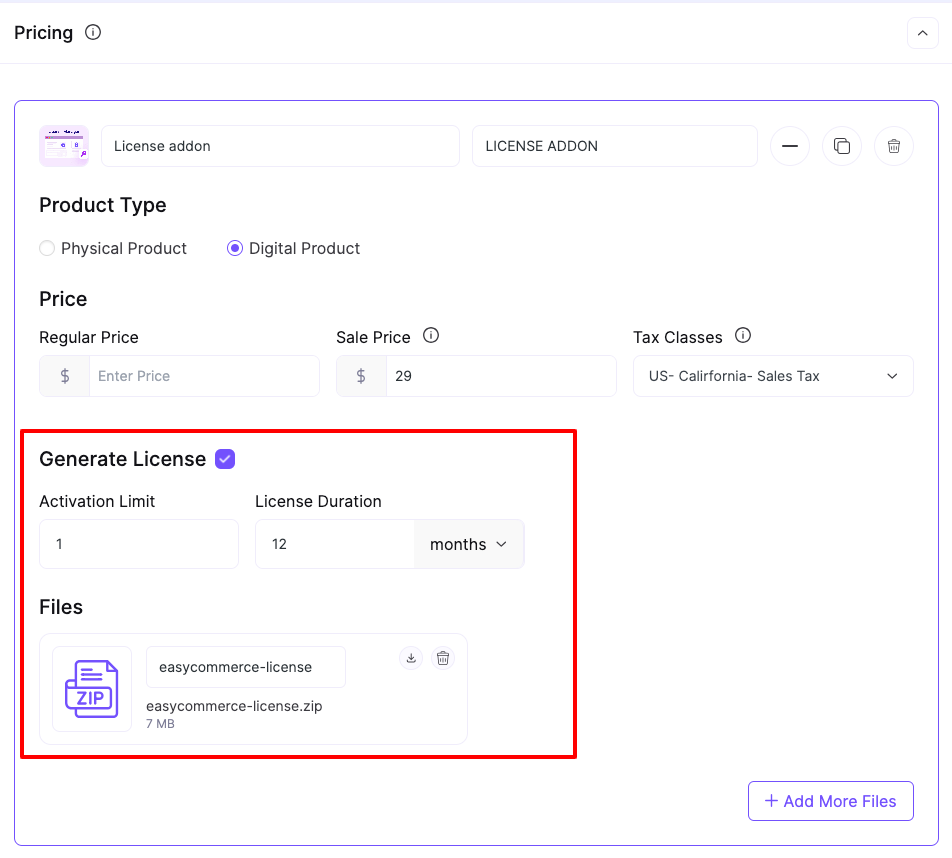
Fill in the following:
- Activation Limit – Set how many times the license can be activated.
- License Duration – Choose how long the license will remain valid (days, months, or years).
- Upload the product file (e.g., ZIP, EXE, etc.) that customers will download after purchase.
Lastly, complete the rest of the process of adding a product, and click Save Product to apply license settings to the product.
Step 3: Manage All Issued Licenses
Now, go to Store > Licenses from your admin sidebar.
You’ll see a table with all issued licenses, showing:
- Order ID
- Product Name
- License Key
- Customer Name
- Activation Limit
- Expiry Date
- Current Status (Active, Expired, etc.)
This dashboard gives you full control over all generated licenses.
Step 4: View License Details
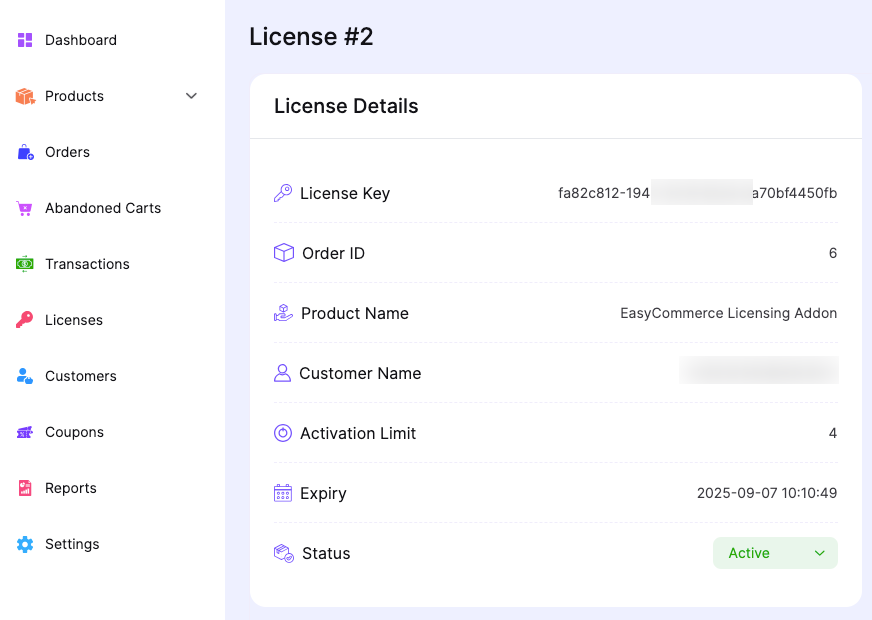
Click on any license (hover and tap ‘View’ under the license ID) in the list to open its details page. You’ll see:
- License Key
- Order ID and Product Name
- Customer Name
- Activation Limit and Expiry
- Current License Status
- Activation Log
You can use this view to track usage, update limits, or deactivate licenses manually if needed.
Step 5: Test the Licensing Flow
- Buy a digital product through your storefront using a test user.
- Complete the checkout successfully to generate the license.
- Go to Store > Licenses to confirm the license was created.
- Click the license to verify its details, limits, and expiry.
This helps ensure the license system is working before going live.
Was this doc helpful?