


Integrating bKash with your ecommerce website is simple with the EasyCommerce bKash Payment addon.
N.B.: Before installing an add-on, make sure the EasyCommerce system is connected to your website with the API key.
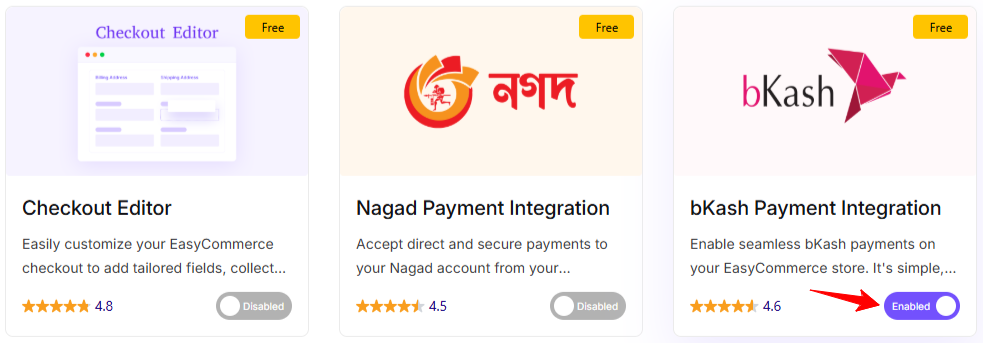
Step 1: Activate the Addon
- Sign in to your WordPress website’s dashboard.
- Go to EasyCommerce > Addons section and make it “Enabled” under the Bkash Payment Integration Addon.
To learn more about addons activation, read this documentation on how to activate free and paid addon on EasyCommerce.
Step 2: Navigate to Payment Settings
- Go to Store > Settings > Payment.
- Select bKash as your payment gateway.
- Tap ‘Save Settings’ to finalize the changes.
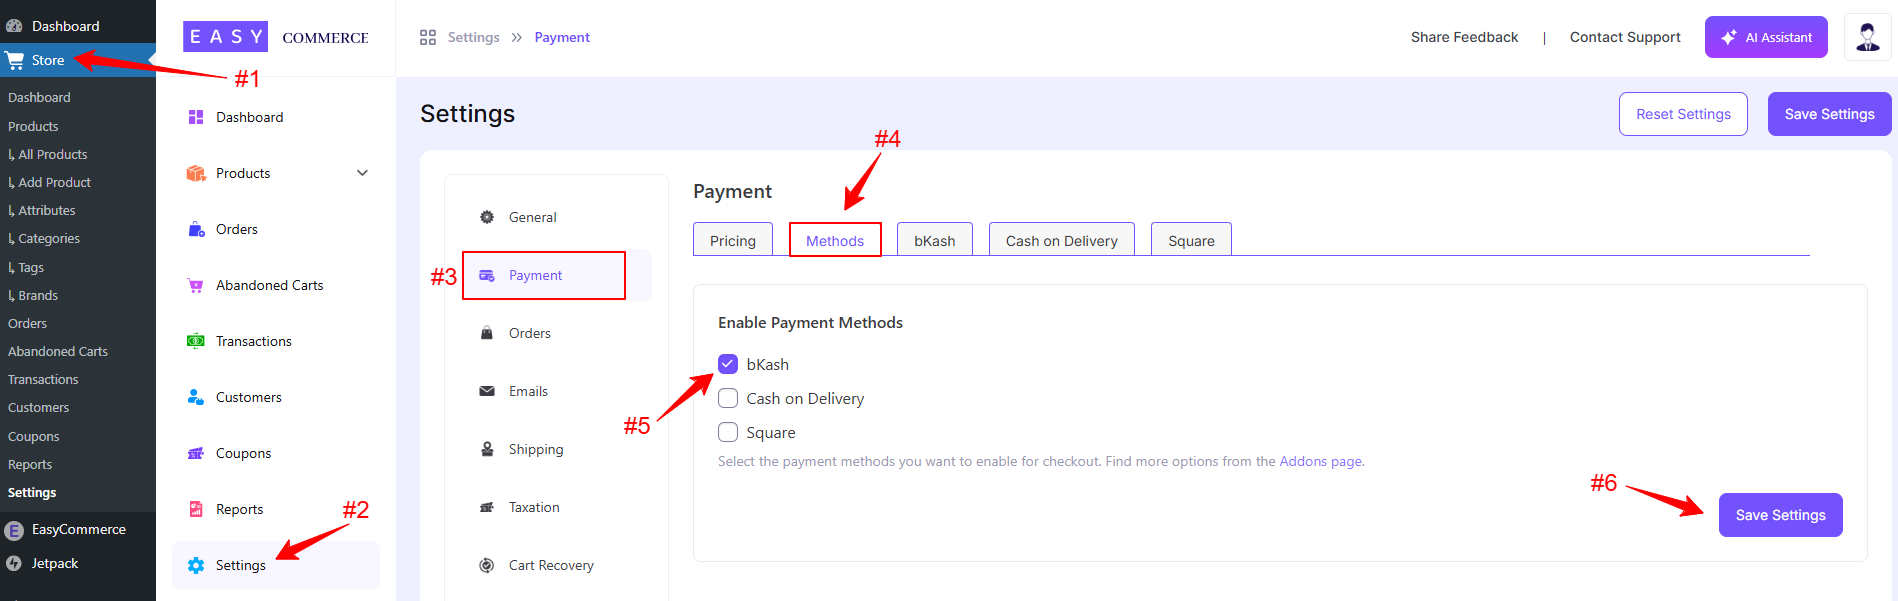
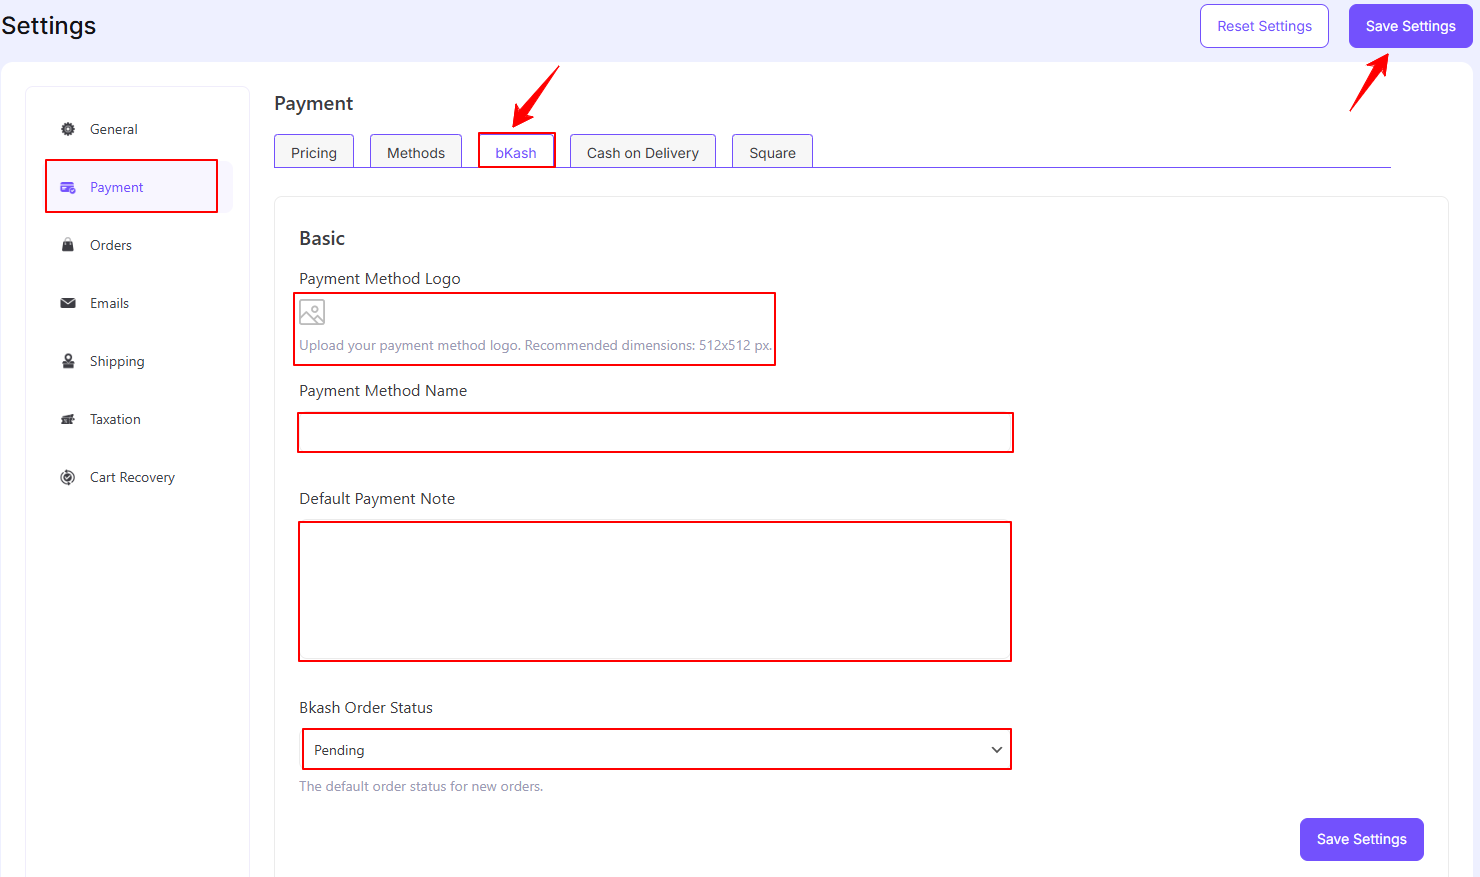
Step 3: Configure BKash Settings
- Access the bkash addon settings tab beside the ‘Methods’ tab.
- Add the bkash payment method logo from Media Library.
- Enter the Payment Method Name.
- Give a Default Payment Note, which will include your personal bkash number.
- Configure the default status payment gateway settings.
N.B.: In the payment note, please remind customers to provide the bKash number they used for the payment, along with the transaction ID, in the fields below.
Step 4: Save Changes
Once you’re done with all the steps, click ‘Save Settings‘ to start accepting payments from bKash.
Was this doc helpful?