


Installing and activating the PayPal Payment Gateway addon is straightforward. Follow the steps below and find your EasyCommerce ecommerce website configured with PayPal payment gateway.
To learn more about addons activation, read this documentation on how to activate free and paid addon on EasyCommerce.
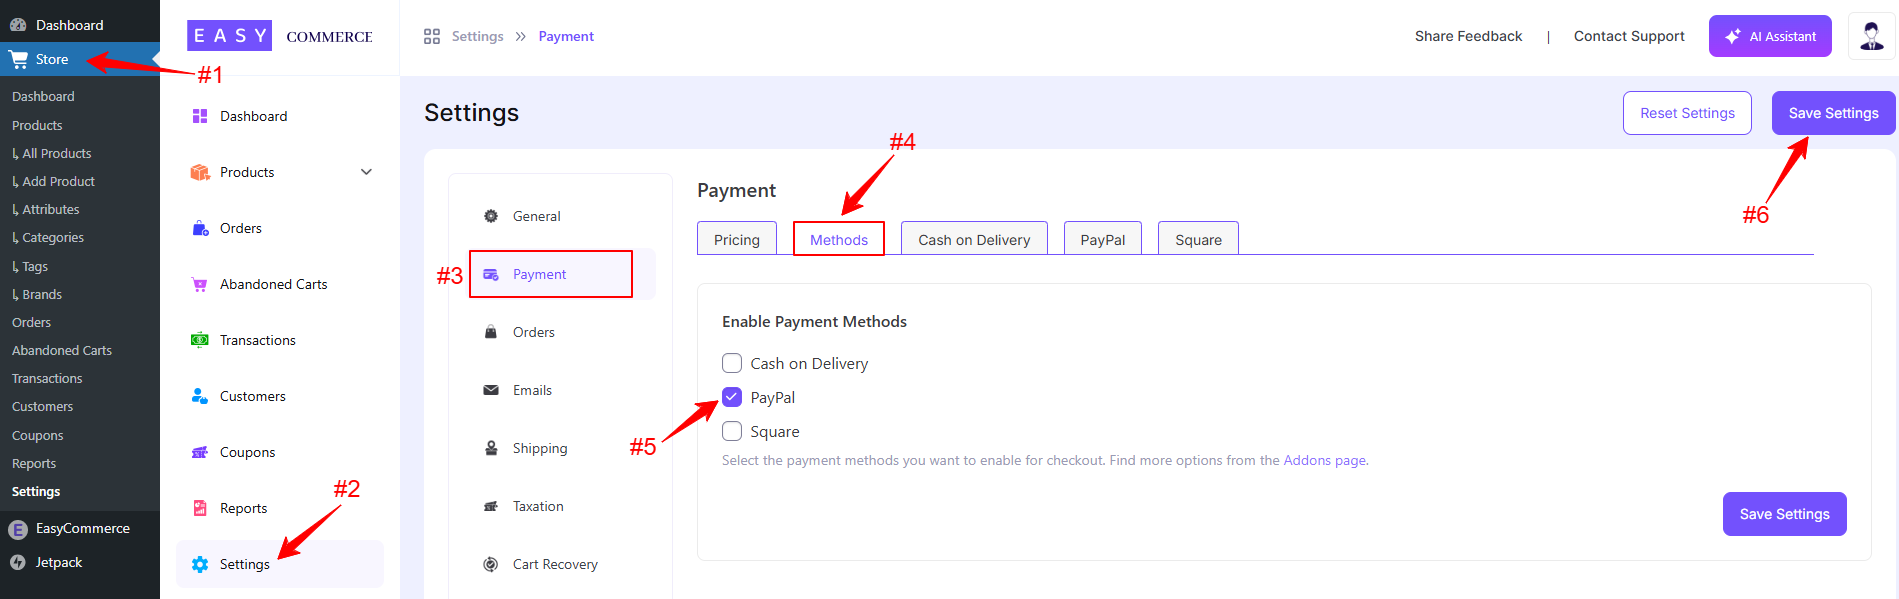
Step 1: Navigate to Payment Settings
- Go to Store > Settings > Payment > Methods.
- Select PayPal as your payment gateway.
- Tap ‘Save Settings’ to finalize the changes.
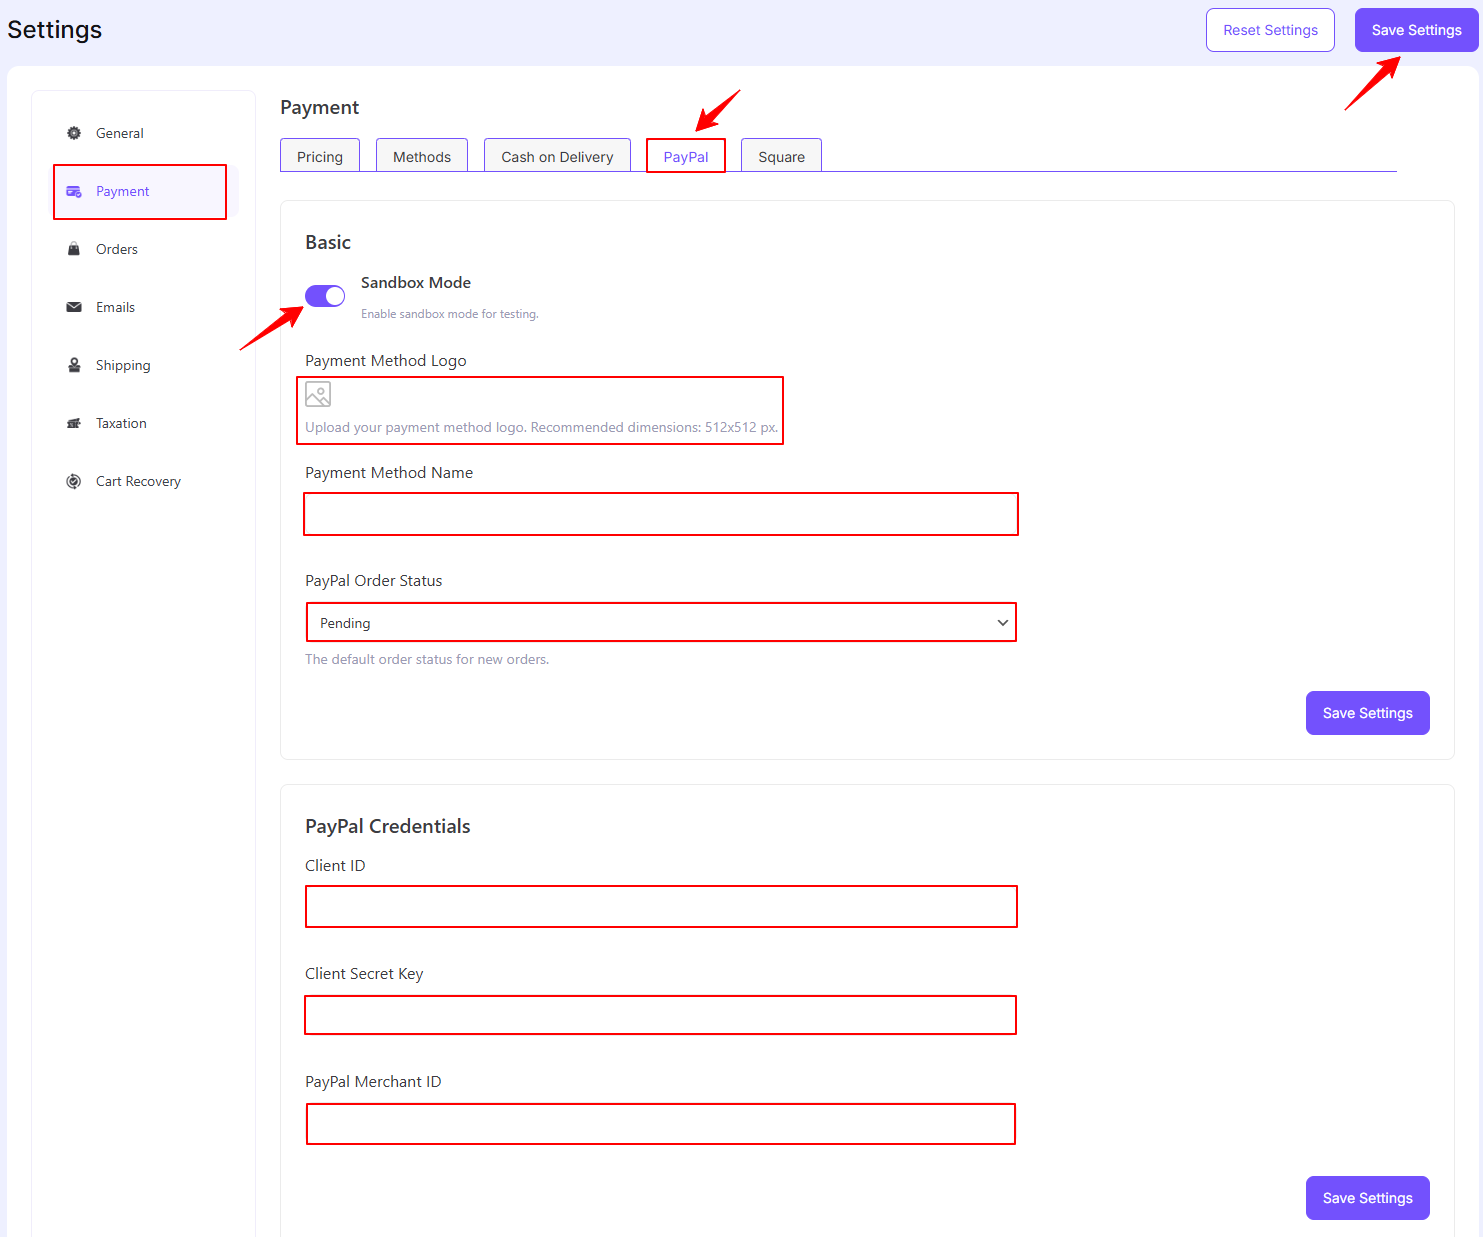
Step 2: Configure PayPal Settings
- Access the PayPal addon settings tab, beside the ‘Methods’ tab.
- Enable the ‘Sandbox Mode’ (optional).
- Enter your PayPal credentials, i.e. Client ID, Client Secret Key and PayPal Merchant ID to verify your connection.
- Finally, tap ‘Save Settings’ to store the changes.
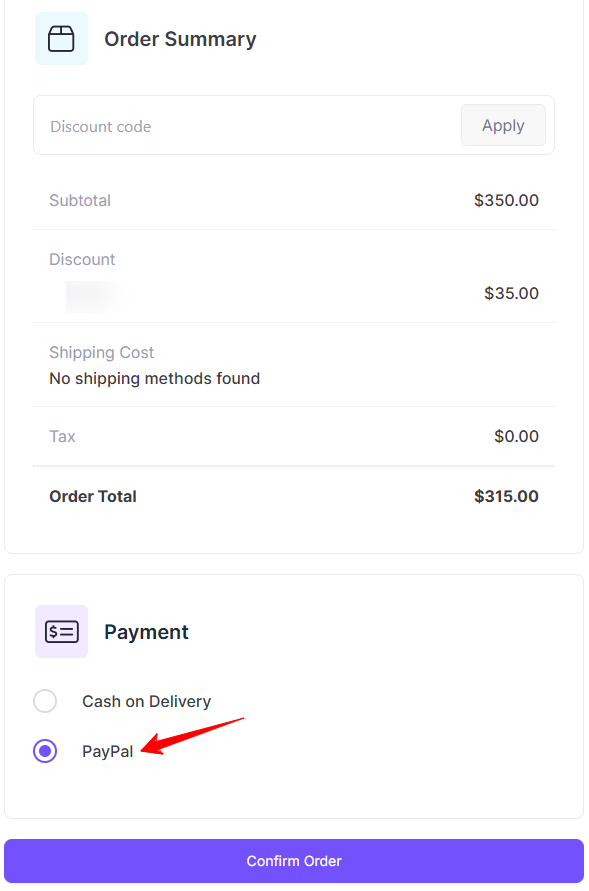
Step 3: Test the Integration
- Test your account for accurate transaction activities using PayPal’s Sandbox Environment.
- Once testing is complete, switch to live mode and start accepting payments.
Was this doc helpful?