


Wishlist for EasyCommerce
Enhance your EasyCommerce store with the Wishlist Integration addon. It is a powerful feature that helps customers save their favorite products, organize their shopping, and return later to complete purchases. This guide will walk you through the quick and easy setup process to get the wishlist up and running on your store.
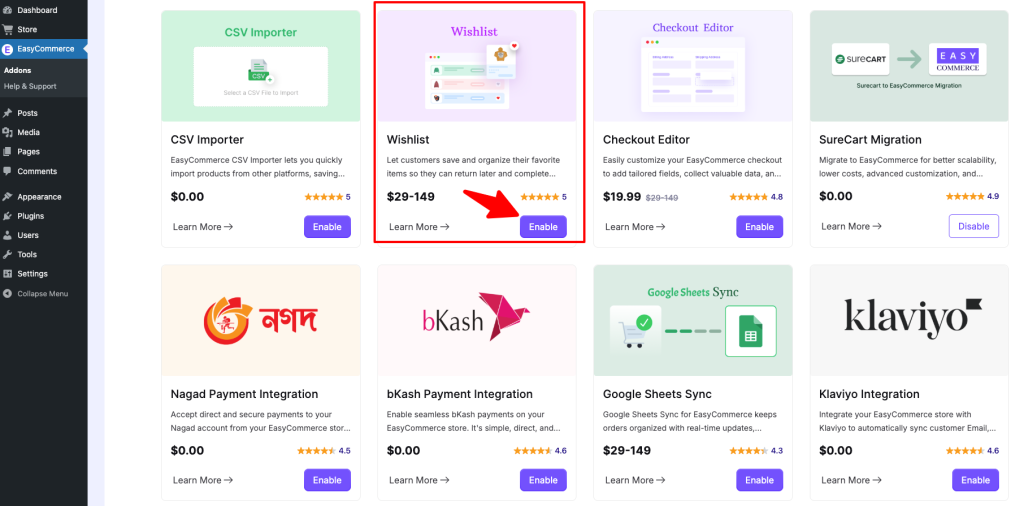
Step 1: Activate the Addon
- Log in to your WordPress dashboard.
- Navigate to EasyCommerce > Addons.
- Find the Wishlist Integration addon and click “Enable”.
- When installing for the first time, EasyCommerce will ask for a license key to install and activate the addon. Provide it.
- EasyCommerce will automatically download, install, and activate the addon for your store.
Read another documentation on how to install and activate a paid addon on EasyCommerce.
Step 2: Love Icon on Product and Shop Pages
- Once activated, a heart (love) icon will appear on each product in your Shop and Product pages.
- Customers can click the icon to add items to their wishlist.
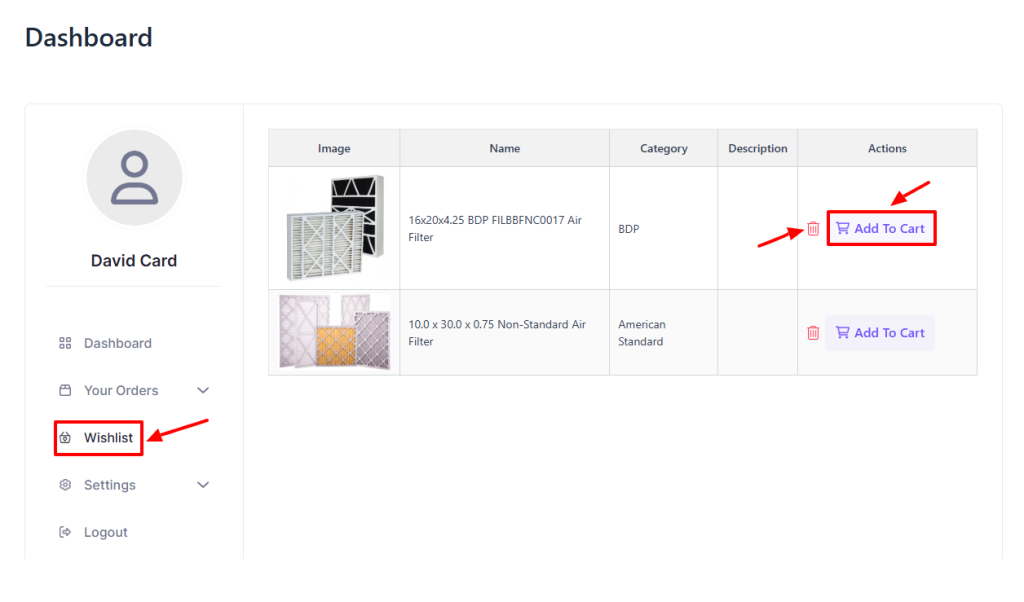
Step 3: Access the Wishlist Menu
- A new Wishlist menu will be available on your customer dashboard page.
- From there, customers can:
- View all items they've added to wishlist
- Delete items they no longer want
- Add to Cart directly from the wishlist
You're All Set!
Was this doc helpful?