


Email Settings
How to Customize the Email Header and Footer Section
EasyCommerce comes with a built-in email functionality that lets you configure complete email functionality to your ecommerce business.
You can customize the email header, footer and overall layout of it hassle free. The best part is you don't have to pay for using this stock feature. Easily customize each section of your business emails. Add images and choose colors to make your emails look more attractive and on-brand.
To configure an email, go to your WordPress dashboard, then Store> Settings> Emails and follow the steps below-
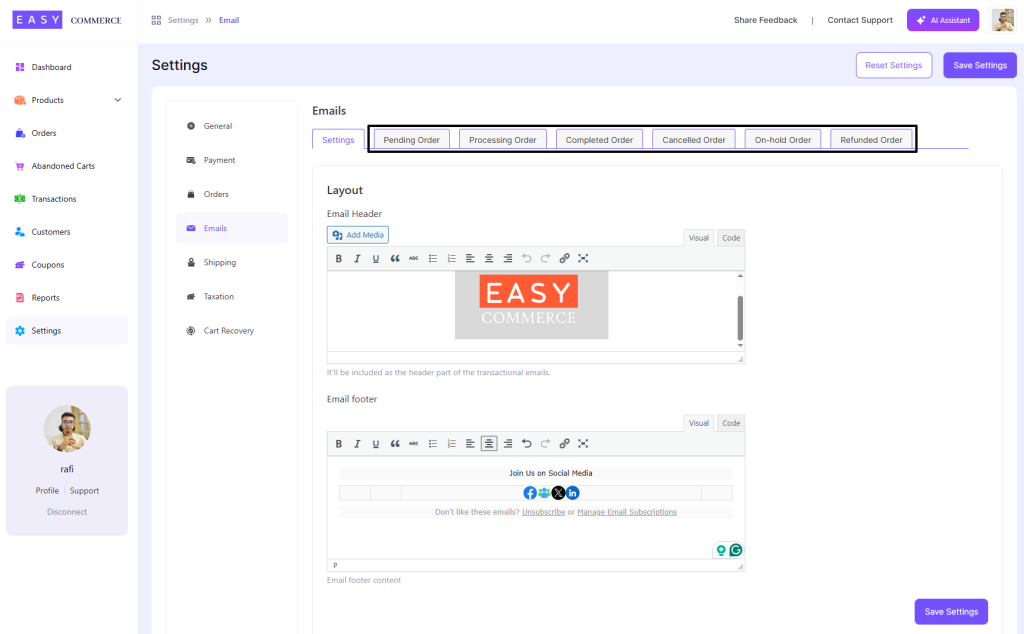
Settings:
- Add Your Email Logo: Click on the image area under Email Header to upload your logo. The recommended use of logo size is 512×512 pixels..
- Set the Email Header Design: Use the editor to customize your email header. You can insert an image, add styled text, or use HTML code in the Visual or Code tabs to reflect your brand’s identity.
- Customize the Email Footer: Scroll to the Email Footer section and enter your footer text, such as your store name, copyright notice, or contact info. You can also insert images or custom HTML here.
Layout:
- Set the Container Width (Optional): You can adjust the width of your email content container. The default is 600px, which is optimal for most email clients.
- Body Background: Choose the background color for the main content area of your emails.
- Container Background: Set the background color of the email wrapper (the outer area around the content).
You can use the color picker or enter a hex code to stay consistent with your brand palette.
Once you're done customizing, click the Save Settings button at the bottom or top-right corner to apply your changes.
Email Formats
EasyCommerce provides a variety of email templates designed to meet various ecommerce needs, below is a list of templates you can customize and send with our plugin.
- Pending – Sent when an order is placed but not yet paid.
- Processing – Sent after payment; order is being prepared.
- Completed – Sent when the order is fulfilled and shipped/delivered.
- Canceled – Sent if the order is canceled by the store or customer.
- On Hold – Sent when an order is paused and needs manual action.
- Refunded – Sent when a refund is issued to the customer.
Note: Each of these email action can trigger sending a mail to both you (admin) and your customers.
To configure any of these email templates-
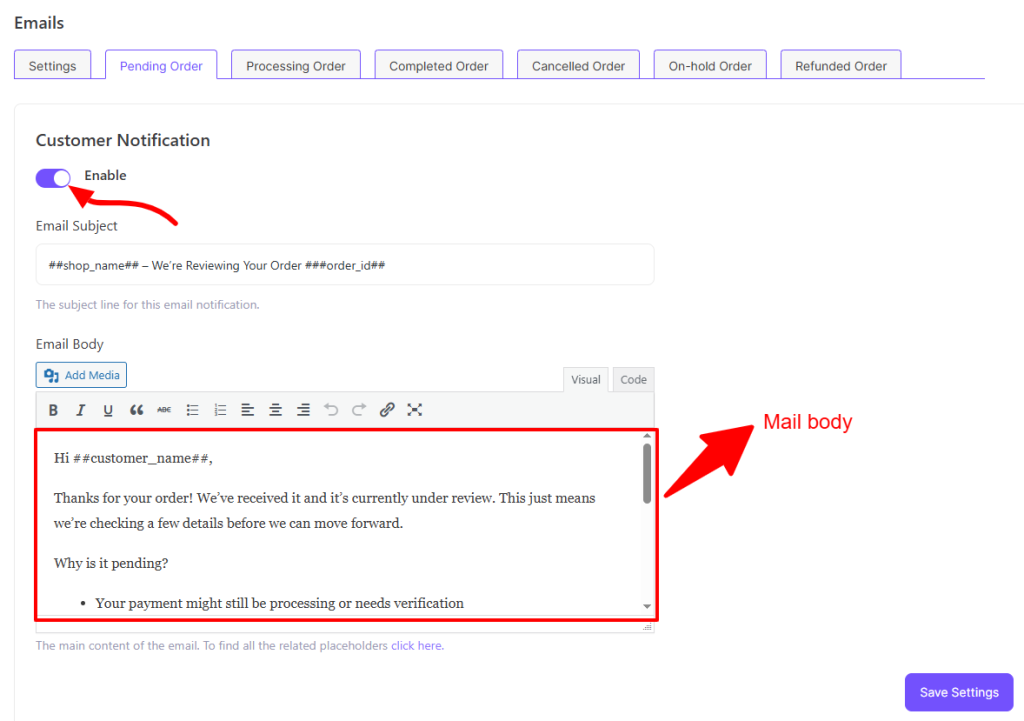
- Toggle activating the email first.
- Place a catchy subject line.
- Then write the core email body matching the intent of the email type.
- Add media files as per requirement.
- Format the text as well as visuals using various default elements.
Each email is pre-configured with smart placeholders to personalize the message using the recipient’s own order details. Click here to access the full placeholder list.
Was this doc helpful?