


EasyCommerce Subscriptions
The EasyCommerce Subscription Addon lets you sell both digital and physical products using recurring billing. It’s ideal for software of sale access, downloadable packs, product refills, coaching sessions, and more.
⚠️ This is a paid addon. You’ll need a valid license key to activate and use it after installation.
Follow the steps below to install, activate, and start using the Subscription Addon on your EasyCommerce-powered store.
Step 1: Install & Activate the Addon
- Sign in to your WordPress dashboard.
- Navigate to EasyCommerce > Addons.
- Find the Subscription Addon, then click Enable.
- You will be prompted (via the Activate License modal) to enter your license key for this addon.
- After successful activation, the addon will be installed and ready to use.
If you don’t have a license key, click on the Get Your License Now button and complete the purchase. After completion, you’ll be taken to your EasyCommerce customer dashboard. The license key will be accessible from there.
Need help? See our guide on activating paid EasyCommerce addons.
Step 2: Enable Subscription for a Product
Go to Store > Products and open an existing product or create a new one. Under the Pricing section, enable the Subscription checkbox.
You’ll now be able to configure the following options:
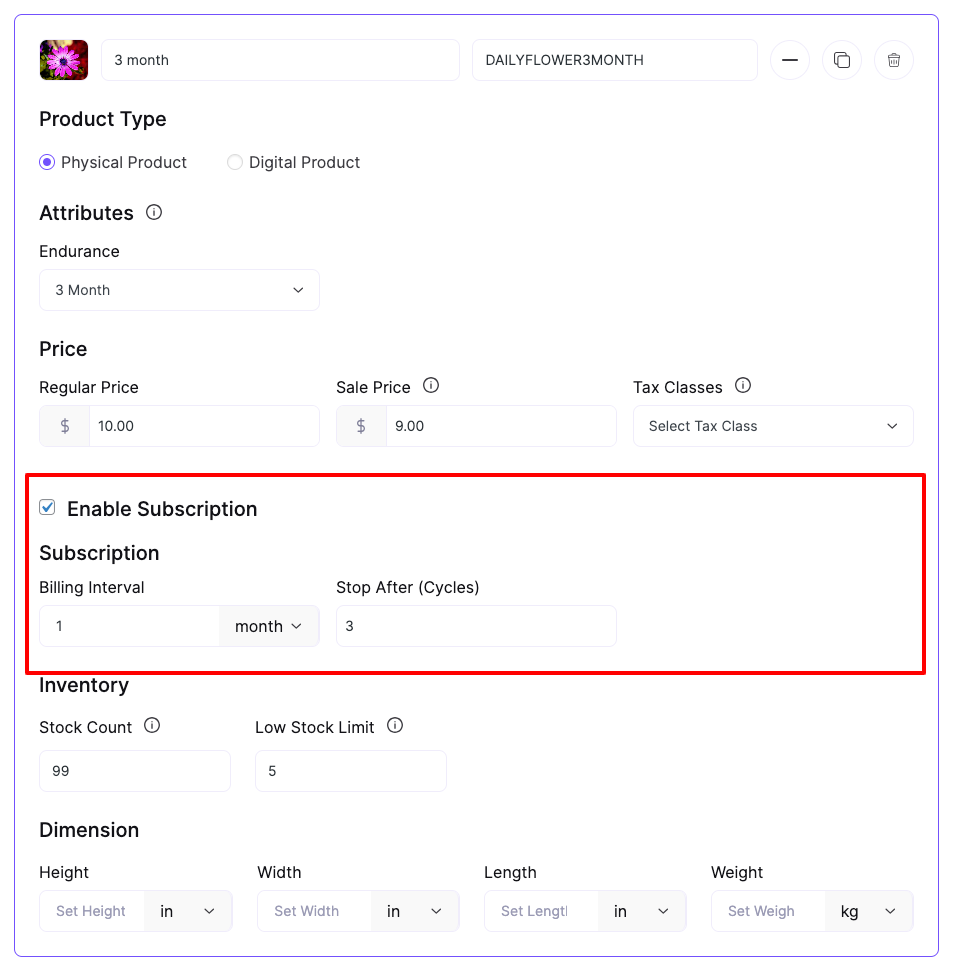
- Billing Interval – Choose how often the customer will be billed: daily, weekly, monthly, or yearly.
- Billing Cycle Limit – Define how many times the billing should occur (e.g., charge for 6 months, then stop).
Lastly, complete the rest of the process of adding a product and click Save Product to apply subscription settings to the product.
Step 3: View & Manage Subscriptions
From the WordPress dashboard, go to Store > Subscriptions.
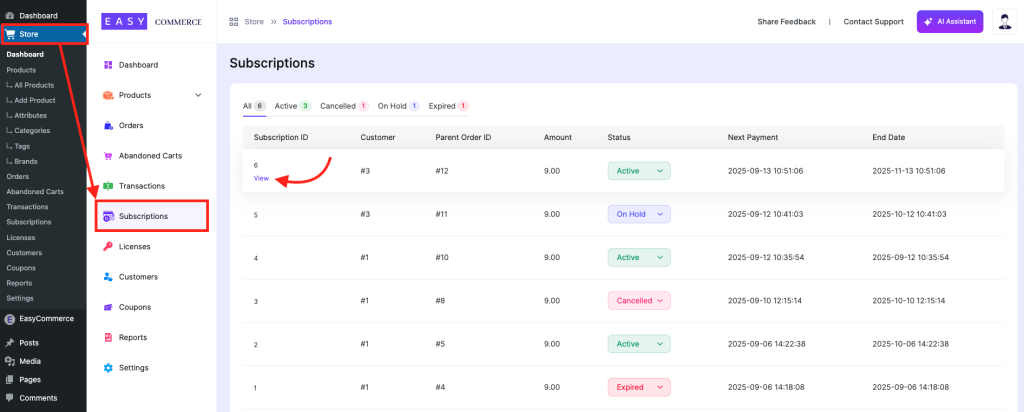
This section lists all active and past subscriptions with information like
- Customer ID
- Purchase amount
- Subscription Status (Active, On Hold, Cancelled, Expired)
- Next Payment
- End Date, etc.
Step 4: View Subscription Details
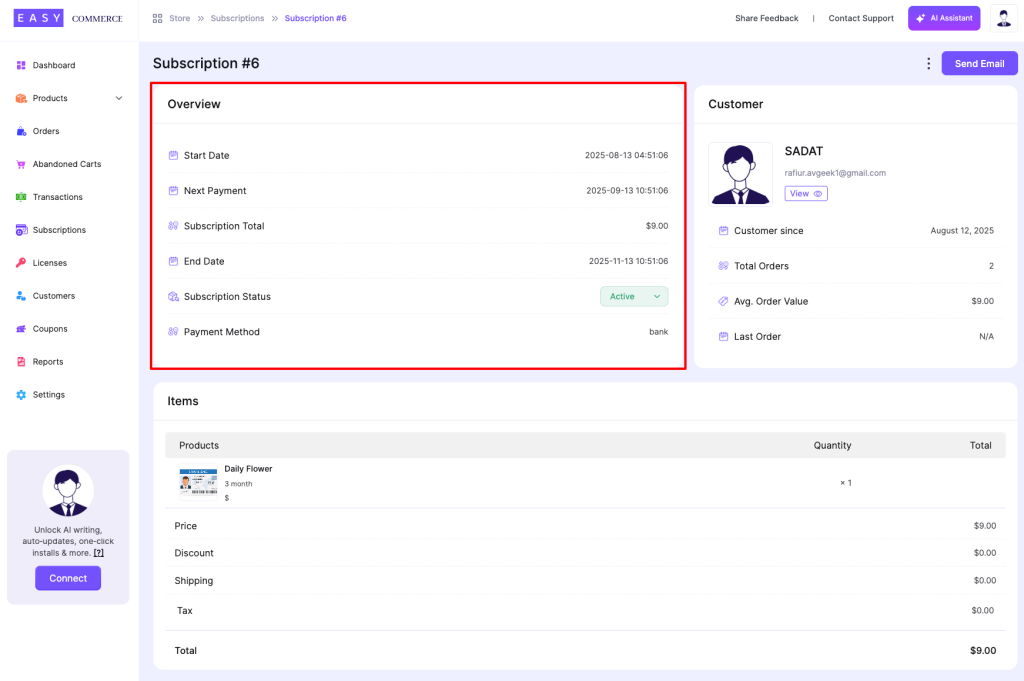
To view more about a specific subscription, hover over any entry and click View.
Inside the detail page, you’ll find:
- Full billing history
- Carted products
- Payment status
- Send email
From now on, the journey is almost similar to managing an ordinary order.
Step 5: Test the Subscription Flow
Before going live, test your subscription setup:
- Purchase the product through your storefront using a test email (not used in your store previously).
- Confirm that the first payment is successful and the subscription is active.
- Go to Store > Subscriptions to verify the new entry appears.
- Click into the subscription to check its billing status, next renewal date, and logs.
Was this doc helpful?