


Integrating your Razorpay account into your ecommerce website is seamless with the EasyCommerce payment gateway addon. Razorpay lets your customers pay with credit and debit cards, UPI, net banking, and popular wallets through a secure checkout modal. Follow these simple steps for a smooth setup.
To learn more about addon activation, read this documentation on how to activate addons on EasyCommerce.
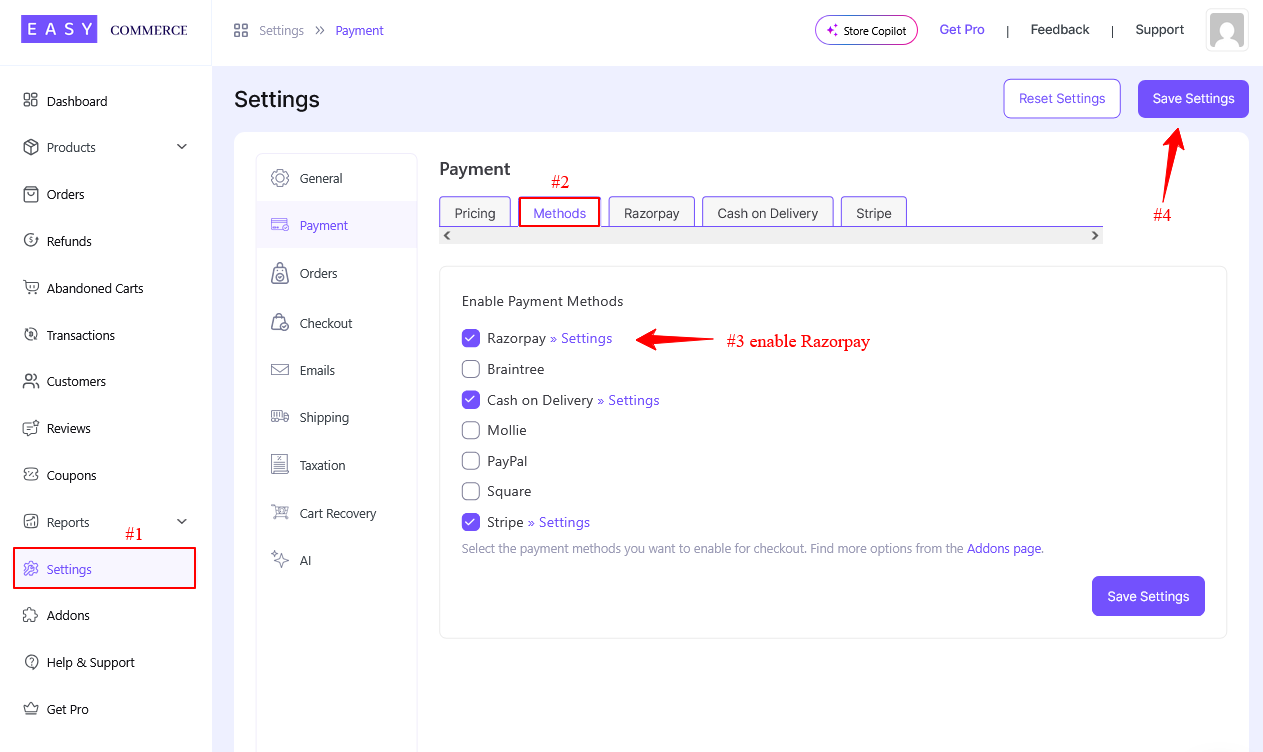
Step 1: Navigate to Payment Settings
- Go to Store > Settings > Payment > Methods.
- Select Razorpay as your payment gateway.
- Tap ‘Save Settings‘ to finalize the changes.
Step 2: Create an OAuth App in Razorpay
Razorpay connects to EasyCommerce through OAuth 2.0. You need an OAuth app in your Razorpay Dashboard before you configure the addon.
- Log in to your Razorpay Dashboard and open the OAuth Apps section.
- Create a new OAuth app.
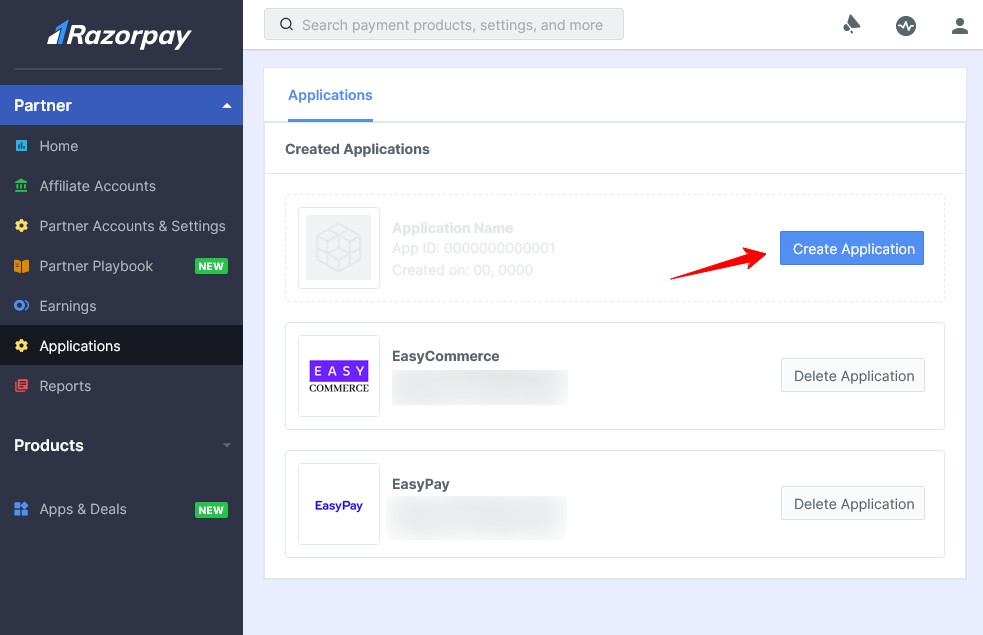
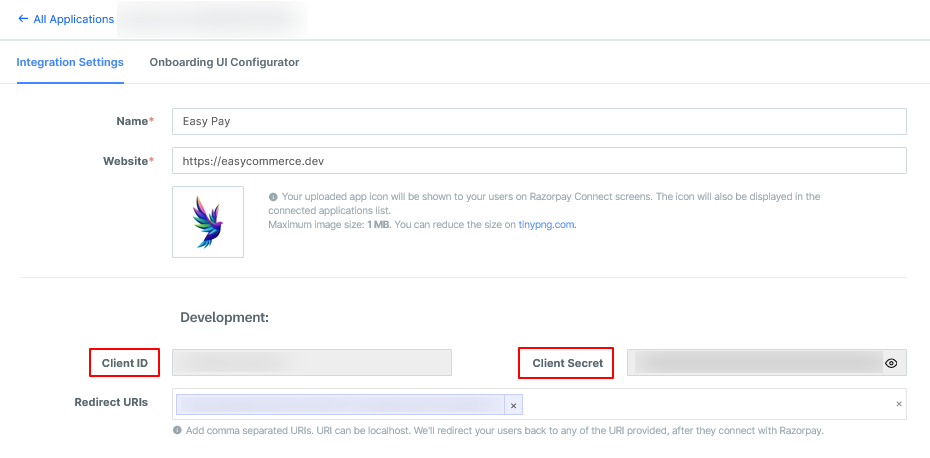
- Copy the Client ID and Client Secret. You will need both in the next step.
Step 3: Configure Razorpay Settings
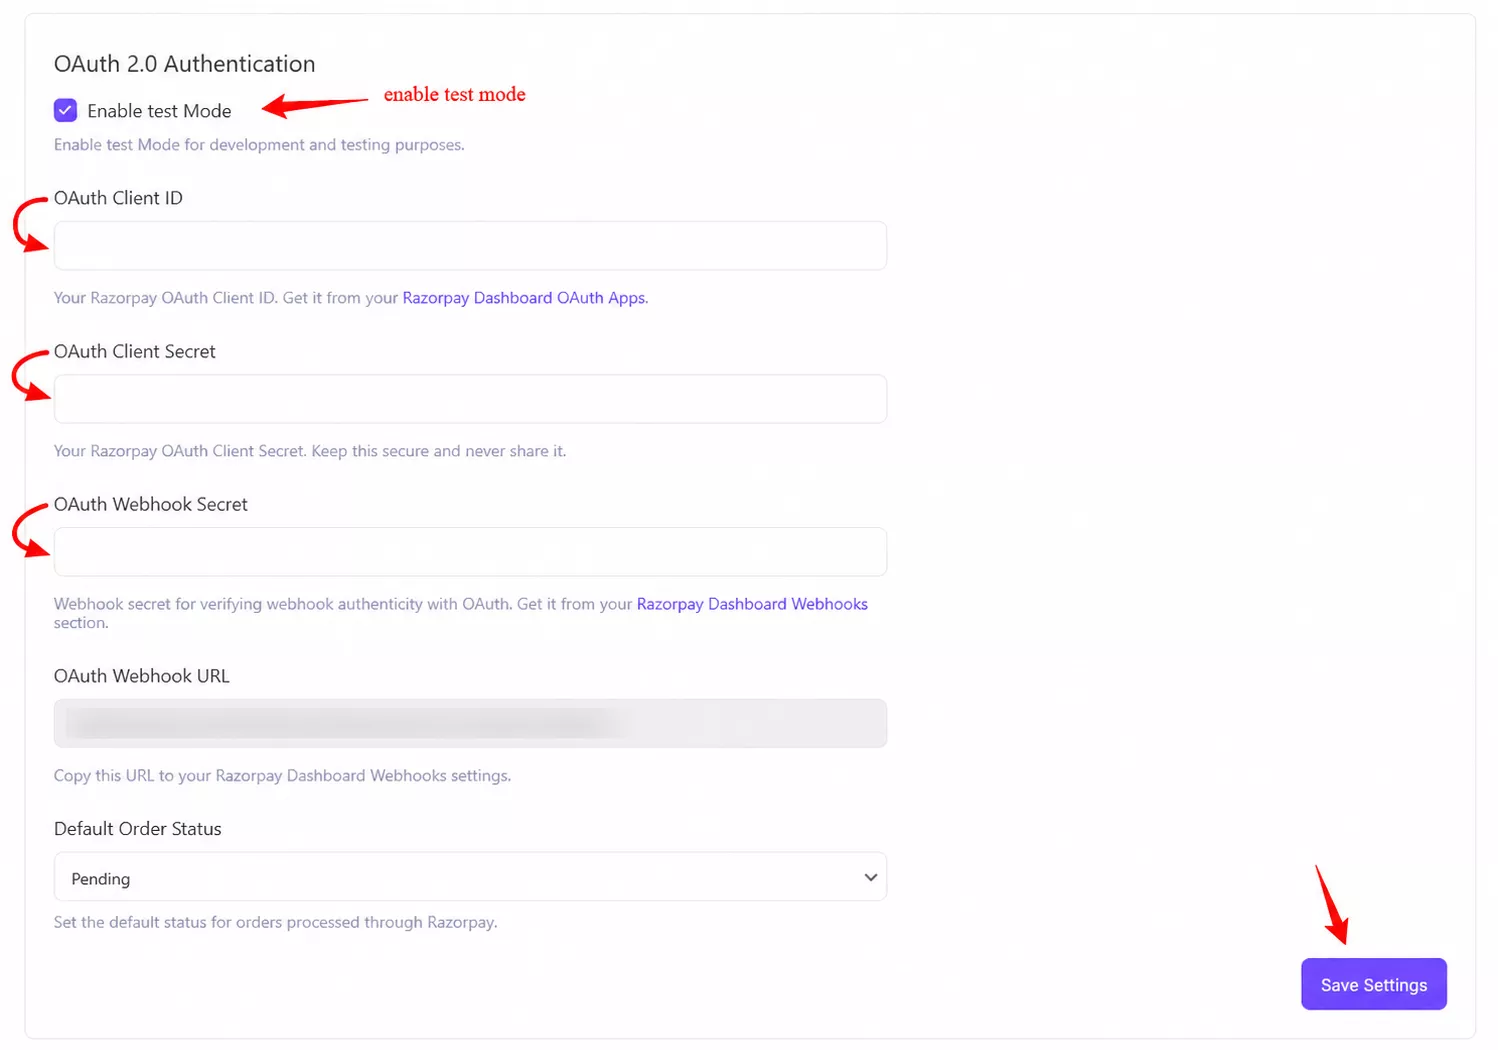
- Access the Razorpay addon settings tab beside the ‘Methods’ tab.
- Enable the ‘Test Mode‘ (optional). Use your Razorpay test credentials while this is on.
- Configure the payment gateway settings with a name, logo, and default order status.
- Enter your OAuth Client ID and OAuth Client Secret from Step 2.
- Finally, tap ‘Save Settings‘ to store the changes.
Step 4: Connect Your Razorpay Account
- Copy the Redirect URL shown in the Connect Account section and add it to your Razorpay OAuth app settings.
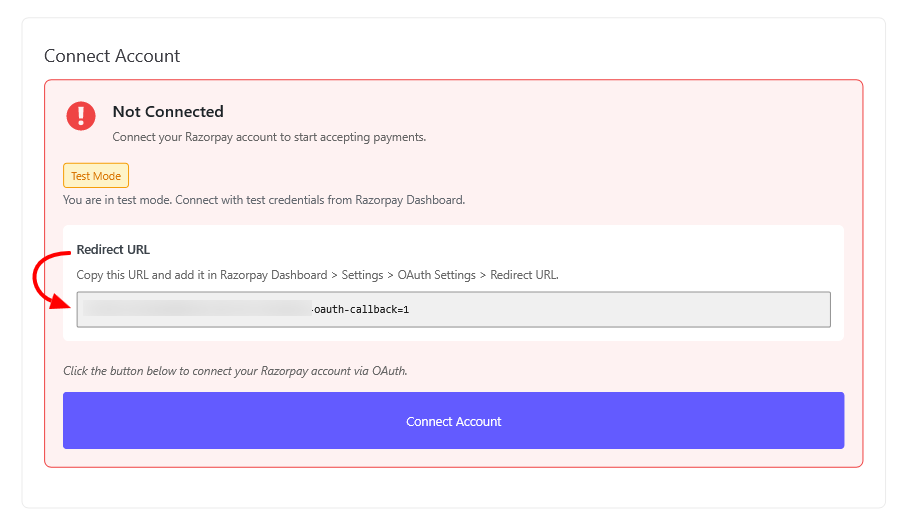
- Tap ‘Connect Account‘. You will be redirected to Razorpay to authorize the connection.
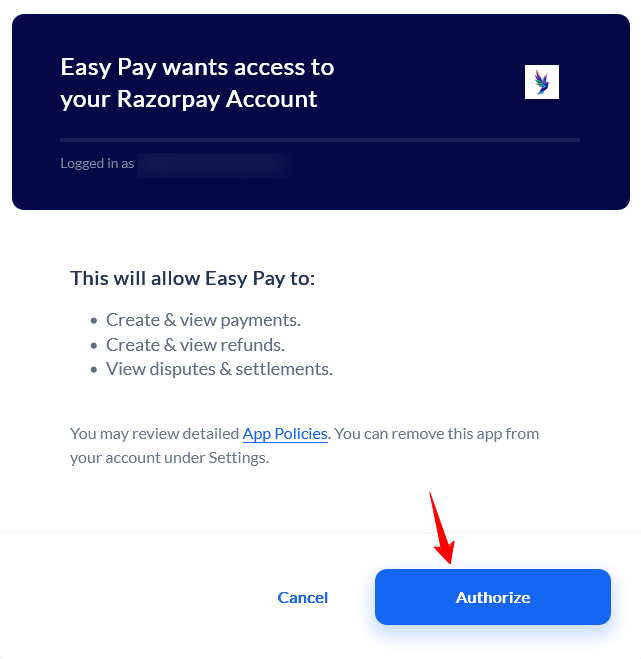
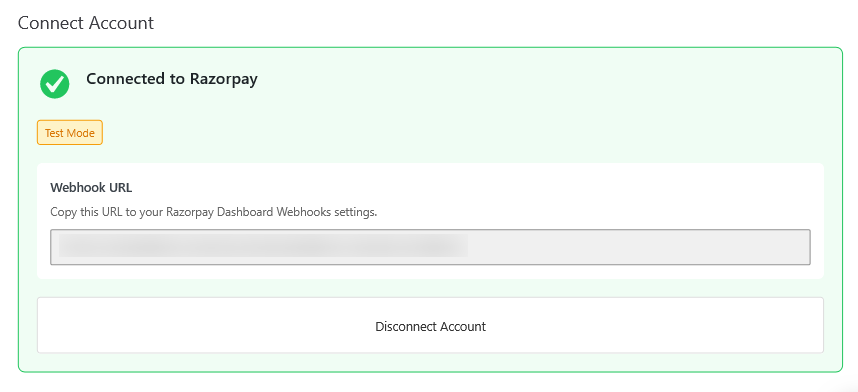
- Approve the request. You will return to your store with a ‘Connected to Razorpay‘ confirmation.
- Your access tokens are stored encrypted and refreshed automatically. Tap ‘Disconnect Account‘ anytime to revoke the connection.
Step 5: Set Up the Webhook
Webhooks keep your order statuses in sync with Razorpay in real time, even if a customer closes the browser before returning to your store.
- Copy the OAuth Webhook URL from the addon settings.
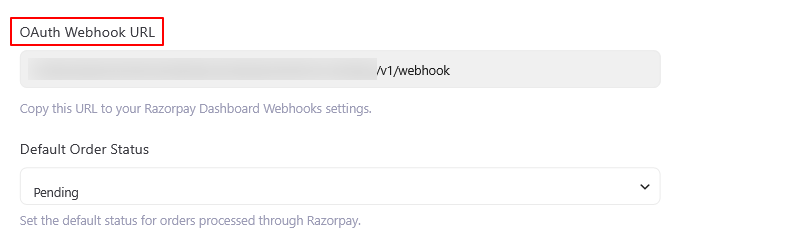
- Go to the Webhooks section in your Razorpay Dashboard and add the URL as a new webhook.
- Enable these events: payment.captured, payment.failed, and refund.created.
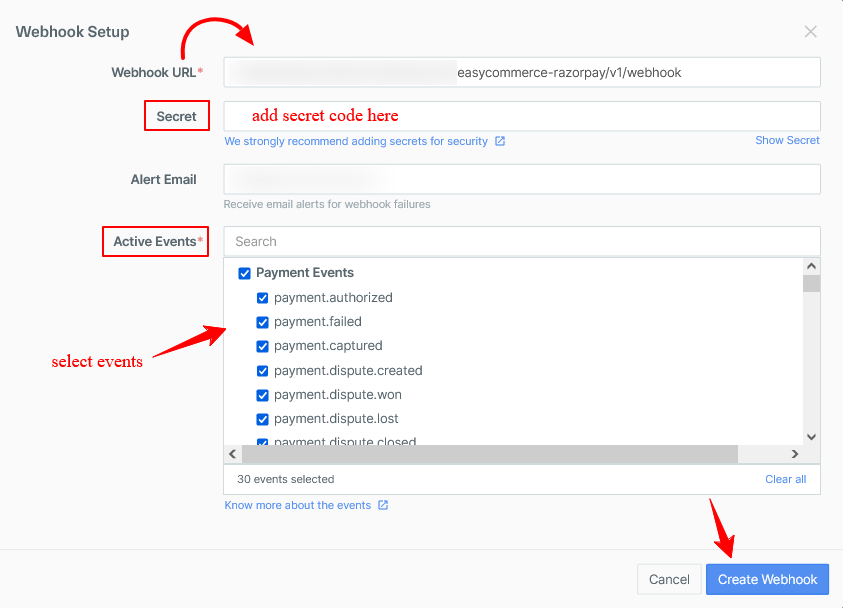
- Copy the Webhook Secret from Razorpay and paste it into the OAuth Webhook Secret field in the addon settings.
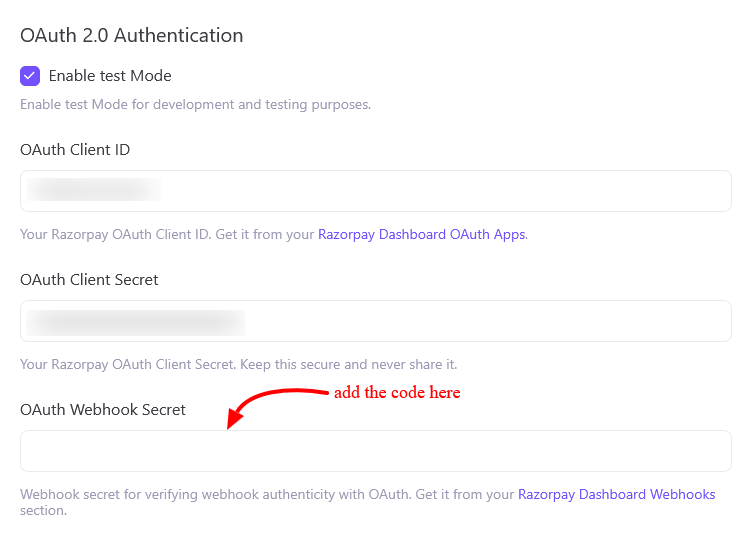
- Tap ‘Save Settings‘ to store the changes.
Step 6: Test the Integration
- Keep ‘Test Mode‘ enabled and connect with your Razorpay test credentials to run end-to-end test transactions.
- Place a test order and confirm that the payment completes, the order status updates, and the transaction appears in your Razorpay Dashboard.
- Once testing is complete, disable Test Mode, reconnect with your live credentials, and start accepting payments.
How Razorpay Payments Work on Your Store
- At checkout, customers pick Razorpay and pay through Razorpay’s official checkout modal without leaving your store. Their name, email, and phone are pre-filled.
- Every payment is verified with an HMAC-SHA256 signature check before the order is marked successful. Failed or unverified payments are marked as failed automatically.
- You can issue full or partial refunds straight from your EasyCommerce order screen. The refund is processed through the Razorpay Refunds API and confirmed via webhook.
Was this doc helpful?