


Connect your FedEx account to your ecommerce website with the EasyCommerce FedEx shipping addon. It fetches live FedEx shipping rates at checkout, lets your customers pick the service they want, and creates shipments with tracking numbers and printable labels right from your order screen. Follow these simple steps for a smooth setup.
To learn more about addons activation, read this documentation on how to activate addons on EasyCommerce.
Step 1: Get Your FedEx API Credentials
The addon connects to FedEx through the official FedEx APIs. You need three things from FedEx before you configure the addon.
- Log in to the FedEx Developer Portal and create a project.
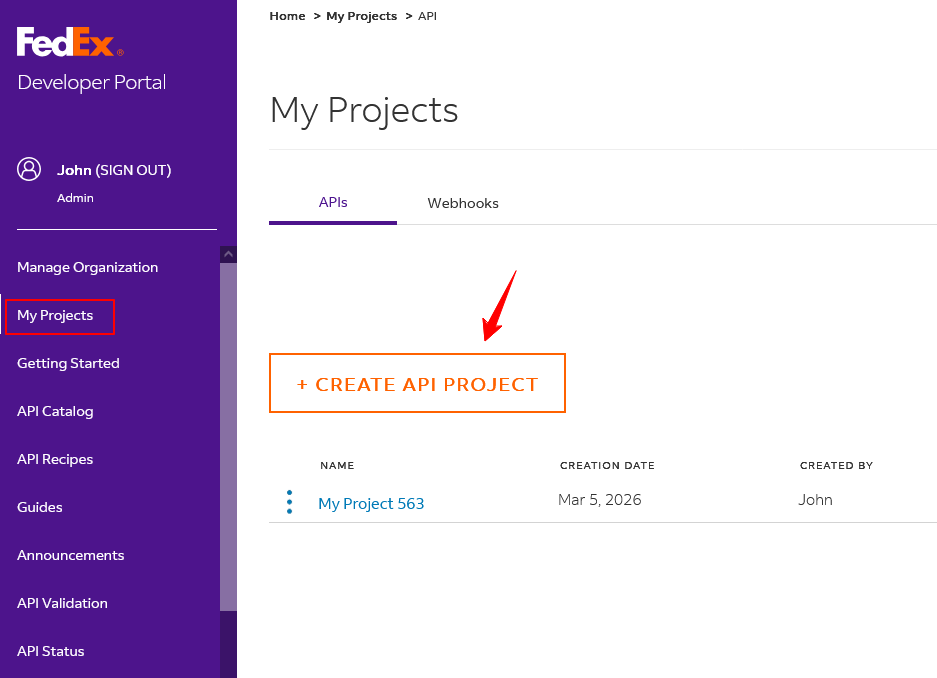
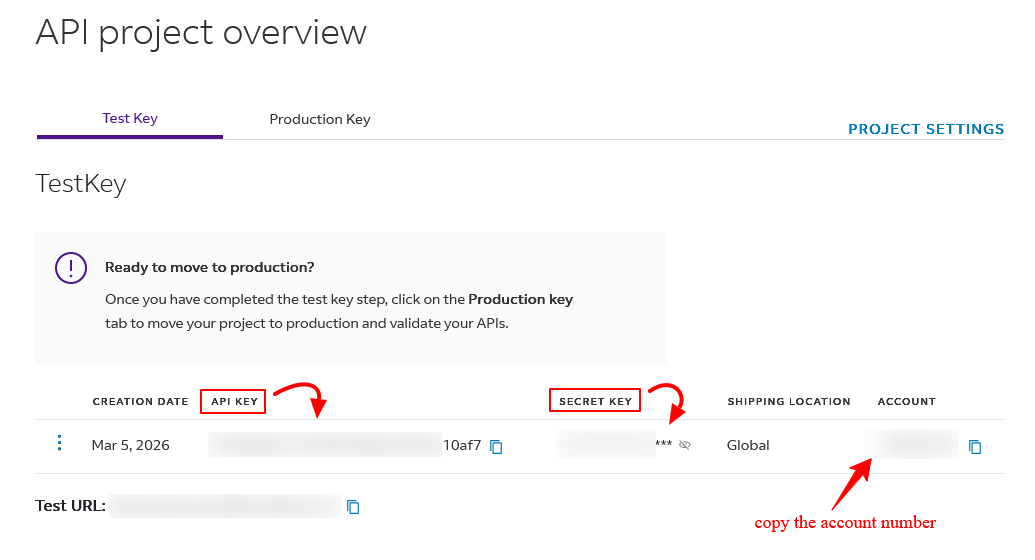
- Copy the API Key and Secret Key from your project. FedEx provides separate test and production credentials.
- Note your FedEx Account Number. FedEx uses it to return your account-specific rates.
Step 2: Configure FedEx Settings
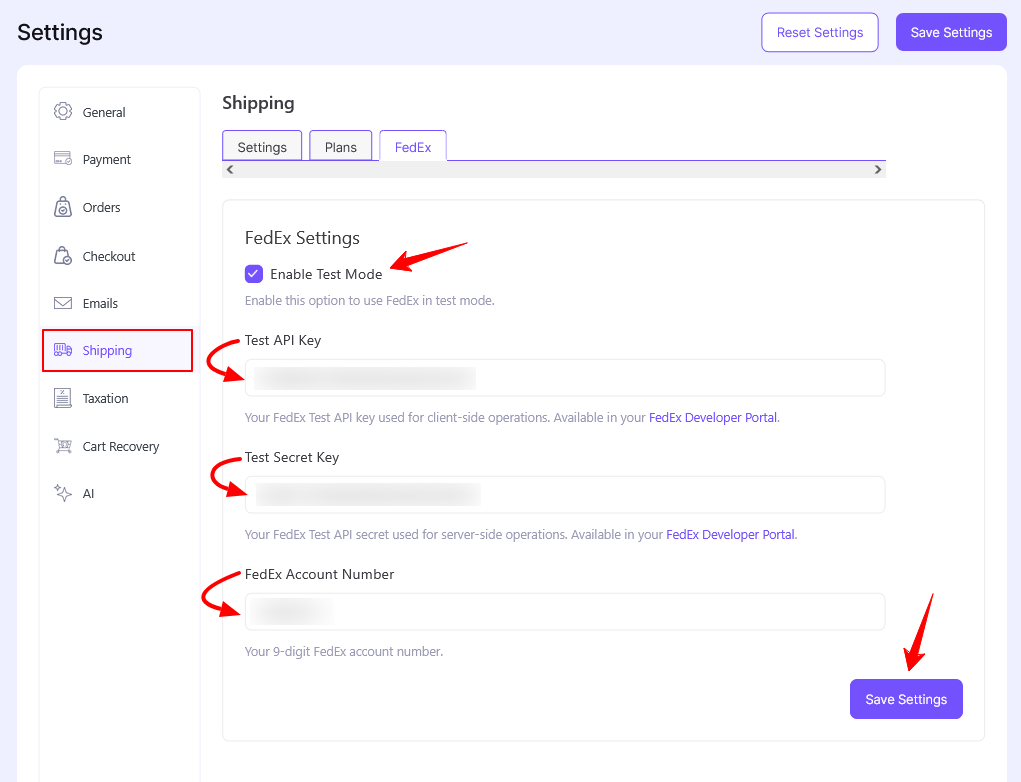
- Go to Store > Settings > Shipping > FedEx.
- Enable ‘Test Mode‘ (optional). While it is on, the addon uses your test credentials against the FedEx sandbox.
- Enter your API Key and Secret Key for live transactions.
- Enter your Test API Key and Test Secret Key for sandbox testing.
- Enter your FedEx Account Number.
- Tap ‘Save Settings‘ to finalize the changes.
Step 3: Set Your Business Postcode
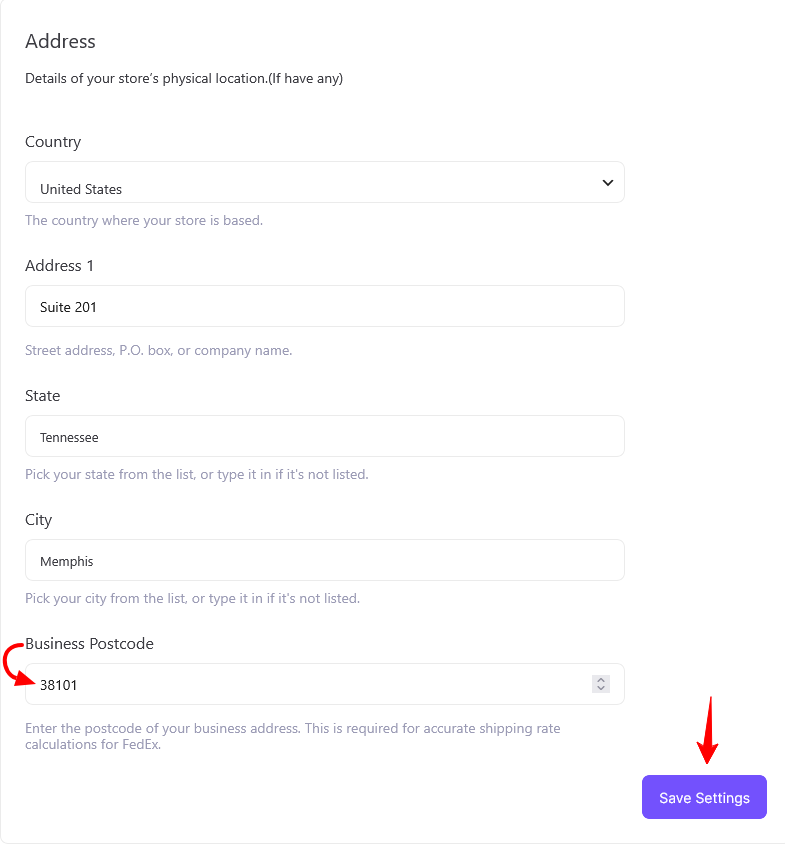
FedEx calculates rates from your business address to the customer’s address. Your business postcode is required for accurate rates.
- Go to Store > Settings > General > Business.
- Enter your Business Postcode in the address section.
- Tap ‘Save Settings‘ to store the changes.
Step 4: FedEx Rates at Checkout
No extra setup is needed here. Once the addon is configured:
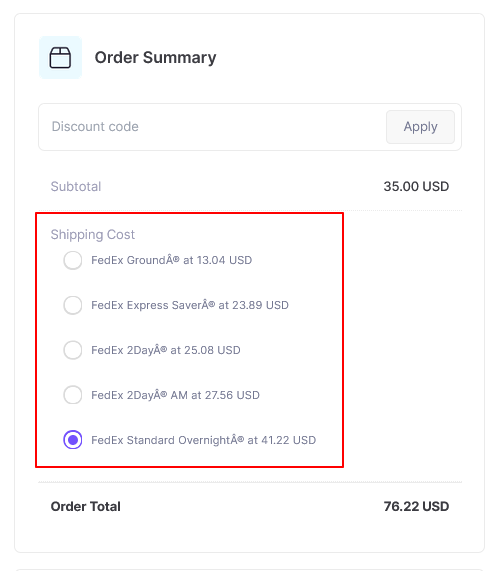
- Customers see live FedEx rates at checkout based on their shipping address, the cart contents, and your account pricing.
- The addon checks service availability for the destination first, so customers only see FedEx services that actually deliver to their address.
- The selected shipping method is remembered, so the choice stays applied if the customer updates the cart or returns later.
Note: Set a weight for your products so FedEx can quote accurate rates. Products without a weight are quoted at a default of 1 unit.
Step 5: Create Shipments from the Order Screen
When a FedEx order comes in, you can create the shipment without leaving your dashboard.
- Open the order and tap ‘Create Shipment‘.
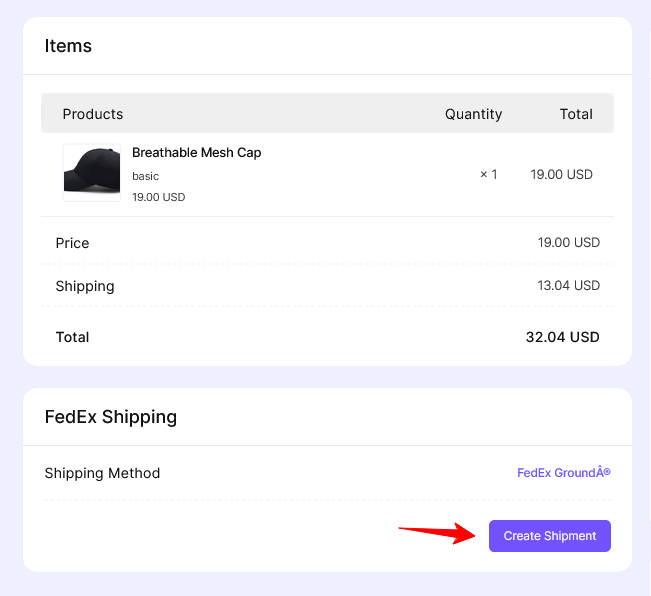
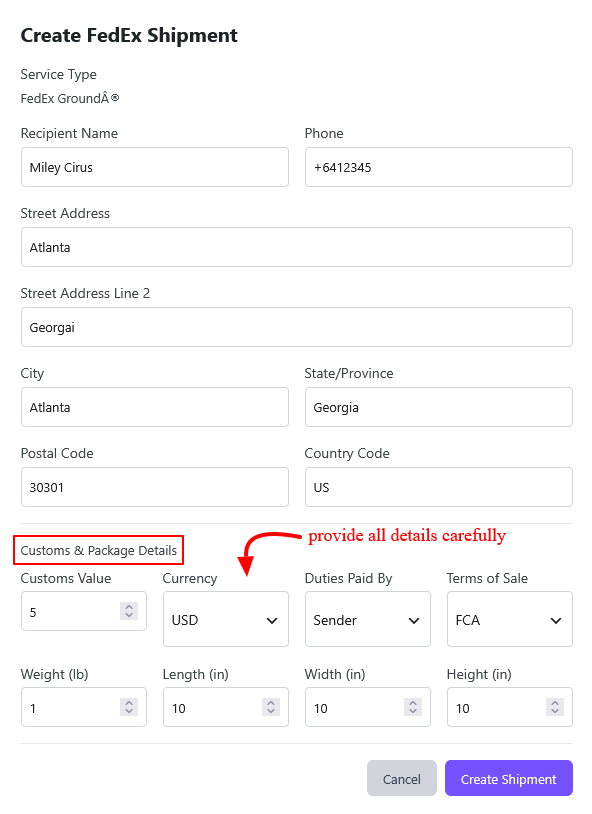
- Review the package weight and dimensions, and pick the service type.
- For international orders, fill in the customs details.
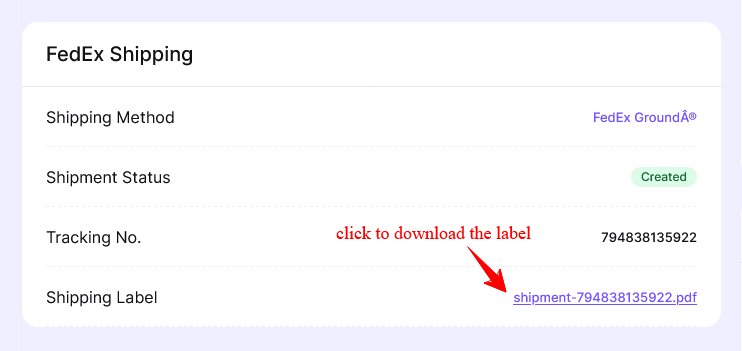
- Tap to confirm. The addon books the shipment with FedEx, saves the tracking number on the order, and marks the order as shipped.
- Tap ‘Download Label‘ to print the FedEx shipping label.
Step 6: Test the Integration
- Keep ‘Test Mode‘ enabled and use your test credentials to run end-to-end tests against the FedEx sandbox.
- Place a test order, confirm rates appear at checkout, then create a test shipment and download the label.
- Once testing is complete, disable Test Mode, and your live credentials take over automatically.
Was this doc helpful?