


Connect your EasyCommerce store to Zapier and automate your workflow with over 40 store events. The addon exposes a secure OAuth2 connection and real-time webhooks so a Zap can fire the moment a product, order, customer, coupon, or cart event happens in your store. Follow these simple steps for a smooth setup.
To learn more about addons activation, read this documentation on how to activate addons on EasyCommerce.
Note: This addon powers a custom Zapier integration built on Zapier’s Developer Platform. Setup is done once by whoever manages your Zapier integration, either through Zapier’s Platform UI or the Zapier CLI. Everything your integration needs is generated for you on the Authentication settings page.
Step 1: Open the Zapier Authentication Settings
- Go to Store > Settings > Zapier > Authentication.
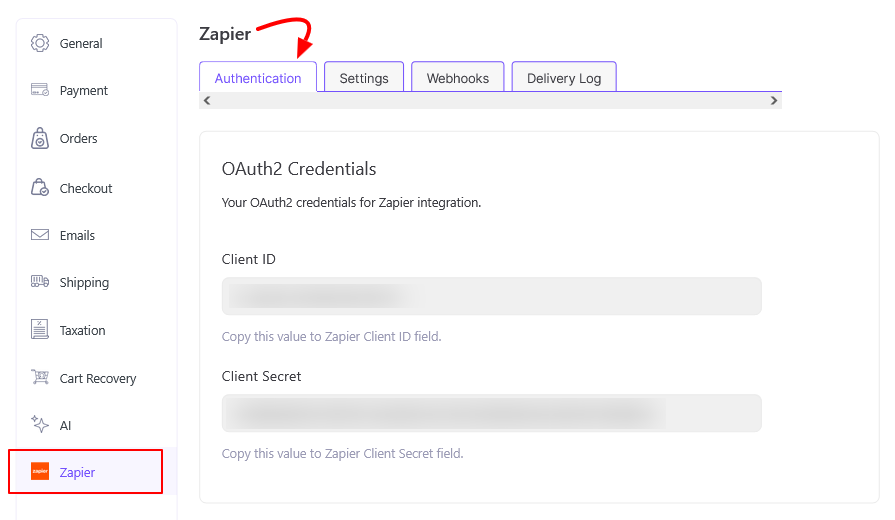
- This page lists every value your Zapier integration needs: Client ID, Client Secret, Authorization URL, Access Token URL, Refresh Token URL, Test Connection URL, and the REST Hook endpoints. All fields are read-only and ready to copy.
Step 2: Configure OAuth2 in Your Zapier Integration
In your Zapier integration’s Authentication settings, choose OAuth2.
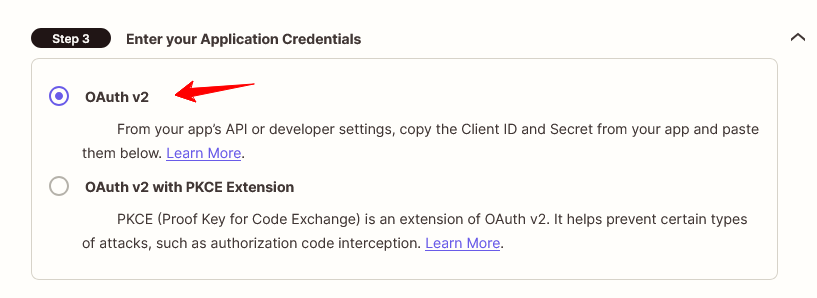
After that, copy over these values from your EasyCommerce Authentication page:
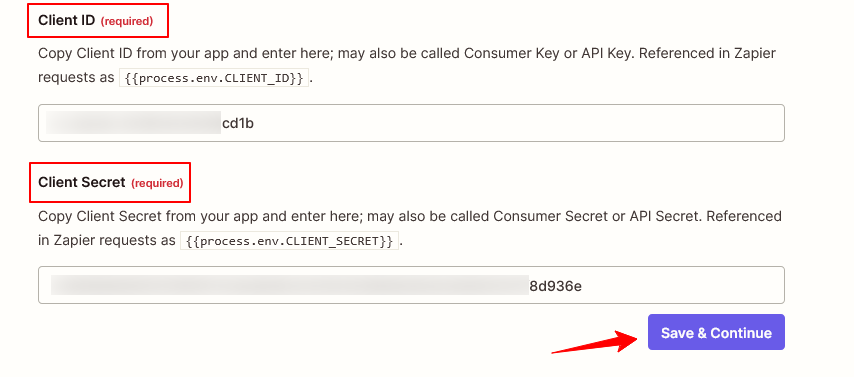
- Client ID and Client Secret.
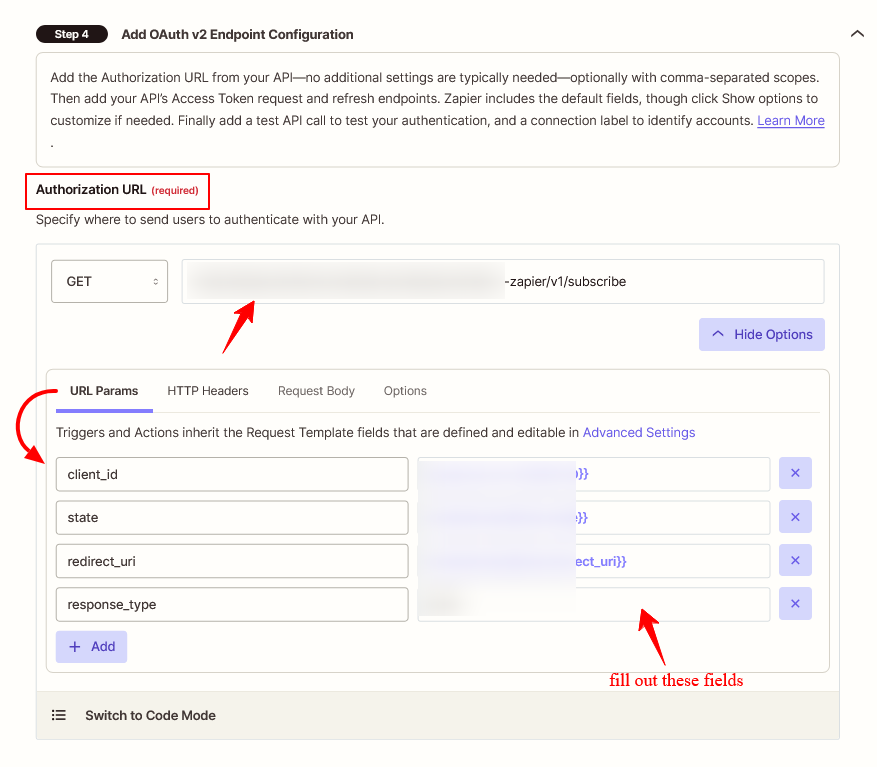
- Authorization URL and its Authorization URL Parameters.
- Access Token URL, its Access Token Parameters, and Grant Type.
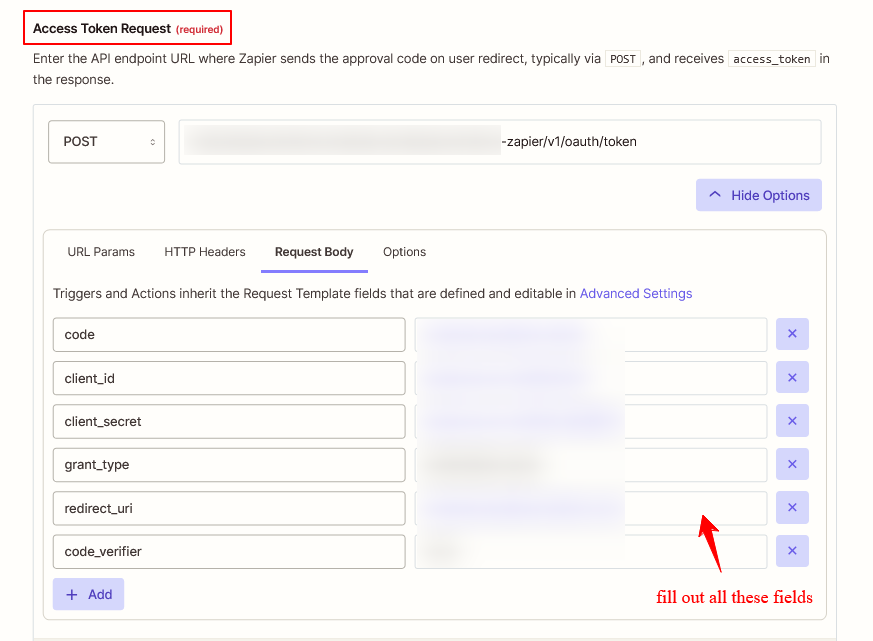
- Refresh Token URL, its Refresh Token Parameters, Grant Type, and Automatically Refresh Token setting.
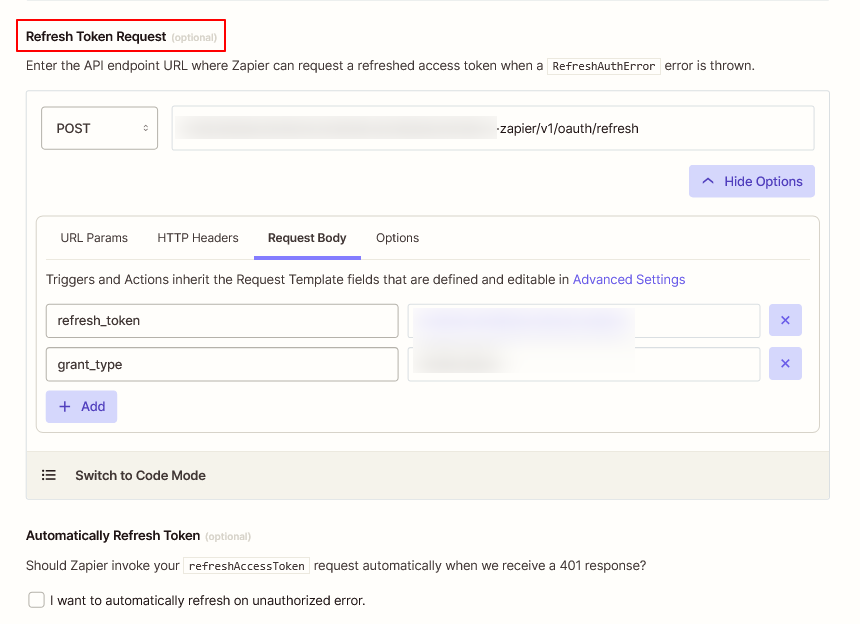
- Test Connection URL and Connection Label.
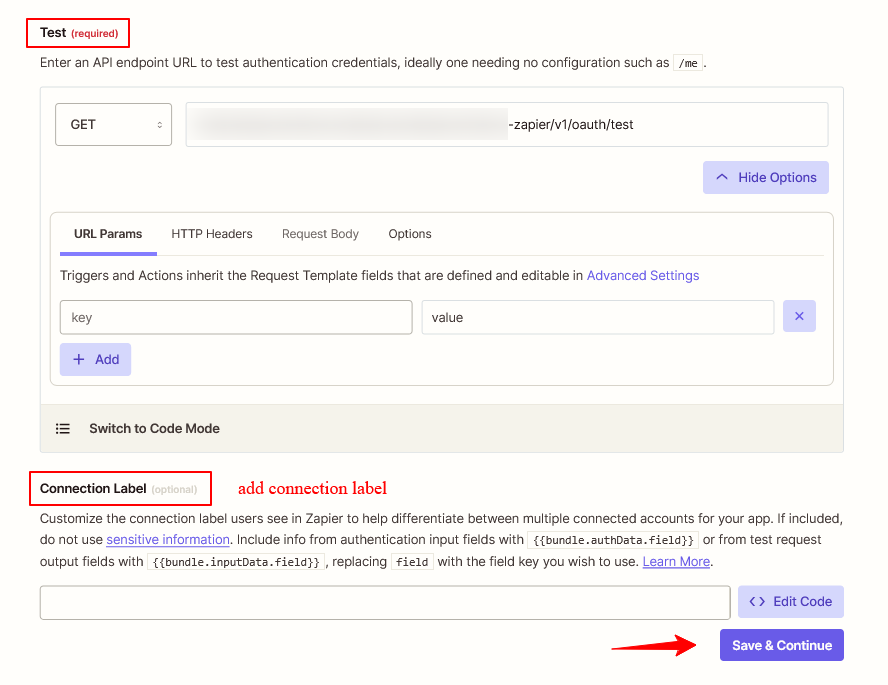
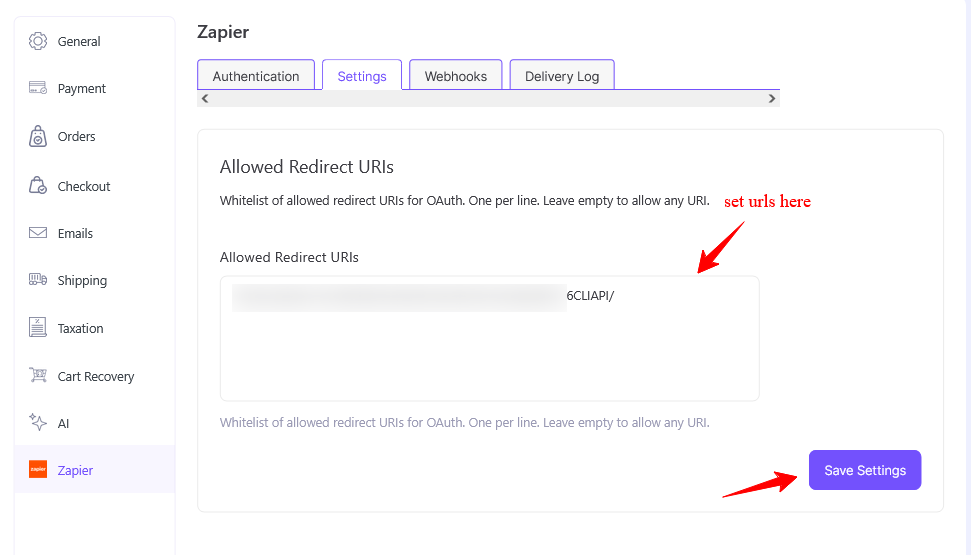
Step 3: Set Allowed Redirect URIs (Optional)
- Go to Store > Settings > Zapier > Settings.
- Add your Zapier redirect URI, one per line, to the Allowed Redirect URIs field. Leave it empty to allow any redirect URI.
- Tap ‘Save Settings‘ to store the changes.
Step 4: Set Up REST Hook Triggers
REST Hooks let Zapier subscribe and unsubscribe to events automatically, so your Zaps stay in sync without polling.
- Copy the REST Hook Instructions into the Zapier Directions field, and the Perform Instructions into the Zapier Perform field for each trigger.
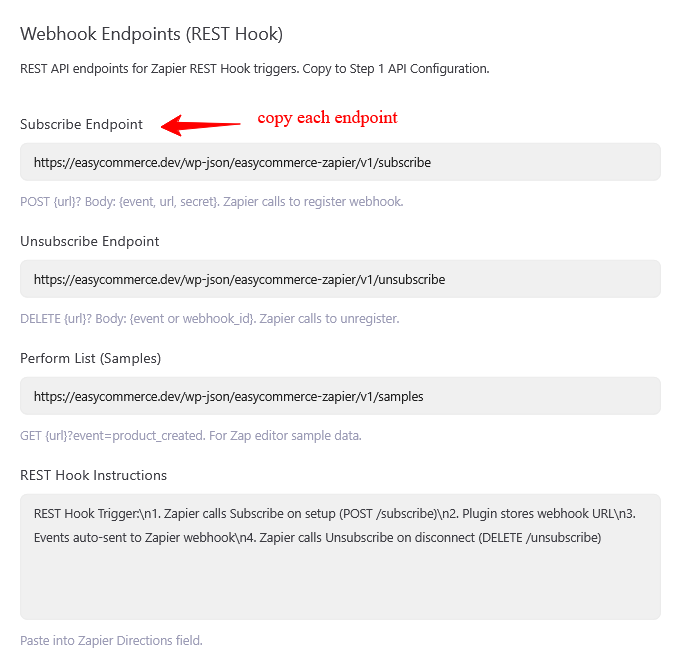
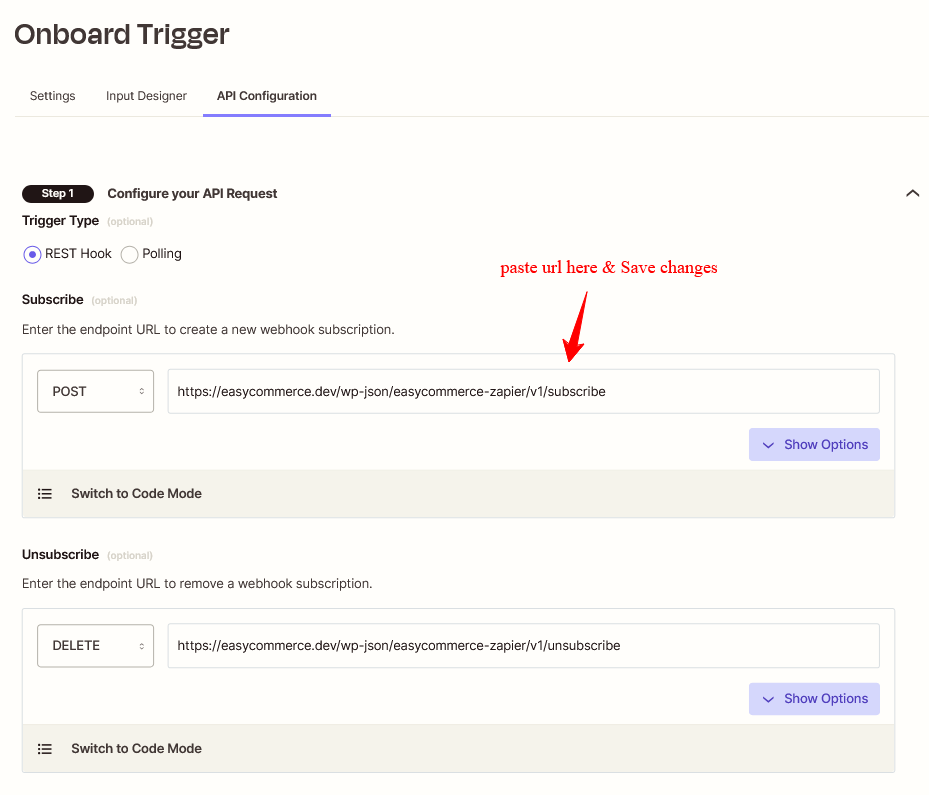
- In your Zapier integration, add the Subscribe Endpoint, Unsubscribe Endpoint, and Perform List (Samples) URLs from the Authentication page to your trigger’s API Configuration.
Step 5: Authorize the Connection
- From your Zapier integration (or when a user connects the app), start the OAuth2 flow. You’ll land on the EasyCommerce consent screen.
- Review the requested permissions, reading your store data, creating and updating records, and managing webhooks, and tap ‘Allow‘ to authorize.
- Zapier now holds an access token for your store and can subscribe Zaps to your events.
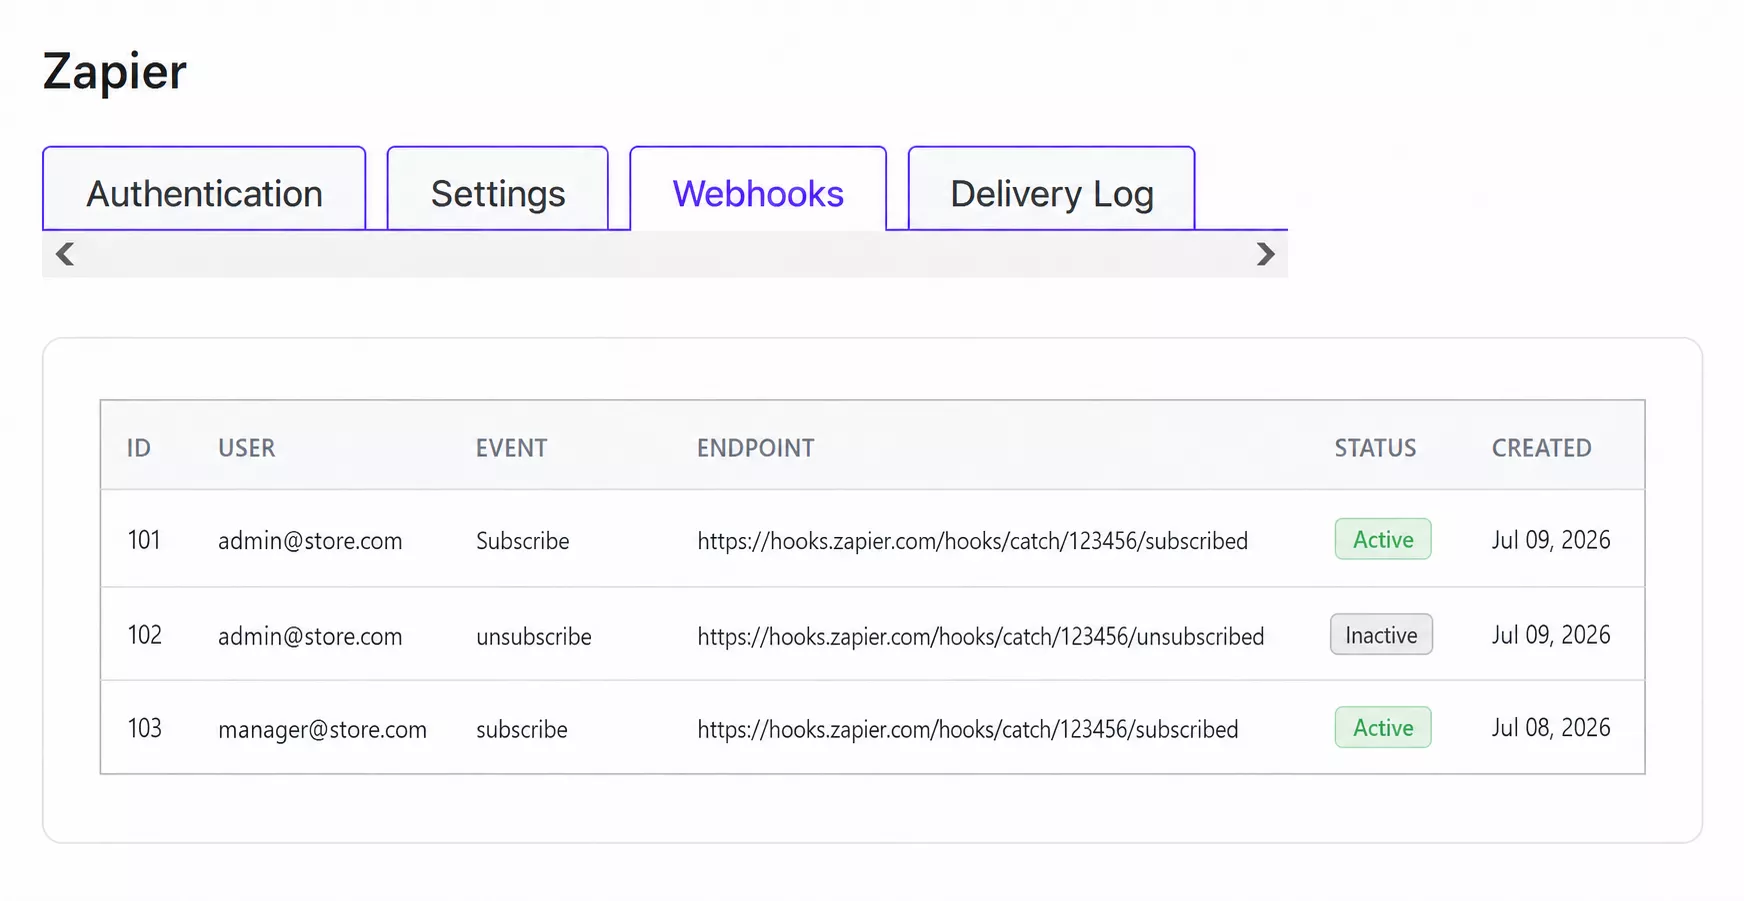
Step 6: Manage Active Webhooks
- Go to Store > Settings > Zapier > Webhooks to see every Zap currently subscribed to your store, grouped by event.
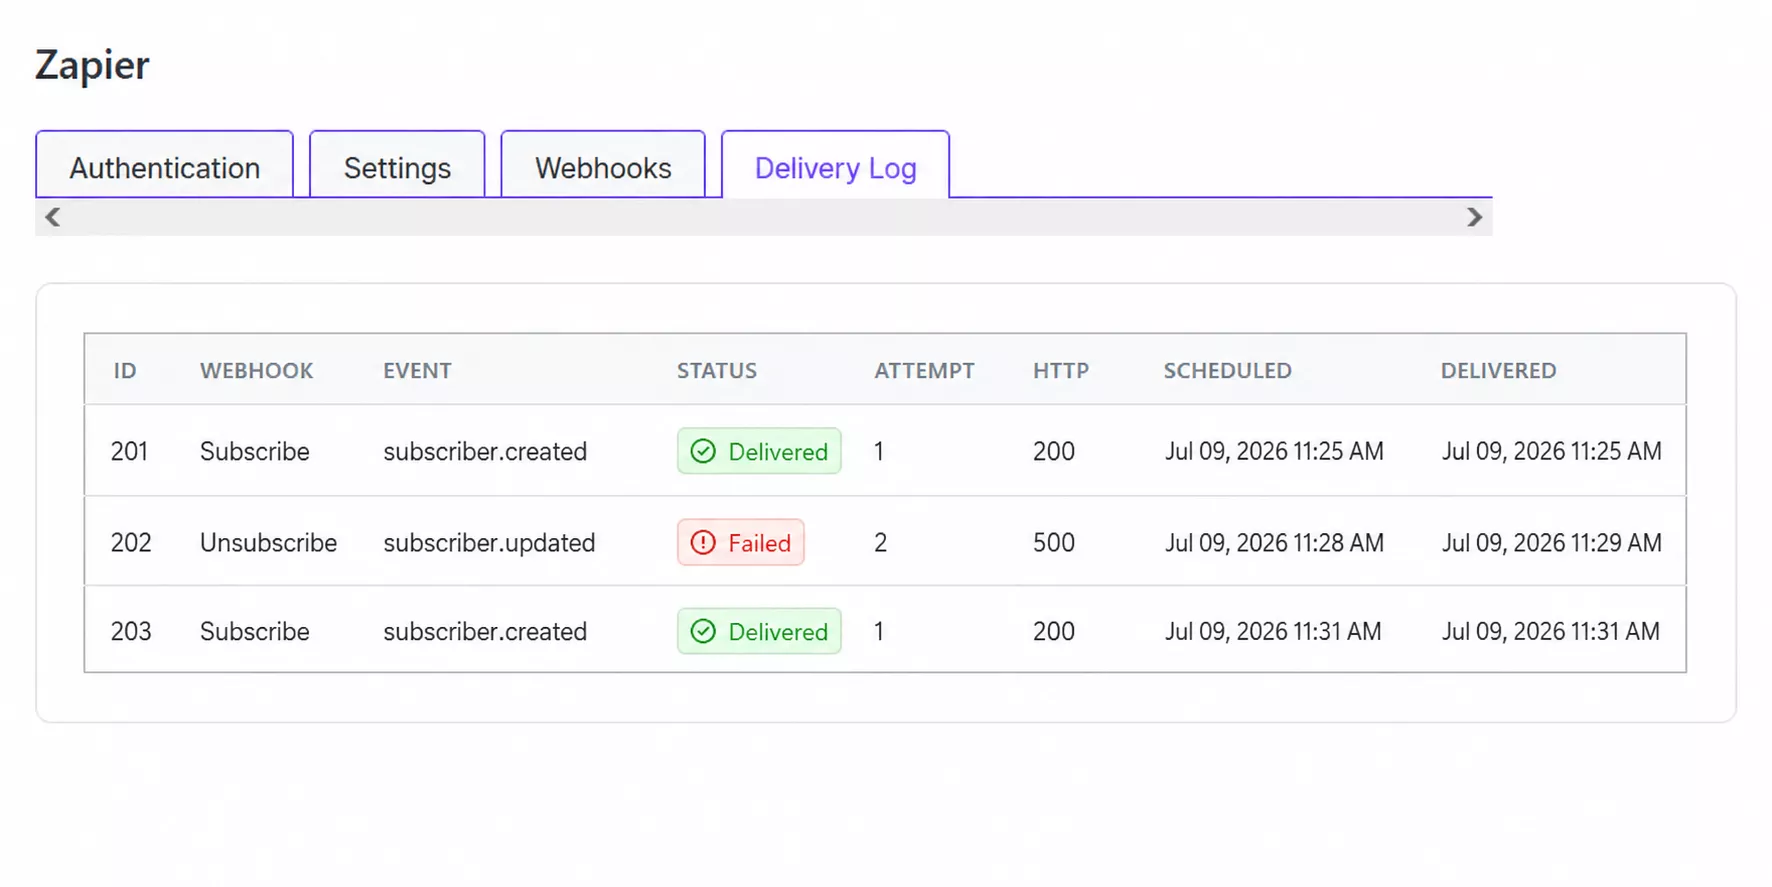
Step 7: Check Delivery Logs
- Go to Store > Settings > Zapier > Delivery Log to see the webhook delivery history, including retry status for any failed deliveries.
Supported Events
The addon can trigger a Zap for 40+ events across your store, including:
- Products – create, update, delete, and status change.
- Orders – create, update, delete, status change, fulfillment status change, and refund.
- Customers – create, update, and delete.
- Coupons – create, update, delete, and status change.
- Cart – add, update, or remove items, apply or remove a coupon, clear the cart, and change the shipping method.
- Categories, brands, and tags – create, update, and delete.
Every webhook is signed with an HMAC signature, so your Zapier integration can verify it genuinely came from your store.
Was this doc helpful?