


HitPay is a Singapore-native payment platform that lets your store accept the methods your customers already use every day, including PayNow, GrabPay, cards, Apple Pay, Google Pay, WeChatPay, and AliPay. Integrating your HitPay account into your ecommerce website is seamless with the EasyCommerce payment gateway addon. Follow these simple steps for a smooth setup.
To learn more about addons activation, read this documentation on how to activate addons on EasyCommerce.
Step 1: Navigate to Payment Settings
- Go to Store > Settings > Payment > Methods.
- Select HitPay as your payment gateway.
- Tap ‘Save Settings‘ to finalize the changes.
Step 2: Enter Your HitPay Credentials
- Access the HitPay addon settings tab beside the ‘Methods‘ tab, then open the Credentials section.
- Log in to your HitPay Dashboard and copy your Business API Key.
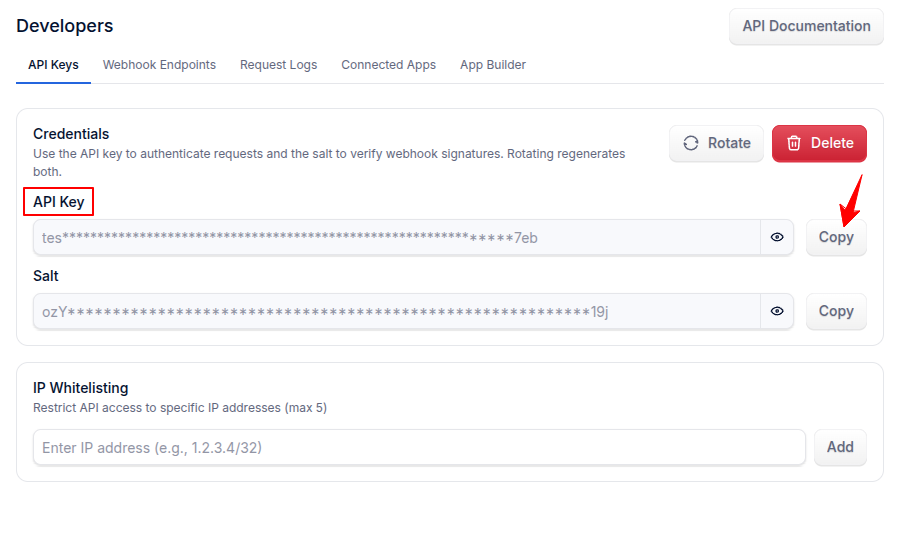
- Paste it into the Business API Key field.
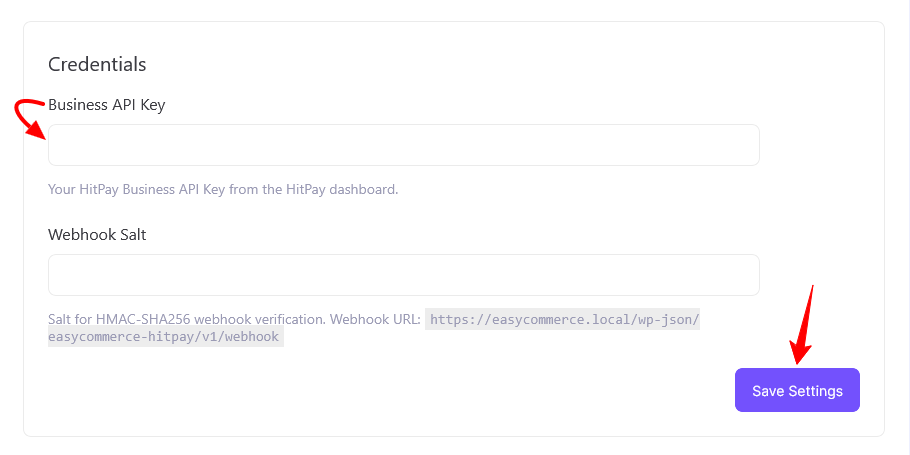
- You’ll add the Webhook Salt in Step 4, once you’ve registered the webhook.
Step 3: Configure Basic and Checkout Settings
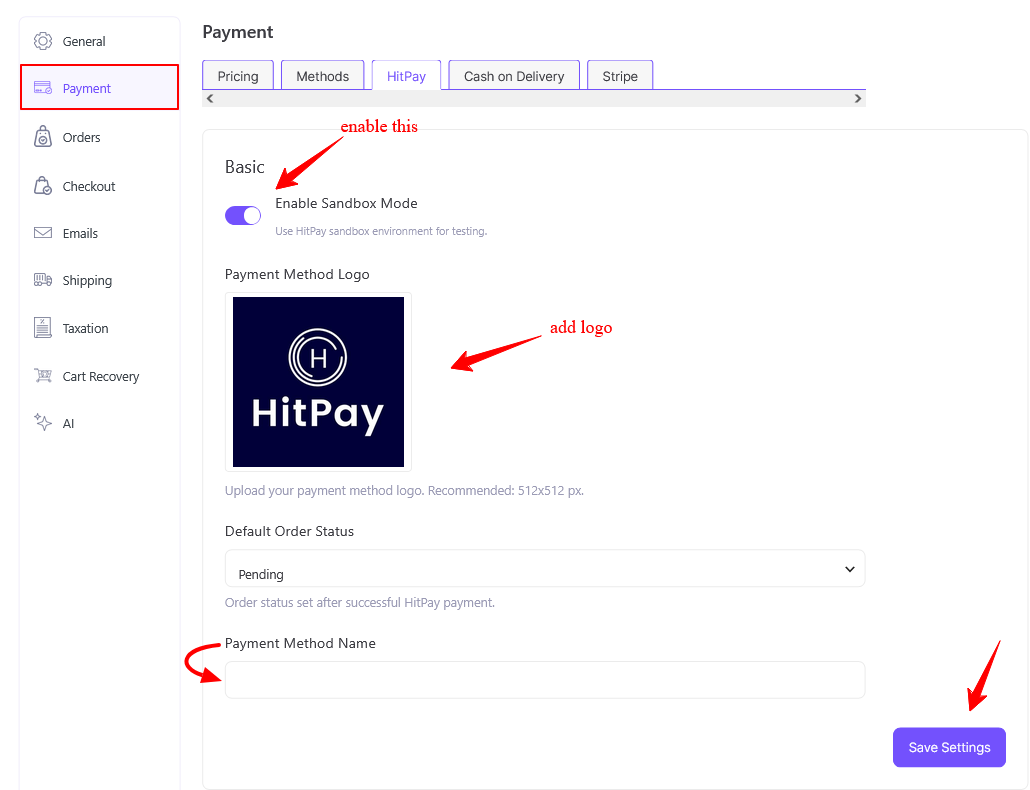
In the Basic section:
- Enable ‘Sandbox Mode‘ (optional) to test against HitPay’s sandbox environment before going live.
- Upload a Payment Method Logo and set a custom Payment Method Name shown at checkout (optional).
- Choose the Default Order Status applied after a successful payment: Pending, Processing, or Completed.
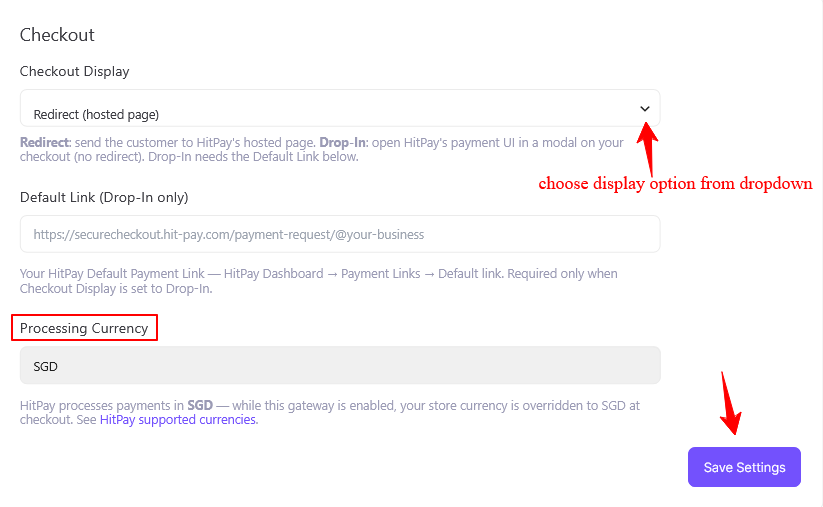
In the Checkout section:
- Choose your Checkout Display:
- Redirect (default) sends the customer to HitPay’s hosted payment page.
- Drop-In opens HitPay’s payment UI in a modal directly on your checkout page, without a redirect. If you choose Drop-In, paste your Default Link from HitPay Dashboard > Payment Links > Default link into the Default Link field.
- Processing Currency is fixed to SGD and cannot be changed. While HitPay is enabled, your store currency is overridden to SGD at checkout, since this is the only currency HitPay processes payments in.
Step 4: Register Your Webhook
Webhooks let HitPay confirm completed payments and keep your order statuses in sync automatically.
- Copy the webhook URL shown next to the Webhook Salt field in the Credentials section.
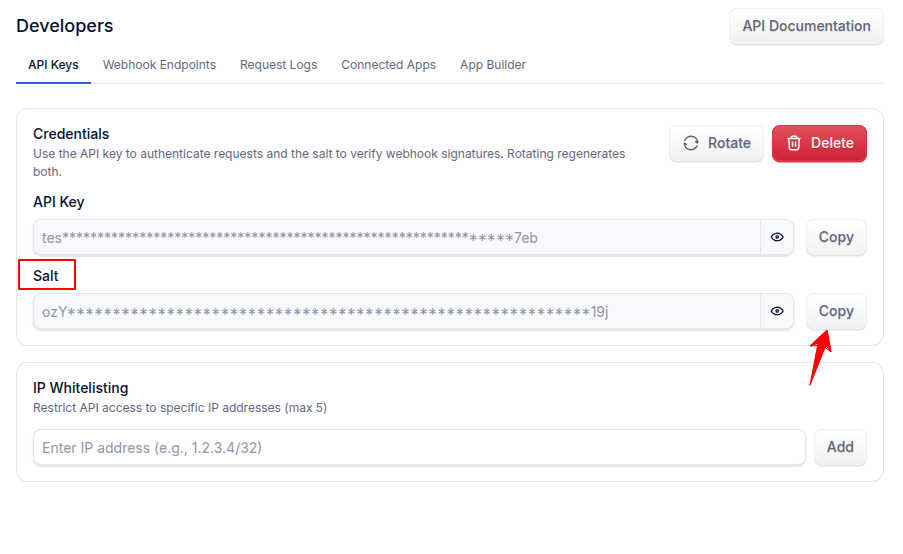
- In your HitPay Dashboard, go to Settings > Payment Gateway and add this URL as your webhook endpoint.
- Copy the Webhook Salt HitPay gives you and paste it into the Webhook Salt field in the addon settings.
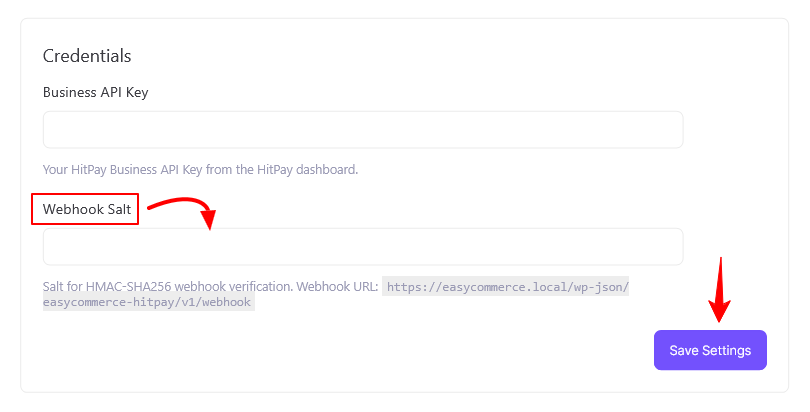
- Tap ‘Save Settings‘ to store the changes.
Step 5: Test the Integration
- Keep ‘Sandbox Mode‘ enabled and use your HitPay sandbox credentials to run an end-to-end test.
- Place a test order and complete the payment on HitPay’s checkout page (or the Drop-In modal, if selected).
- Confirm the order returns to your store and updates to your chosen Default Order Status.
- Once testing is complete, disable Sandbox Mode and switch to your live credentials to start accepting real payments.
How HitPay Payments Work on Your Store
- Available payment methods, PayNow, GrabPay, cards, Apple Pay, Google Pay, WeChatPay, and AliPay, are controlled by your HitPay account, not by the addon settings. The Payment Methods section in the addon simply lists what HitPay supports.
- Card and wallet details are handled entirely by HitPay’s hosted checkout or Drop-In modal, so sensitive payment data never touches your server.
- Every webhook notification is verified with an HMAC-SHA256 signature using your Webhook Salt before an order is touched, and repeated notifications never process the same order twice.
- Even if a webhook is delayed or blocked (for example, by a firewall), the addon also confirms the payment when the customer returns to your store after checkout, so orders don’t get stuck as pending.
- You can issue full or partial refunds straight from the EasyCommerce order screen. Refunds are sent to HitPay and recorded against the original payment.
Note: This addon requires the EasyCommerce plugin to be installed and active, plus a HitPay account with a Business API Key and Webhook Salt. Payments are processed in Singapore Dollars (SGD) while the gateway is enabled.
Was this doc helpful?