


Paystack connects to EasyCommerce with your Paystack API keys – no OAuth apps, no code. This guide walks you through enabling the gateway, adding your keys, choosing how customers pay, setting up the webhook, and testing the flow before you go live.
Step 1: Navigate to Payment Settings
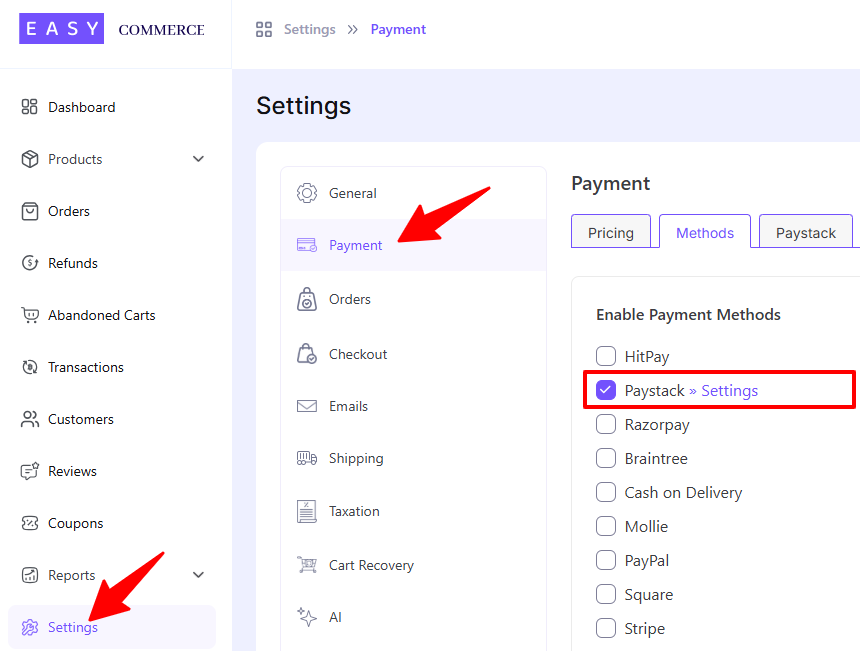
- Go to Store > Settings > Payment > Methods.
- Select Paystack as your payment gateway. Tap ‘Save Settings’ to finalize the changes.
Step 2: Get Your Paystack API Keys
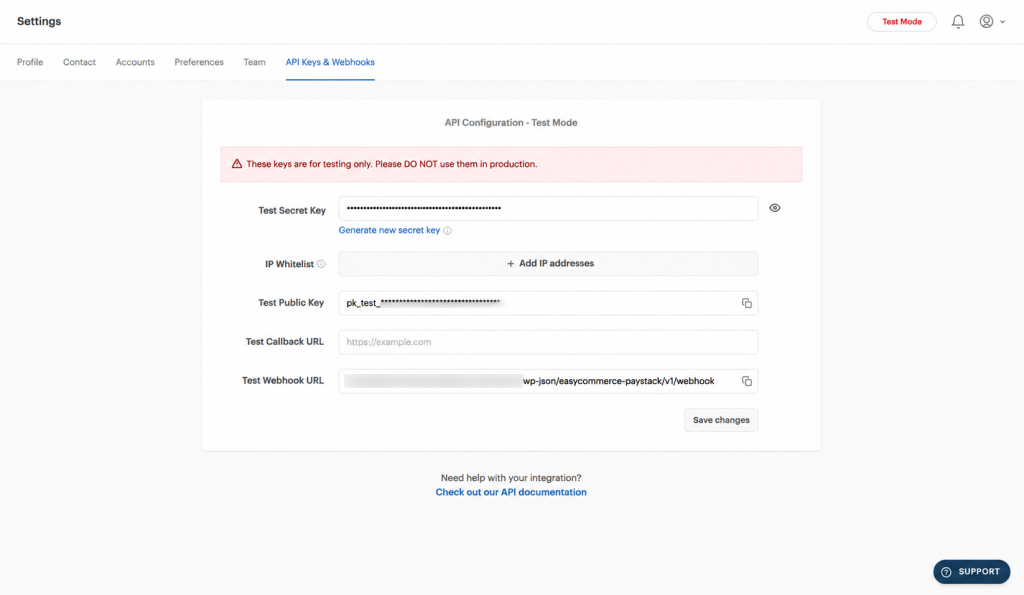
The addon authenticates with Paystack using your API keys. You will find them in your Paystack Dashboard before configuring the add-on.
Log in to your Paystack Dashboard and open Settings > API Keys & Webhooks. Copy your Secret Key and Public Key. Paystack provides two pairs – a test pair (sk_test_… / pk_test_…) and a live pair (sk_live_… / pk_live_…). You will need them in the next step.
Step 3: Configure Paystack Settings
Access the Paystack addon settings tab beside the ‘Methods’ tab, then work through the three groups:
Basic
- Enable ‘Test Mode’ (optional). While it is on, the addon uses your test keys.
- Upload a logo and set the Name on Checkout shown to customers (defaults to “Paystack”).
- Choose the Default Order Status applied after a successful payment — Pending, Processing, or Completed.
Checkout
- Set the Checkout Display: Redirect sends the customer to Paystack’s hosted page, while Inline opens Paystack’s payment popup on your checkout with no redirect.
- Confirm your active store currency is one Paystack supports: NGN, USD, GHS, ZAR, KES, XOF, EGP, or RWF (and enabled on your account).
Credentials
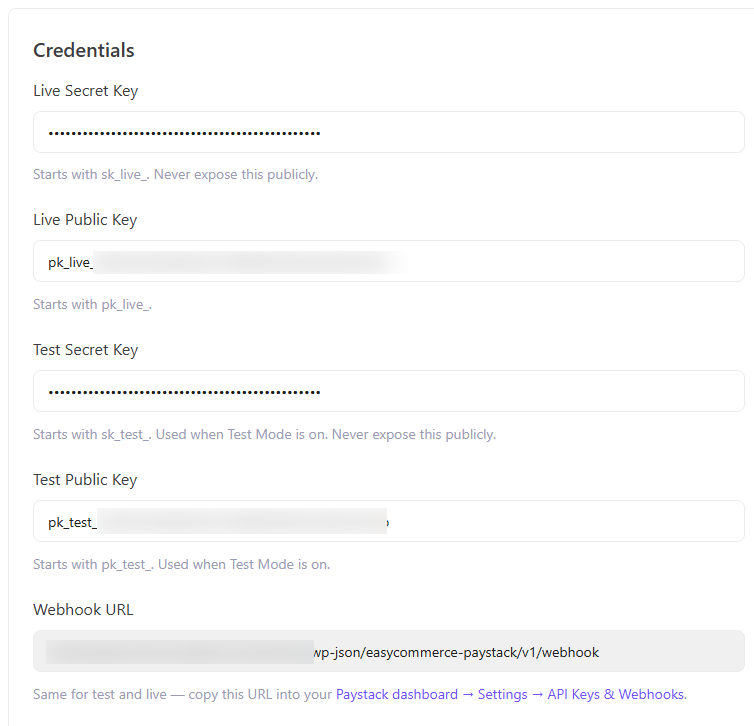
- Enter your Live Secret Key and Live Public Key from Step 2.
- Enter your Test Secret Key and Test Public Key as well if you plan to use Test Mode.
Finally, tap ‘Save Settings’ to store the changes.
Step 4: Set Up the Webhook
Webhooks keep your order statuses in sync with Paystack in real time, even if a customer closes the browser before returning to your store.
Copy the Webhook URL shown in the Credentials section of the addon settings. It is the same for both test and live.
Go to Settings > API Keys & Webhooks in your Paystack Dashboard and paste the URL into the Webhook URL field, then save.
Note: Paystack signs each webhook with your secret key, so there is no separate webhook secret to paste. The addon verifies every event with an HMAC-SHA512 signature check before processing it.
Step 5: Test the Integration
- Keep ‘Test Mode’ enabled and use your Paystack test keys to run end-to-end test transactions.
- Place a test order and confirm that the payment completes, the order status updates, and the transaction appears in your Paystack Dashboard.
- Once testing is complete, disable Test Mode and start accepting live payments with your live keys.
How Paystack Payments Work on Your Store
At checkout, customers pick Paystack and pay either on Paystack’s hosted page or through an inline popup on your store – whichever display you choose. Their email and order details are passed to Paystack automatically.
Every payment is verified directly with Paystack’s API and checked against the order total before the order is marked successful, and each webhook is confirmed with an HMAC-SHA512 signature. Failed, unverified, or mismatched payments are marked as failed automatically and never silently completed.
You can issue full or partial refunds straight from your EasyCommerce order screen. The refund is processed via the Paystack Refund API and recorded against the order, ensuring your totals always reconcile.
Was this doc helpful?